
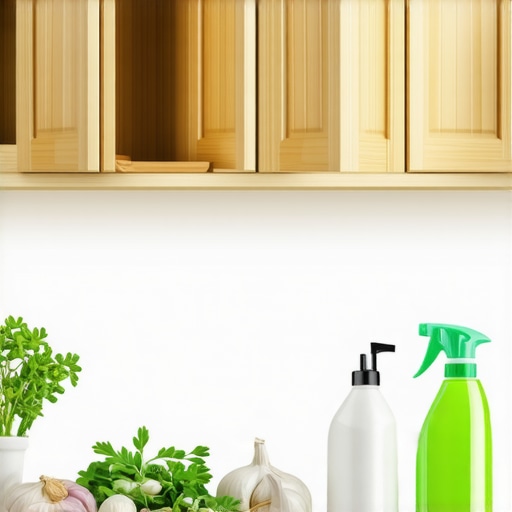
It was late one evening when I finally opened my kitchen cabinet door and was hit by that overwhelming, almost pungent garlic aroma. I’d just finished preparing a delicious pasta sauce, forgetting to ventilate properly. But the smell lingered—every time I opened the cabinet, it was like my kitchen had become a garlic fortress. Sound familiar? If you’ve ever faced this stubborn scent, you know how it can turn your clean-up effort into a frustrating game of whack-a-mole. Today, I’ll share practical, proven ways I’ve used to banish garlic odors from kitchen cabinets for good—no fancy gadgets needed.
Why Garlic Smell Lurks Behind Your Doors and How It Affects Your Home
Garlic is a beloved ingredient for its bold flavor, but its strong scent can become a persistent problem once it escapes from the pan and settles into your cabinets. The reason it’s so challenging to remove is because the odor molecules are tiny and can infiltrate porous surfaces like wood and particleboard, where they become trapped and slowly release over time. According to a study by the National Institutes of Health, odor molecules are remarkably resilient, especially when they settle into your home’s hidden corners. That’s why even after a thorough wipe-down, the garlic smell can come roaring back days later, leaving you wondering what went wrong.
Is Freshening Your Cabinets Overhyped or Truly Effective?
Early in my cleaning journey, I made the mistake of relying solely on surface wipes and sprays—products that promised to eliminate odors instantly. Spoiler: they don’t. Sure, they mask the smell temporarily, but the onion or garlic scent often just hides beneath the surface, waiting to reappear. I learned this the hard way, and it made me realize that truly effective deodorizing requires targeted strategies addressing the source of the odor. Now, I focus on deep cleaning and natural odor absorbers—techniques I’ll share momentarily—and the results have been nothing short of revolutionary. If you’re skeptical—completely understandable—think about how many times you’ve sprayed something and still noticed that lingering smell afterward. Together, we’ll beat that odor once and for all.
Deep Clean with Baking Soda and Vinegar
When I first tackled garlic odor in my cabinets, I started with a simple solution: baking soda and white vinegar. I removed all items from the shelves and mixed equal parts of vinegar and water in a spray bottle. Then, I sprinkled a generous layer of baking soda on the surfaces. As I sprayed the vinegar mixture onto the baking soda, it fizzed and lifted the odor molecules. Using a damp cloth, I scrubbed the interior, paying special attention to corners and crevices where smell tends to hide. This process is akin to a mini-whirlpool that dislodges embedded scents and leaves your cabinets smelling fresh. To maximize results, I repeated this cleaning once a week for a month, and the garlic smell gradually disappeared—an affordable trick that rivals commercial deodorizers. For a detailed step-by-step, check out this move-out cleaning hack guide that emphasizes deep DIY cleaning methods.
Use Activated Charcoal as a Natural Odor Absorber
After my initial scrubbing, I realized I needed a long-term solution to prevent smell from settling again. That’s when I discovered activated charcoal. I placed small bowls of activated charcoal powder on each shelf and in corners of the cabinets. The porous structure of charcoal acts like a sponge, trapping odor molecules rather than masking them. I left these bowls in place for 48 hours, then replaced the charcoal to maintain freshness. This technique is similar to how professional cleaners use odor absorbers in move-out cleaning strategies to permanently eliminate stubborn smells. An internal tip: replace the charcoal every 2-3 months to keep your cabinets odor-free. For more deep cleaning tips, explore our house cleaning strategies that guarantee a sparkling home.
Refresh with Natural Citrus Solutions
While absorbers tackle lingering odors, I also wanted a pleasant scent to greet me when I opened my cabinets. I sliced lemons and oranges, then soaked the slices in water for a few hours. I placed these citrus-infused water bowls inside the cabinets, where they released a natural, uplifting aroma that competed with any remaining garlic scent. This method is similar to sanitizing techniques that refresh and deodorize using natural ingredients—like our house cleaning secrets. The citrus also helps break down residual oils that garlic leaves behind on wood surfaces, making your kitchen smell clean and inviting without chemical overload. Remember, consistency is key—repeat this process weekly for ongoing freshness.
Seal Porous Surfaces for Long-Term Protection
Garlic odors penetrate porous surfaces like wood, making removal challenging over time. To prevent this, I applied a mineral-based wood sealant to the cabinets after cleaning. Sealants create an invisible barrier, preventing odor molecules from seeping into the material. Think of it like a raincoat for your cabinets, blocking scents from settling in and re-emerging later. This step is especially valuable in move-out scenarios or if you frequently cook strong ingredients. If you’re considering a comprehensive clean, check out our move-out cleaning checklist for tips that ensure you’d receive your full deposit back. Sealing also simplifies future cleaning, saving time and effort.
Regular Maintenance and Odor Prevention
Finally, quick regular maintenance can keep your kitchen cabinets odor-free. Wipe shelves monthly with a damp cloth and freshen the interior with citrus peels or activated charcoal periodically. Aerate cabinets after cooking by leaving doors ajar to prevent stale smells from settling. These small steps act like routine health checks, preventing odors from becoming a major problem. For continuous tips and expert advice, refer to our daily cleaning routine.
Contrary to popular belief, many tenants and homeowners assume that a quick once-over with a mop and some sprays will pass inspection or leave their house truly sanitized. However, this approach often overlooks the nuanced realities of effective cleaning and disinfecting. For instance, superficial wipes may mask dirt temporarily but won’t eradicate deeply embedded bacteria or lingering odors, especially in porous surfaces like grout lines or upholstery.
One common myth is that using disinfectant sprays alone guarantees a germ-free environment. While disinfectants are crucial, their efficacy diminishes without proper contact time, precise application, and pre-cleaning to remove organic matter that shields microbes. A study by the Sanitizing Secrets for a Safer House in 2025 emphasizes the importance of comprehensive cleaning routines that incorporate both cleaning and disinfecting steps for optimal results.
Advanced cleaners know it’s not just about visible cleanliness but also about understanding the hidden nuances, such as the bacteria lurking deep within upholstery fibers or behind appliances. Many overlook the significance of regular upholstery care, which can harbor dust mites, pet dander, and bacteria if neglected. An Ultimate Upholstery Care Guide illustrates that deep-cleaning fabrics with appropriate methods extends their lifespan and health benefits.
One advanced mistake to avoid involves overestimating the cleaning power of steam cleaners. While effective on hard surfaces, they can be detrimental to certain fabrics or leave moisture trapped where mold and bacteria can thrive if not used properly. According to experts, integrating proper drying and ventilation post-steaming ensures that no hidden moisture fosters microbial growth.
Deep sanitization isn’t just about chemical applications but also about understanding the science behind microbial adhesion. Many overlook that bacteria and viruses tend to cling to textured surfaces, making thorough cleaning of detailed moldings, handles, and fabric textures essential. Incorporating this knowledge allows for a more targeted approach—think scrubbing grout lines or meticulously sanitizing high-touch areas with appropriate solutions, rather than casual cleaning.
So, next time you plan a move-out clean or a deep house refresh, ask yourself: am I merely masking dirt or truly eliminating germs and odors? Implementing meticulous strategies and understanding the science can make the difference between a passing inspection and your home genuinely being sanitized and sparkling. For more expert insights, check our comprehensive house cleaning strategies that deliver long-lasting results.
Have you ever fallen into this trap? Let me know in the comments.
Keep It Working: Essential Tools for Effective Cleaning
Staying consistent with your cleaning routine requires more than just elbow grease; it demands reliable, specialized tools that do the hard work for you. As someone who’s grappled with stubborn odors and grime, I swear by high-quality equipment that combines durability with efficiency. For example, my favorite corded HEPA vacuum cleaner is vital for capturing dust mites and pet dander from upholstery, as highlighted in the Ultimate Upholstery Care Guide. Its powerful suction and HEPA filtration ensure long-term cleanliness and health benefits.
In addition, I rely on a multi-purpose steam cleaner for deep sanitization. Unlike cheap models that leave moisture behind, my preferred steam cleaner heats up quickly and maintains consistent temperature, effectively killing bacteria on surfaces like kitchen counters, bathroom tiles, and fabric upholstery. This aligns with the approach suggested in Effective Sanitizing Methods. Regular use of quality steamers minimizes microbial build-up and sustains a hygienic environment, especially important when dealing with move-out cleaning or long-term sanitization.
How do I maintain these tools over time?
Keeping your equipment in top shape is crucial. I routinely replace vacuum filters every six months and descale steam cleaners monthly using vinegar solutions to prevent mineral buildup, which can compromise performance. Proper maintenance extends the lifespan of your tools and guarantees they work effectively each time. For comprehensive tips, check our Daily House Cleaning Routine.
Smart Software to Keep Results Consistent
Technology also plays a role in maintaining consistency. I use a simple scheduling app to set reminders for deep cleaning routines, ensuring I don’t skip essential tasks like sanitizing high-touch areas or airing out cabinets. Additionally, advanced house cleaning software like TaskRabbit or Thumbtack can connect you with vetted professionals for periodic deep cleans, especially after move-outs. Future trends point toward AI-assisted cleaning schedules that optimize based on your home’s unique needs, making long-term maintenance more manageable. Expect more integrated solutions that combine robotic vacuums with smart home sensors for a truly hands-free experience.
What methods can keep your tools running smoothly long-term?
Avoid neglecting routine maintenance, such as cleaning filter bins, checking seals, and replacing worn brushes. Investing in quality equipment translates to cleaner, healthier spaces over time, reducing the need for repeated scrubbing or chemical use. This investment not only saves money but also ensures your home remains hygienic and odor-free for the long haul. I recommend trying out a high-pressure garment steamer for upholstery refreshes—it’s a game-changer in reducing allergens and extending furniture lifespan, detailed in our Upholstery Cleaning Tips. Practical tools backed by proper maintenance are your allies for a consistently clean home.
In the future, expect innovations like self-cleaning vacuum brushes and app-controlled sanitizing stations that make maintaining cleanliness effortless. For now, though, selecting high-quality tools and caring for them diligently forms the backbone of a successful long-term cleaning strategy. Take this tip: invest in a durable HEPA vacuum and schedule monthly descaling of your steam cleaner—these small steps will pay dividends in your home’s hygiene and your peace of mind. Want to explore more advanced cleaning strategies? Visit our House Cleaning Strategies page to stay informed.
What I Learned the Hard Way About Odor Sealing and Surface Restoration
- I used to believe that wiping with sprays was enough, but sealing porous surfaces with a mineral-based barrier has transformed my approach—preventing stubborn garlic smells from creeping back.
- Deep cleaning isn’t just about appearance. Understanding the science behind odor infiltration helped me target problem areas more effectively, saving time and effort.
- Natural solutions like citrus infusions do more than freshen—they actively break down residual oils. This insight has kept my kitchen smelling citrus-fresh, even after vigorous garlic use.
- The biggest revelation? Long-term odor control demands consistent maintenance—replacing activated charcoal and sealing surfaces periodically. Small efforts yield lasting freshness.
- Real progress came when I ignored myths about quick fixes. Instead, I committed to a holistic routine incorporating deep cleaning, natural deodorizing, and surface sealing—an unstoppable trio in my arsenal.
My Top Tools and Resources for Odor-Free Living
- Activated Charcoal: My go-to for absorbing odors everywhere—trustworthy because of its proven porous structure.
- Mineral-Based Sealants: They create an invisible defensive barrier that keeps stubborn odors at bay—something I highly recommend for porous cabinetry.
- Citrus Infused Bowls: A natural, pleasant way to maintain a fresh kitchen aroma—simple and effective.
- Deep Cleaning Guides: I rely on comprehensive resources like house cleaning strategies to refine my routines regularly.
Embrace the Journey to a Fresher Home Today
Remember, mastering odor elimination isn’t an overnight feat—it’s about persistent effort and the willingness to learn from experience. Each step I took brought me closer to a kitchen that welcomes with a fresh scent, free from the stubborn grip of garlic. You can do the same. Dive into these techniques, adapt them to your space, and enjoy the satisfying results of a truly clean, fresh home. What’s one odor challenge you’ve struggled to conquer? Share your story below and let’s learn together.