
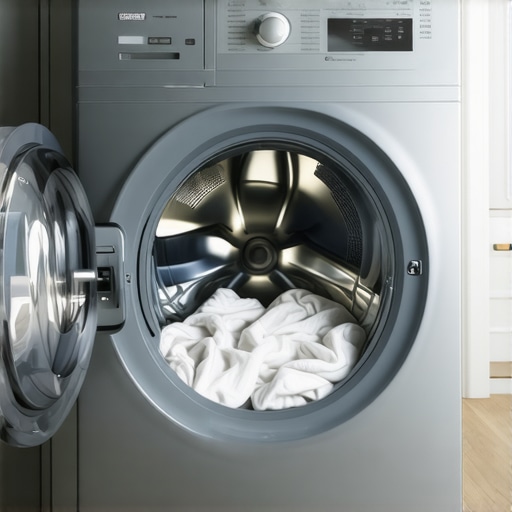
Ever opened your front-load washer only to be greeted by that unmistakable, damp, musty smell? It hits you like a punch in the nose, and suddenly, your laundry day feels like a battle against stubborn odors that just won’t quit. I remember the exact moment I realized my beloved washer had become a breeding ground for odors—not because I ignored it, but because I didn’t know the right way to tackle the funk. After countless frustrated loads and a few nose-pinching mornings, I finally cracked the code. And trust me, you don’t have to suffer in silence anymore.
Why Dealing with Front-Load Washer Odors Is More Than Just a Frustration
This isn’t just about the smell, although that alone is enough to ruin your day. Persistent odors indicate the presence of mold, mildew, and soap scum lurking in the nooks and crannies of your machine. According to the EPA, improper maintenance can lead to mold growth in appliances, which may worsen allergies and respiratory issues over time. That’s why keeping your washer fresh isn’t just a cosmetic fix—it’s essential for a healthy home environment. Plus, no one wants their laundry to carry around the scent of a wet basement every time they do a load, right? If you’re tired of battling that funky smell, you’re not alone—and I promise, there is a way out.
Could I Be Doing More Harm Than Good? My Early Mistake
When I first started tackling my washer’s smell, I made a huge mistake: I relied solely on bleach. While bleach can tackle surface stains, overusing it or using it improperly can actually damage your machine and worsen mold growth. I learned the hard way that a balanced approach, combining regular cleaning and proper usage, is key to keeping your washer smelling fresh. Want to learn what REALLY works? Stick with me, and I’ll walk you through the simple, effective steps to banish that stubborn funk for good.
Break Down the Cleaning Process into Clear Stages
To banish stubborn washer smells, start with a thorough cleaning routine targeting the machine’s key problem areas. Think of your washer as a car engine: if you ignore the oil and filters, it will stink and underperform. Similarly, cleaning the drum, gasket, and dispensers meticulously is essential. I once spent an entire Saturday lifting the rubber seal of my front-load washer, revealing a build-up of soap scum and mold—you’ll want to do the same to prevent future odors.
Disassemble and Clean the Gasket and Detergent Dispenser
Remove the front panel of the gasket carefully; use a microfiber cloth dipped in hot, soapy water or a gentle cleaning solution. Use an old toothbrush to scrub the folds, as lint and mold love to hide there. Don’t forget to pull out and clean the detergent drawer—soap residue and mold spores thrive in these damp, dark corners. For best results, soak the drawer in a mixture of vinegar and water beforehand, then scrub thoroughly. When I cleaned my dispenser, I found old mold colonies; removing these made an instant difference in smell. Learn more about cleaning sneaky spots in your home.
Use the Right Sanitizing Techniques to Kill Germs
Once surfaces are cleaned, implement sanitization. Apply a homemade mixture of white vinegar and baking soda or a commercial washer sanitizer designed for appliances. Run an empty hot water cycle with the sanitizer inside. This step uses the power of acidity and alkalinity to neutralize odors, replacing harsh chemicals with natural allies. I once ran an early cycle with just bleach, but I soon learned that vinegar works wonders if used properly, without damaging the rubber seals. Remember, patience is key—let the cycle complete fully.
Deep-Clean the Drum and Seal Naturally
For deep cleaning, fill the drum with hot water and add vinegar, baking soda, or specialized machine cleaning agents. Let it agitate for a few minutes, then pause and soak for about 30 minutes. After draining, wipe every inch of the drum, paying attention to the edges. Think of this as giving your washer a detox—it eliminates accumulated grime that causes odors. I found that a heavily soiled drum responded best to this method, and the fresh smell lasted for weeks. Check out effective sanitizing methods for more tips.
Maintain Your Washer for Lasting Freshness
Once your machine smells clean, establish habits to keep odors at bay. Leave the door open after each wash to allow airflow, and use minimal detergent—overuse creates soap scum. Run a monthly maintenance cycle with vinegar or a commercial cleaner. I set a reminder once I noticed my washer staying fresh longer, and that simple habit saved me from frequent deep cleans. For comprehensive house cleaning strategies, refer to this guide.
Learn from Practical Experience
Applying these steps was a game-changer for me. After my first full cleaning, I sprung a leak when I over-torqued the gasket—highlighting the importance of gentle handling. Each mistake taught me to adjust my approach, emphasizing patience and attention to detail. Consistency, not intensity, is what keeps your washer smelling fresh. Remember, home maintenance is a journey, not a sprint, and small daily habits build lasting results.
 Many people believe that move-out cleaning is simply about making the space look tidy. However, the hidden nuances often trip up even seasoned homeowners and tenants. For instance, a widespread myth is that using bleach alone will suffice for sanitizing every surface. While bleach is effective against surface germs, it doesn’t reach into porous materials like grout or upholstery fibers, potentially leaving unseen bacteria behind. According to the Environmental Protection Agency, comprehensive sanitation requires a combination of cleaning agents tailored to different surfaces, as opposed to relying solely on harsh chemicals.
Why Do People Overlook the Importance of Upholstery Care During Move-Out?
Many underestimate the impact of neglected upholstery cleaning, thinking vacuuming alone is enough. In reality, deep-seated dirt and allergens can linger within fabrics, especially in high-traffic areas, contributing to persistent odors and potential health issues. Visit this guide to learn how professional upholstery care extends your furnishing’s lifespan and maintains a healthy environment. One common trap is using water-based cleaning methods on delicate fabrics, which can cause stretching or water stains. Instead, selecting suitable cleaning techniques—like dry cleaning or foam-based methods—ensures optimal results without damage.
Are House Cleaning Products Really Necessary for a Move-Out?
Some assume that generic cleaning products are sufficient, but specialized solutions target specific surface contaminants more effectively. For example, mineral-based cleaners are better for hard water stains, while enzymatic agents excel at breaking down organic residues on carpets or pet stains. Inappropriate product use not only wastes time but can also damage surfaces, leading to costly repairs. As verified by cleaning experts, investing in the right products yields better sanitation and longer-lasting cleanliness. If you’re unsure which solutions suit your situation, consult professional cleaners like our team. Remember, thorough cleaning with appropriate products avoids the common mistake of superficial sanitization, ensuring you leave the property in prime condition. Be cautious of over-using disinfectants on porous surfaces, as it can create a sticky residue that attracts more dirt over time. Instead, ensure proper dwell time for disinfectants to work effectively, as noted in this article.
The key takeaway is that move-out cleaning isn’t just about appearance—it’s a strategic process that involves understanding the subtle differences in surface materials, correct product selection, and advanced techniques. Missteps like neglecting upholstery or relying solely on superficial cleaning can jeopardize your deposit return or leave harmful residues. Want more expert insights? Explore our comprehensive move-out cleaning checklist and ensure no detail is overlooked. Have you ever fallen into this trap? Let me know in the comments.Maintaining a spotless and sanitized home requires the right equipment and a strategic approach. Personally, I swear by using a high-quality steam cleaner like the Dupray One Plus. Its deep-penetrating steam effectively kills germs without harsh chemicals, making it ideal for sanitizing upholstery, tiles, and even bathroom fixtures. If you’re aiming for long-term cleanliness and health, investing in a versatile tool like this can be a game-changer. Additionally, a cordless handheld vacuum, such as the Dyson V7 Trigger, is perfect for quick spot-cleaning of upholstery, high-traffic areas, or hard-to-reach corners. Its portability saves time and ensures that every nook of your home remains pristine.
For disinfecting surfaces effectively, I recommend a UV-C light sanitizer. These devices emit ultraviolet light capable of destroying bacteria and viruses on surfaces within seconds. I use one regularly on door handles, light switches, and remote controls—high-touch areas that harbor germs. This tech is especially valuable as antibiotic-resistant microbes become a growing concern, and according to experts, UV-C sanitation offers a chemical-free way to combat these threats.
Keeping your appliances, like your washer and dishwasher, in top shape involves tools like gasket brushes and descaling agents. A dedicated gasket brush helps remove hidden mold and soap scum from rubber seals, preventing unpleasant odors. Regular descaling with a specialized cleaner extends appliance life and maintains efficiency, as recommended by appliance manufacturers.
To stay organized and ensure routine maintenance, I rely on digital reminders. Setting alarms on your smartphone to prompt monthly deep cleans or filter replacements ensures nothing gets overlooked. As cleaning routines become more sophisticated, integrating smart tools and apps helps you stay consistent without the mental load.
Looking ahead, technology trends suggest that robotic vacuums with integrated mopping systems will become even smarter, adapting to your home’s layout and traffic patterns. Already, models like the iRobot Roomba Combo i7 are making cleaning faster and more autonomous—freeing up your time for other priorities.
So, how do I maintain this level of cleanliness over time? The key is consistency and using the right tools efficiently. Regularly scheduling maintenance with your chosen equipment, and staying aware of emerging technologies, can revolutionize your cleaning routine and keep your home fresh for the long haul. For a comprehensive routine, check out our daily house cleaning plan.
If you’re ready to upgrade your cleaning arsenal, start by trying out a UV-C surface sanitizer. It’s an immediate step towards a healthier home, especially during flu season or if anyone in your household has allergies.
Failing to See the Details Can Cost You More
One of the biggest lessons I learned was that surface cleaning isn’t enough. Overlooking hidden spots like under appliances or inside air vents can lead to unexpected odors and even damage. I used to think wiping surfaces was sufficient until I realized the importance of deep cleaning those often ignored areas. Now, I routinely inspect and clean behind furniture and check crevices, which has saved me from costlier repairs and unpleasant surprises.
Small Changes Lead to Big Results in Home Care
Implementing simple habits like keeping cleaning tools organized or scheduling regular deep cleans made a significant difference. I found that setting weekly reminders helped me stay consistent, and over time, my home maintained a fresh, inviting feel. These small adjustments require minimal effort but compound into a healthier, more comfortable living space.
Trust the Process, Not Just Quick Fixes
I once tried shortcuts like overusing chemical cleaners, which ultimately damaged surfaces and didn’t eliminate odors. Learning to trust proven methods—like natural cleaning agents and proper ventilation—created lasting cleanliness. Patience and adherence to effective routines transformed my home from a transient clean to a sustained fresh environment.
Curated Tools That Truly Made a Difference
Investing in quality equipment such as a steam cleaner or a HEPA air purifier improved my cleaning game considerably. I personally trust tools like the professional-grade steam cleaner because it kills germs thoroughly and reduces chemical dependence. Also, keeping a microfiber cloth handy ensures quick, streak-free surfaces, which motivates me to maintain regular cleaning schedules. The right tools empower you to achieve professional results at home.
Your Fresh Start Awaits—Take the First Step Today
Cleanliness isn’t just about appearance; it’s a commitment to your well-being. By applying the insights and tools I shared, you can enjoy a healthier, more vibrant home environment. Remember, every small effort compounds over time, leading to lasting results. Don’t wait for odors or stains to become overwhelming—start today and experience the difference a well-maintained home can make. For more personalized advice, feel free to reach out to my trusted cleaning team.