It was a typical Saturday afternoon when I caught my youngest with a handful of crayons, merrily decorating the living room wall like it was their personal masterpiece. My heart sank. Not because I didn’t love their creativity, but because I knew—if I didn’t handle it just right—their colorful artwork could turn into a costly painting repair. I tried scrubbing with soap and water, only to find the marks smeared and the paint duller than before. That moment was a lightbulb for me: there’s a fine art to removing crayon marks without damaging your walls.
The Secret to Clean Walls Without the Damage
Crayon marks seem harmless, but they can be surprisingly stubborn—and tempting to scrub hard, which risks stripping or damaging your paint. I learned early on that the key is using gentle, effective methods that lift the waxy residue without harming the surface. Today, I want to share proven techniques that have saved my walls more times than I can count and can do the same for you. If you’ve ever faced the frustration of trying to erase your child’s artistic expressions without making things worse, this guide is for you.
Is It Really Possible to Remove Crayon Without Damage?
Absolutely! Early in my cleaning journey, I made the mistake of using harsh chemicals or abrasive sponges—things that seemed like quick fixes but ended up causing more harm than good. That’s a mistake I see many others making, and it can be costly. Luckily, with a few simple supplies and a gentle touch, you can preserve your walls’ paint while removing even the most stubborn crayon marks. In fact, some household items you already have can do the trick, saving you time and money. For a safe and effective method, consider using a magic sponge or even a natural solution like baking soda—just a small investment for big results. Want an easier way? You might want to check out how effective microfiber cloths can be for delicate cleaning tasks.
Are crayon marks turning your walls into a colorful chaos? Don’t worry—I’ve got your back. Let’s dive into the specific steps that will have your walls looking pristine again, all without risking harm to the paint.
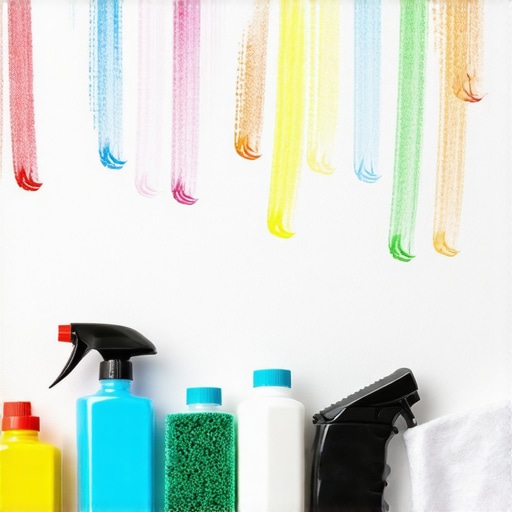
Gather Your Supplies and Prepare the Area
Start by collecting gentle cleaning tools: a microfiber cloth, baking soda, or a magic sponge. Move furniture away and lay down a towel to protect your flooring. I vividly recall tackling a stubborn crayon streak behind the sofa—having everything ready made the process smoother and prevented accidental smudges elsewhere.
Test Your Cleaning Method First
Choose a small, inconspicuous wall area to test your cleaning approach, especially on painted walls. Dabbing a damp microfiber cloth is safe for most paints, but if you’re using baking soda, make a paste with water. In my experience, testing prevented an accidents—like when I accidentally removed part of the paint on a bold accent wall and learned to proceed cautiously.
Gentle Wiping with Microfiber Cloth
Wrap a microfiber cloth around your finger or a soft sponge, dampen it slightly, and gently rub over the crayon marks. Apply light pressure—think of it as soothing the stain instead of scrubbing it away harshly. During my last cleanup, this approach lifted the color effortlessly without leaving scratches or dull patches.
Maintain a Light Touch for Best Results
To avoid damaging the paint, keep movements soft and steady. If the mark persists, slightly increase pressure but avoid aggressive scrubbing, which risks peeling or discoloration. I learned this the hard way when my initial vigorous scrubbing caused a faint patch to peel, forcing me to repaint a small area.
Use Baking Soda for Stubborn Marks
If gentle wiping doesn’t fully remove the crayon, sprinkle a small amount of baking soda onto a damp cloth. Gently buff the stain in a circular motion, like polishing a gemstone. This works because baking soda’s fine abrasive action lifts residue without harming the paint. I once used this technique on my child’s wall and was amazed by how easily the mark came off, restoring the pristine look.
Cream of Tartar or Magic Erasers as Alternative Solutions
For especially stubborn crayon, dip a damp magic eraser into a tiny bit of water or baking soda paste. Gently glide over the stain—think of it as erasing with a whisper rather than a squeeze. Be cautious; pressing too hard can dull the paint’s finish. In a past project, using a magic sponge saved me from repainting an entire wall after a failed attempt with soap alone.
Clean Up and Final Checks
Once the stain is gone, wipe the wall with a clean, damp microfiber cloth to remove any residue. Dry with a soft towel to prevent streaks or water spots. Always inspect the area under different lighting to catch missed spots or dull patches. My last touch-up involved using a dry microfiber to blend the cleaned area seamlessly, leaving the wall looking fresh and undisturbed.
Prevent Future Crayon Mishaps
Encourage your kids to use sketchbooks or drawing paper, and provide designated art spots to contain their creativity. Quick action and gentle methods like these preserve your walls and keep your home looking pristine. For more tips on maintaining your home’s interior, check out effective house cleaning secrets from cleaning experts.
While many homeowners and tenants rely on popular cleaning myths, understanding the nuanced realities of professional house cleaning, upholstery care, and sanitization reveals often overlooked pitfalls and misconceptions. For example, a widespread belief is that aggressive scrubbing always yields better results, but in reality, excessive force can damage delicate fabrics and surfaces, leading to costly repairs. Experts suggest gentle, targeted methods—like using microfiber cloths or appropriate cleaning solutions—that preserve material integrity while effectively cleaning.
Does Using More Product Mean Better Cleaning?
A common error is overusing disinfectants or detergents, thinking it enhances cleanliness. However, studies indicate that applying the correct amount of product and following proper rinsing practices is more effective and environmentally friendly. Overapplication can leave residues that attract dirt or cause discoloration, especially on upholstery. To avoid this, consult professional guides or cleaning service providers like Spotless Carpetz for tailored advice. Additionally, many assume that a quick once-over is sufficient, but true sanitation often requires more thorough, systematic approaches—deep cleaning protocols that go beyond surface appearance. This is particularly vital in move-out scenarios, where landlords scrutinize for cleanliness, which is why strategic move-out cleaning strategies can make the difference between getting your full deposit back or facing deductions. One trap to avoid is neglecting hidden spots like behind appliances or within vents, which harbor dust and bacteria, undermining even superficial cleanliness. Advanced techniques, such as steam cleaning or using specialized equipment, can ensure comprehensive sanitation. In the realm of upholstery, many believe that regular vacuuming alone suffices. However, fabric fibers trap oils, dirt, and allergens, necessitating periodic deep cleans—either professionally or with suitable DIY methods tailored to the fabric type. For a thorough approach, exploring upholstery cleaning tips can be beneficial. Lastly, one misconception is that all cleaning products are safe to mix. This ‘kitchen chemistry’ error can produce hazardous fumes or diminish effectiveness, emphasizing the importance of understanding chemical compatibilities. For instance, mixing bleach with ammonia creates toxic chloramine vapors—a dangerous mistake to avoid at all costs. For detailed guidance on safe cleaning practices and sanitization hacks, check our dedicated resources linked through sanitizing hacks.
Awareness of these misconceptions and nuanced practices helps ensure that your cleaning efforts are both safe and effective. Remember, mastering house cleaning isn’t just about visible results—it’s about comprehensive, smart approaches that protect your home and health. Have you ever fallen into this trap? Let me know in the comments.
Keeping Your Cleaning Tools in Top Shape for Long-Term Results
Investing in quality cleaning equipment is only half the battle; maintaining these tools ensures they perform optimally over time. From vacuum cleaners to microfiber cloths, every tool has specific needs to stay effective and hygienic. For example, I personally recommend using a HEPA-filtered vacuum and regularly replacing filters to prevent dust redistribution. Also, cleaning microfiber cloths properly—by washing them in hot water without fabric softener—keeps their electrostatic properties active, facilitating better dust and dirt pickup.
How do I maintain upholstery cleaning tools over time?
Maintaining upholstery tools, such as steam cleaners or upholstery brushes, involves thorough flushing after each use to prevent residue buildup and mold. I prefer using manufacturer-approved cleaning solutions to avoid damage and ensuring all parts are dried before storage. These habits extend the lifespan of your equipment and guarantee consistent, professional-level results. Moreover, scheduling regular inspections helps identify worn parts early, saving money and time down the line.
Essential tools I personally rely on for effective cleaning
For sanitizing and detailed cleaning, I’ve found that a steam mop with adjustable steam levels is invaluable. It disinfects surfaces without chemicals and is gentle on delicate materials. Additionally, a high-quality microfiber cloth—like those designed for electronics and glass—can be reused multiple times if cleaned properly, making it both eco-friendly and cost-effective. Investing in a versatile handheld vacuum with a sturdy HEPA filter and a variety of attachments has also transformed my approach to move-out cleaning, ensuring no dust or debris get left behind, which is especially important for securing deposits.
Predicting the future of cleaning tools and maintenance
As technology advances, I foresee smart cleaning devices integrating IoT sensors to monitor wear and suggest maintenance schedules proactively. AI-powered tools might automatically alert you when replacement parts are needed, making upkeep more seamless. This shift will empower homeowners and professionals alike to preserve equipment longer, ultimately saving money and ensuring consistent cleanliness. For now, though, establishing a routine of regular maintenance—such as cleaning filters, unclogging hoses, and inspecting brush heads—remains the best practice.
What about long-term results and scaling your efforts?
Consistent maintenance of your tools directly correlates with better long-term results. Plus, scaling your home cleaning becomes easier when your equipment functions reliably. As your cleaning needs grow, upgrading to modular systems or investing in multifunctional devices can save space and money. If you’re preparing for a move-out or deep-cleaning project, I recommend revisiting your tools’ condition frequently and replacing worn components early to avoid last-minute surprises. Want some actionable advice? Try establishing a quarterly maintenance checklist based on your equipment’s specifications—this proactive approach keeps your home spotless and your tools working perfectly.
The Unexpected Lessons from Walls and Kids
One of the biggest insights I gained was realizing that patience and gentle techniques are far more effective than brute force when cleaning crayon marks. I used to think aggressive scrubbing was the answer, but I learned that a soft touch preserves your paint and prevents new damage. Another lesson was the importance of testing your cleaning approach in hidden spots first—what worked perfectly on one wall could be harmful on another. Lastly, investing in quality tools like microfiber cloths and magic erasers saved me countless headaches, proving that the right tools make all the difference in maintaining your home’s beauty over time.