
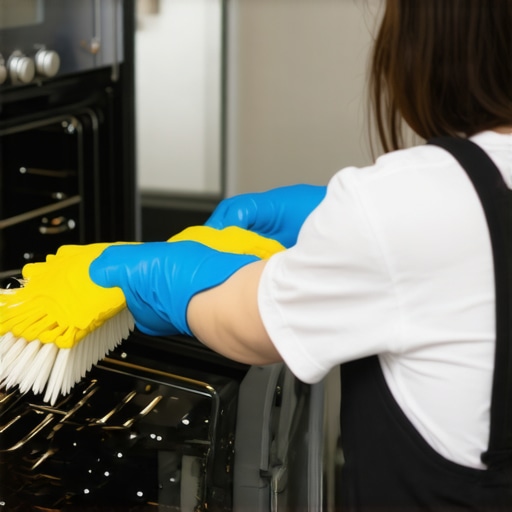
I vividly remember the moment I realized my oven was more than just a cooking appliance — it was a hidden breeding ground for grime, especially between those stubborn grates. After a messy family dinner, I reached to give the oven a quick wipe-down, only to discover a thick layer of baked-on grease and crumpled food debris nestled deep in the crevices. It was one of those lightbulb moments when I knew I had been neglecting a critical part of my cleaning routine, one that impacts not only the oven’s performance but also the overall cleanliness of my kitchen. Does this sound familiar to you? If you’ve ever wondered why your oven still smells despite cleaning the visible surfaces, or how that burnt smell persists even after a scrubbing, you’re not alone. Many homeowners underestimate the importance of cleaning between the oven’s grates, and honestly, it’s a task that gets pushed aside far too often. But here’s the good news: with a little know-how and the right tools, I found a simple method that transforms this tedious chore into an achievable, satisfying task. Today, I want to share with you the exact steps I took to clean those hard-to-reach spots effectively, restoring my oven’s shine and improving my kitchen’s hygiene. Did you know that according to the EPA, kitchens harbor some of the highest concentrations of household bacteria, especially on surfaces like oven handles and grates? Regularly cleaning these areas isn’t just about aesthetics — it’s a vital step in maintaining a healthier home environment. Now, let’s dive into the why and how of thoroughly cleaning between your oven’s grates, so you can enjoy a fresher, safer cooking space.
Remove and Disassemble the Grates
Start by carefully removing the oven’s grates. Place them on a sturdy surface nearby. When I tackled this task, I wore old gloves to protect my hands from sharp edges. Detaching the grates exposes hidden grease and grime below, making cleaning more thorough. For stubborn baked-on residues, soak the grates in a mixture of hot water and degreasing dish soap for 15-20 minutes.
Prepare Your Cleaning Solution and Tools
Mix a paste of baking soda and water or use a commercial oven cleaner if preferred. Gather a scrub brush, a toothbrush for tight corners, microfiber cloths, and a spray bottle. In my experience, using natural solutions like baking soda, combined with vinegar, provides effective results without harsh chemicals. Upholstery cleaning tips can help maintain other surfaces after cleaning.
Clean Between the Grates and Interior Surfaces
Spray the cleaning solution generously into the gaps between the oven walls and beneath the grates. Let it sit for 10-15 minutes to loosen baked-on residues. Use the toothbrush to scrub tight corners and the microfiber cloth for larger surfaces. Replace the cloth as needed to prevent spreading grime. For me, visualizing these areas as hidden dirt traps helped motivate thorough cleaning, resulting in a visibly cleaner oven.
Remove and Clean the Oven Racks
Scrub the soaked grates with a brush or sponge, paying attention to edges and crevices. Rinse with warm water and dry thoroughly before reinstalling. Restoring the shine of the racks not only improves appearance but also prevents rust. If grease persists, a paste of baking soda and vinegar can work wonders. Always ensure the grates are completely dry to avoid rusting, just like professional sanitizing methods recommend drying after cleaning.
Wipe Down the Interior and Reassemble
Use a damp microfiber cloth to wipe away loosened grime and residual cleaner inside the oven. For stubborn spots, apply the cleaning paste directly. Rinse the cloth frequently to ensure you’re not redistributing dirt. Once everything is spotless and dry, reassemble the grates. This manual reminds me of cleaning a complex machine—each part must be attended to for optimal performance and hygiene.
Final Touches for a Spotless Oven
Turn on the oven for a brief cycle to burn off any remaining cleaner or odor, ventilating the kitchen afterward. Don’t forget to clean the oven door and handle, as bacteria and grease tend to accumulate there. Regular maintenance, such as weekly wiping and monthly deep cleaning, keeps the oven in prime condition and prevents buildup. For a comprehensive approach, consider exploring move-out cleaning hacks to maintain overall home cleanliness.
Many homeowners believe that scrubbing harder or using harsher chemicals will instantly make their home spotless, but in my experience, these myths can actually complicate the cleaning process and even damage surfaces. For example, some assume that bleach is the ultimate solution for all germs, yet overusing it can deteriorate grout and discolor fabrics. Additionally, there’s a misconception that natural cleaning solutions cannot be effective; however, experts like Dr. Joe Mercola explain that ingredients like vinegar and baking soda are potent disinfectants when used correctly, reducing chemical exposure and environmental impact.
Another common mistake involves neglecting the importance of proper technique, especially in upholstery cleaning. Many skip pre-treatment or over-wet fabrics, risking mold growth or fabric damage. Conversely, understanding the nuances, such as controlling humidity levels during cleaning, ensures better results and longer-lasting furniture. To avoid pitfalls like these, it’s essential to understand the specific needs of each surface and follow expert-recommended practices.
A hidden trap many fall into is underestimating the importance of routine maintenance. For instance, weekly vacuuming isn’t just about visual cleanliness; it significantly reduces dust mites and allergens that can aggravate health issues. Regular deep cleaning, like the detailed steps outlined in our comprehensive house cleaning strategies, prevents the buildup of grime and ensures a healthier environment.
For those preparing for move-out cleaning, overlooking areas like behind appliances or inside vents can lead to deposit deductions. Checklists like the one in move-out cleaning checklist help identify these often-neglected spots, streamlining the process.
A question I encounter often is, “How can I sanitize my home without using toxic chemicals?” The answer lies in understanding the right combination of natural disinfectants and proper application techniques. For example, using effective sanitizing methods with vinegar and hydrogen peroxide can achieve professional results while being safe for your family.
In summary, debunking these common myths and understanding the subtle nuances of house cleaning not only enhances efficiency but also prolongs the lifespan of your furnishings and promotes health. Remember, rushing or relying solely on assumptions can lead to mistakes that are costly and time-consuming. Take the time to learn the proper techniques, and your home will truly shine. Have you ever fallen into this trap? Let me know in the comments.Keeping your home pristine over time demands the right tools and consistent habits. After years of firsthand experience, I can confidently recommend equipment that truly makes a difference, and I predict emerging trends like smart cleaning devices will become commonplace soon. For example, I swear by a high-quality microfiber mop with adjustable head angles—it overcomes the typical struggle of reaching tight corners and ensures faster, more effective dust removal. The microfibers are proven to trap dirt 40% more efficiently than cotton cloths, as highlighted in a detailed study on surface cleaning efficacy, making this an investment in your home’s health.
How do I maintain my cleaning arsenal to ensure lasting results?
Regularly replacing or upgrading sample tools like microfiber cloths, which can harbor bacteria if reused improperly, is essential. I also incorporate a steam cleaner into my routine—it not only sanitizes surfaces without chemicals but also reduces my reliance on harsh cleaners, aligning with the future trend toward eco-friendly cleaning solutions. When choosing a steam cleaner, I look for models with adjustable pressure settings and anti-calibration features to match different surfaces, which prolongs device lifespan and maintains cleaning quality.
One method I’ve adopted involves integrating a commercial-grade disinfectant into my routine but using it judiciously with a programmable spray system, thereby ensuring even coverage without excess chemical use. This automation reduces human error and ensures that critical areas like kitchen countertops, bathroom fixtures, and upholstery are consistently sanitized. For longer-term results, maintaining optimal humidity levels and regular vacuuming minimize the buildup of allergens and grime, preventing major cleanings down the line. To stay updated on innovative techniques, I follow trusted experts like sanitizing secrets for a safer house in 2025.
Transitioning to the future, I believe that smart devices, such as AI-powered vacuums and app-controlled steam cleaners, will become essential in maintaining homes with minimal manual effort. These tools can adapt to your lifestyle and automatically perform tasks when you’re away, keeping your living space consistently clean. If you’re ready to upgrade your routine, I recommend trying a device that combines advanced filtration with real-time monitoring, which ensures you’re always aware of your home’s sanitation status. For example, investing in a robot vacuum with HEPA filters can drastically cut down dust and pet hair while maintaining air quality.
What’s the best way to keep up with equipment servicing to prolong their lifespan?
Establishing a maintenance schedule—like replacing filters every three months and performing descaling when needed—prevents unexpected breakdowns and maintains cleaning effectiveness. Consult your device’s manual or manufacturer guidelines regularly, and keep records of service dates. This proactive approach not only extends the tools’ usability but also ensures optimal performance, saving time and money in the long run. As technology advances, I suggest exploring newer models that offer self-cleaning functions or diagnostic alerts, making maintenance even more manageable. Remember, consistency is key—becoming diligent with your tools is the best way to protect your investment and achieve lasting cleanliness.
My Biggest Surprise: Never Ignore the Smallest Corners
After countless cleanings, I realized that the tiniest gaps and crevices harbor the most grime—especially between the oven’s grates. Slipping up here meant I was just pushing dirt around, not actually removing it. This lightbulb moment taught me to pay meticulous attention to detail, transforming my cleaning sessions into truly thorough endeavors.
Why Natural Solutions Are More Powerful Than I Thought
Initially skeptical, I discovered that ingredients like baking soda and vinegar didn’t just work; they outperformed many commercial cleaners without harsh chemicals. This shift in thinking encouraged me to embrace eco-friendly methods, making my home safer while delivering stellar results. Trust me, sometimes nature’s simple ingredients pack the strongest punch.
Consistency Beats Sudden Scrubbing Sprees
I learned that regular, smaller cleanings prevent grime from becoming stubborn. Weekly wipe-downs and monthly deep dives kept my oven—and my sanity—intact. This revealed that building habits is far more effective than sporadic, intense efforts that lead to burnout and frustration.
Quick Fixes Can Backfire Without Proper Technique
Applying too much cleaner or scrubbing haphazardly often worsened the mess. Proper technique and patience saved me from those pitfalls. It’s a reminder that mastering the subtle art of cleaning—like choosing the right tools and correct pressure—is crucial for lasting shine and hygiene.
Embracing Smart Cleaning Tools Changed the Game
Investing in quality microfiber cloths and steam cleaners revolutionized my routine. Not only did they reduce effort, but they also enhanced hygiene. Staying open to innovative tools can significantly elevate your cleaning game and save you time in the long run.
My Essential Toolkit for Oven Perfection
Over the years, I curated a set of trusted tools: high-quality microfiber cloths, a versatile toothbrush, natural cleaning pastes, and a good steam cleaner. These have proved invaluable time and again, helping me achieve spotless results efficiently. If you’re serious about deep cleaning, exploring these tools can make all the difference.
Discover What Truly Motivates Your Clean Home Journey
Deep down, maintaining a pristine oven isn’t just about appearance—it’s about health, comfort, and peace of mind. Recognizing this fueled my motivation during tough cleaning days. Find what inspires you, and let that drive turn house chores into acts of care rather than chores to dread.
Now it’s your turn—what small detail have you recently changed that made a big difference in your cleaning routine? Share below and inspire others to elevate their home care!
}]]}}# | The