It was one of those moments where I nearly panicked—standing in front of my apartment after a long day of packing, realizing I’d left the EV charger covered in dust and grime. The worst part? I knew that if I didn’t clean it thoroughly, I might lose my security deposit or face a hefty cleaning fee. It dawned on me then: move-out cleaning isn’t just about sweeping floors and wiping counters; those tiny, overlooked spots can make or break your refund.
The Hidden Importance of Your EV Charger and Other Small Details
Here’s the honest truth: I used to think focusing on the kitchen counters and bathroom tiles was enough. Until I learned that landlords often scrutinize hidden spots—like your EV charger, wall scuffs, or behind appliances—during move-out inspections. Neglecting these can lead to deductions or even disputes. According to move-out cleaning experts, attention to detail is key, especially for modern homes with integrated tech like EV chargers (check out these detailed strategies).
Have You Faced the Frustration of a Partial Refund?
I made an early mistake—thinking a quick wipe would suffice for my charger, only to be told it was still dusty and unclean. That taught me a crucial lesson: superficial cleaning often isn’t enough. Deep, targeted disinfecting and scrubbing are necessary to ensure no spot is missed. So, over the years, I’ve developed a simple, reliable method that guarantees you’ll hit all those tricky little spots, from chargers to corners, and keep your deposit intact.
Focus on Deep Cleaning Your Equipment and Hidden Spots
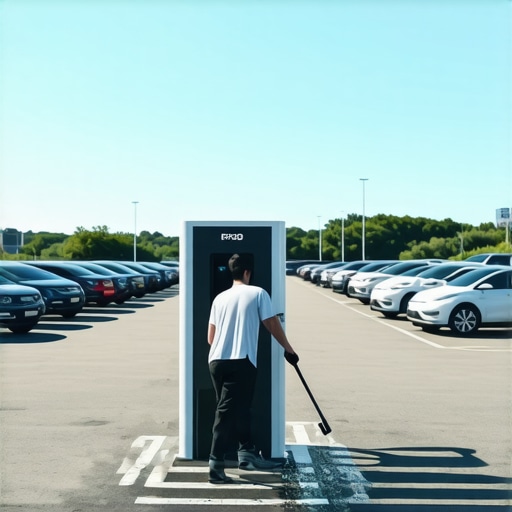
Start by inspecting your EV charger and other tech devices, understanding that superficial wiping won’t cut it. Use a brush attachment on your vacuum to loosen dust, then follow with a damp microfiber cloth, ensuring every crevice is clean. Think of it like cleaning a delicate piece of upholstery—gentle, precise, thorough. I once attempted a quick wipe on my charger, but after a skeptical landlord inspection, I realized the dust bunnies had lodged in hard-to-reach corners. That experience taught me to treat every component like a piece of fine fabric, requiring careful attention to detail.
Target These Hidden Spots for a Perfect Result
- Behind appliances such as the refrigerator or washer-dryer—the back wall often collects grime unseen by daily sight.
- Wall scuffs near switches and outlets, which can betray your cleaning efforts if overlooked. Use a magic eraser for stubborn marks.
- Air vents and ceiling fan blades—dust accumulates here and can be a quick detour from your cleaning routine.
For all these tricky areas, employ the same method I used when tackling my apartment’s dust buildup: a combination of vacuum tools and a damp cloth, followed by dry polishing. This ensures no spot is missed, which is crucial since landlords are wary of dust and grime in these technical or hidden spots. For a detailed checklist and expert tips, consult these guidelines.
Sanitize with Precision and the Right Tools
Next, focus on sanitizing high-touch areas—door handles, light switches, and electronic panels. Use a disinfectant suitable for electronics; avoid harsh chemicals that can damage sensitive surfaces. Apply with a microfiber cloth and let it sit for the recommended contact time to effectively kill germs. Remember, a simple wipe isn’t enough—think of sanitizing as a targeted attack, just like deep cleaning upholstery with specialized techniques that avoid damage. For fabrics, check out these expert upholstery tips.
Employ the Right Cleaning Techniques for Fabrics and Upholstery
When it comes to sofas, chairs, or curtains, recognize that each material demands a different approach. I personally failed to clean my velvet sofa properly, causing some fading when I used water-based cleaners. Instead, I now use dry-cleaning tactics for sensitive fabrics, treating them with specialized sprays that absorb dirt without saturating fibers. This method is akin to cleaning a delicate piece of upholstery—using the right tension, minimal moisture, and the proper tools. For insights specific to modern fabrics, explore these pro tips.
Pay Special Attention to Transition and Ventilation Systems
Don’t forget the vents and ventilation shafts; they are silent dust traps that can tarnish your move-out status if neglected. Use a long-handled duster or a vacuum with a dusting attachment, working methodically from top to bottom. Clean these spots as if you are removing years of accumulated dust from a cherished antique—carefully and thoroughly. A neglected vent can be a red flag during inspections, but a well-cleaned one can speak volumes about your attention to detail. For cleaning tips on tricky areas, see more strategies here.
Final Inspection and Touch-Ups
Once you’ve tackled the major and minor spots, do a detailed walk-through. Use a checklist, similar to the one used by professional cleaning services, to ensure no corner is missed. Carry a handheld mirror to view high and low spots and use your phone’s flashlight to spot any remaining dust or streaks. Remember, consistency is key—what looks clean to you might not pass a strict landlord’s eye. For a comprehensive checklist, see these proven methods.
Many assume that vacuuming and wiping surfaces are enough for a thorough clean, but in reality, there’s often more beneath the surface that can make or break your deposit. One common myth is that water-based cleaning methods are universally safe for all fabrics; however, for delicate upholstery like microsuede or velvet, excessive moisture can cause discoloration or damage, as detailed in expert guides. Moreover, a frequent mistake is neglecting to address hidden dust traps such as air vents or behind appliances, which can harbor allergens and dust mites, undermining your sanitization efforts. Have you ever fallen into this trap? Let me know in the comments. For advanced upholstery care, consider dry-cleaning techniques and specialized tools that prevent fabric damage, as described in professional strategies. Remember, superficial cleaning can give a false sense of cleanliness, while deep, targeted approaches ensure every fiber is truly sanitized, preventing issues like mold or permanent stains. A nuanced understanding of fabric types, combined with the right tools and techniques, elevates your cleaning from ordinary to expert level and helps secure your deposit. Don’t underestimate the power of overlooked details—sometimes, it’s the tiny spots that define success or failure in move-out inspections.
Investing in Reliable Equipment for Long-Term Results
To ensure your cleaning efforts stand the test of time, selecting the right tools is essential. I personally swear by an adjustable cordless vacuum like the Dirt Devil Endura Reach, which offers lightweight handling and variable suction power perfect for tackling everything from upholstery to hidden corners. The cordless feature allows seamless movement around furniture and tight spaces, reducing fatigue and increasing efficiency. Additionally, a high-quality microfiber mop equipped with quick-release pads has transformed my floor cleaning routine, making deep cleans faster and more effective. Such investments, although seemingly minor, drastically improve the longevity of your cleanliness and help maintain your home’s appeal over months.
How do I maintain my cleaning tools over time?
Proper maintenance of your equipment involves regular cleaning, checking for damage, and storing them correctly. Rinse vacuum filters and replace them as recommended—neglecting this can diminish suction power and spread dust. Wash microfiber cloths after each use to preserve their absorbency, and store tools in a dry, accessible space to prevent mold and degradation. Embracing these habits extends the lifespan of your tools and maintains their performance, turning routine cleaning into a consistent success. For more detailed guidance, visit these expert house cleaning secrets.
Mastering Sanitization with Precision Tools
When it comes to sanitizing, choosing the right disinfectants and application methods makes all the difference. I recommend using a spray bottle filled with hospital-grade disinfectant combined with a microfiber cloth for touchpoints like doorknobs and switches. For electronic panels, I prefer UV-C sanitizing wands; they effectively kill bacteria without risking chemical damage, as detailed in recent studies on UV sanitation (see more on UV germicidal tools). This dual approach ensures every surface is not only visually clean but also microbiologically safe, providing peace of mind long after the initial cleaning.
What future trends will influence cleaning tools and methods?
Innovation in smart cleaning devices, such as app-controlled robotic vacuums with advanced mapping, promises even more efficient maintenance routines. These devices can schedule cleanings during your absence, monitor wear and tear, and optimize paths for maximum coverage, making routine upkeep effortless. As technology evolves, integrating such tools will become standard for conscientious homeowners aiming for consistent, professional-grade results without frequent manual intervention.
Prioritize Regular Upkeep for Lasting Cleanliness
Maintaining your cleaning arsenal and methods isn’t a one-time effort but an ongoing process. Schedule routine tool checks and deep cleans of your equipment every few months to prevent buildup and ensure peak performance. By doing so, you’ll find that your move-out cleaning becomes less stressful, and your home remains consistently welcoming. Remember, the key to a spotless move-out and long-term home care is investing in quality tools and mastering their maintenance—this duo will save you both time and money in the long run. For comprehensive cleaning strategies, don’t hesitate to explore these expert service options.
Throughout my cleaning journey, I realized that the most overlooked details often determine whether I get my full deposit back. One lightbulb moment came when I discovered how tiny dust particles behind appliances or on delicate upholstery could be the clincher during inspections. Deep learning about upholstery care, especially for modern fabrics, transformed my approach from superficial wipe-downs to thorough, expert methods, ensuring I hit every hidden spot effectively. Knowing which tools and techniques work best for specific fabric types saved me from costly damage and repeated cleaning efforts, reinforcing that investing in proper equipment is crucial for lasting results. Plus, understanding the importance of inspecting and sanitizing ventilation systems beforehand helped me avoid red flags during the final walkthrough, proving that every detail counts in move-out cleaning.
I totally relate to the anxiety of missing tiny spots like the EV charger! It’s surprising how much dust can hide behind appliances and in crevices, and I’ve learned that a detailed deep clean makes all the difference. The tips about using a vacuum with a brush attachment followed by microfiber cloths have transformed my move-out routine. I used to overlook wall outlets and vents, but now I know they can impact my deposit. Has anyone tried using a handheld steam cleaner for those tricky spots? I found it really effective without risking damage, especially on sensitive surfaces. I’d love to hear others’ go-to tools for those hidden areas, especially if they’re eco-friendly or budget-friendly. The key seems to be patience and attention to detail, but it’s so worth it when you get your full refund. What’s your biggest challenge when tackling those hard-to-reach places? It’s definitely a game changer to have the right approach and tools to make sure no dust or grime is left behind.