
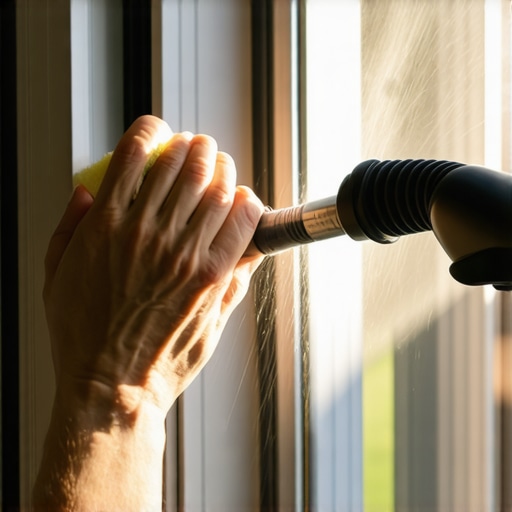
I remember the first time I actually looked down into my window tracks after a long winter. It wasn’t just dust; it was a microscopic graveyard of flies, pollen, and what I’m pretty sure was petrified dog hair from three years ago. I tried to ignore it, but that “skritch-skritch” sound every time I wanted fresh air was like nails on a chalkboard. It felt like a personal failure. How could the rest of my house look okay while these tracks were a biohazard? Most of us just pretend they aren’t there because the thought of scrubbing those tiny crevices is exhausting. We tell ourselves it requires special tools or a professional crew. I’m here to tell you that’s a lie. You can get that satisfying, smooth-glide window experience today using nothing more than a standard kitchen sponge and the vacuum you already own. We’re going to stop the “skritch” and bring back the sparkle. Have you ever avoided opening a window just because you didn’t want to deal with the grit? Let me know, because I’ve definitely been there.
Stop Overcomplicating Your Dirty Window Tracks
In the early days of my obsession with house cleaning strategies for a sparkling home today, I made the classic rookie mistake. I’d spray a bunch of all-purpose cleaner directly into the track and then try to wipe it out. Big error. Huge. I ended up with a thick, grey sludge that was impossible to remove. It was like I was trying to clean with wet cement. I learned the hard way that you have to respect the order of operations. You need a dry-first approach.
Is a Basic Kitchen Sponge Actually Better Than a Power Tool?
It sounds like a joke, right? Why would a $1 sponge beat a $40 “crevice cleaning kit”? Because the sponge is adaptable. When you notch it correctly, it hugs the metal rails in a way that plastic bristles just can’t. While a vacuum gets the loose stuff, the sponge provides the friction needed to lift that stubborn, stuck-on grime. Plus, it’s a lot faster than you think. You can actually deep clean your window tracks in five minutes if you use this method. According to the American Lung Association, household dust can contain high levels of mold spores and even fire retardants, which tend to settle in window tracks more than almost anywhere else in the home. Getting this right isn’t just about aesthetics; it’s about your family’s health. If you’re currently prepping for a landlord inspection, these little details are exactly what move-out cleaning strategies to secure your deposit are built on. Don’t let a handful of dead bugs cost you hundreds of dollars. Let’s get into how we actually prep the sponge for success.
Suck Up the Big Stuff First
In the early days of my obsession with cleaning, I once skipped the vacuuming stage entirely. I thought a wet rag would just grab everything. Instead, I pushed a dead spider and three years of dust into the very corner of the frame, turning it into a permanent, cement-like blob that took me forty minutes to pick out with a toothpick. Learn from my failure: use the crevice tool on your vacuum first. If you notice why your vacuum isn’t picking up dirt like it used to, check the nozzle for clogs or pet hair before you start. You want the tracks as bare as possible before any liquid touches them. This is one of those effective house cleaning secrets from cleaning experts that saves you an hour of frustration. 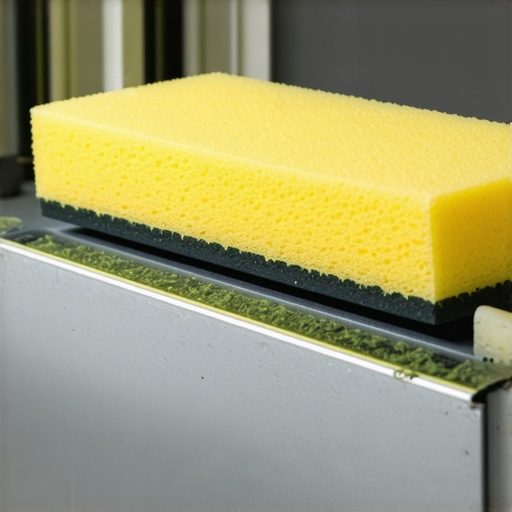
Custom Fit Your Sponge to the Rail
Think of your kitchen sponge like a custom-molded gasket for your window. Most tracks have two or three parallel metal rails that the window slides on. Line a dry sponge up against these tracks and use a permanent marker to draw lines where the rails sit. Then, take a utility knife or sharp scissors and cut about halfway through the sponge along those lines. You are essentially creating “teeth” that will straddle the tracks. This is similar to how upholstery cleaning tips for a fresh home revival often emphasize using the right tool for the specific shape of the furniture—the right fit prevents you from just moving dirt around. When you press the notched sponge down, it should hug the metal perfectly, reaching the bottom and the sides simultaneously.
Wipe Away the Sludge Without Making a Mess
Wet the notched sponge and wring it out until it is just barely damp. If it is dripping, you are headed back toward that dreaded “wet cement” sludge. A tiny drop of dish soap or a mild solution based on sanitizing secrets for a safer house in 2025 is all you need. Press the sponge firmly into the tracks and slide it from one end to the other. You will see the tracks go from grey and gritty to shining silver in one single pass. If you are working through a move-out clean checklist to simplify your transition, this trick is a total lifesaver because it doesn’t leave streaks on the window glass or nearby trim.
Conquer the Stubborn Corners
The corners are the “boss fight” of window cleaning. If the sponge can’t quite reach into the tight 90-degree angles, do not just shove it harder and risk tearing the foam. Instead, wrap a thin microfiber cloth around a flathead screwdriver or a dull butter knife. This provides the surgical precision needed to pull out that last bit of gunk without scratching the aluminum finish. If you are worried about your drapes, remember the ultimate upholstery care guide for lasting freshness and keep your cleaning solutions far away from the fabric. This level of detail is exactly what your move-out inspector is really looking for in the kitchen and living areas. Once you are finished, the window will glide so smoothly it feels brand new.Most people assume that because a surface looks white or silver again, it is actually clean. In my experience, this is the biggest lie in the world of DIY maintenance. While the notched sponge trick handles the visible grime, there is a hidden layer of complexity that separates a weekend warrior from a pro. Everyone says you should use more product for tougher stains, but I’ve found that the more liquid you introduce, the faster the dirt returns. It creates a sticky residue that acts like a magnet for the next gust of wind. This is a core pillar of daily house cleaning routine to maintain perfection: the less chemistry you use, the longer the surface stays pristine.
Stop Drowning Your Surfaces in All-Purpose Cleaner
The most common ‘Oops’ factor I see involves people confusing saturation with effectiveness. If you are prepping for a landlord walk-through, you might be tempted to douse everything in heavy-duty spray. However, you should why you should never spray cleaning products directly on surfaces because it leads to ‘product buildup.’ In window tracks, this buildup traps moisture against the frame, which can lead to oxidation or even rot in wooden sills. This same nuance applies to your furniture; if you over-saturate a stain, you’re just pushing the dirt deeper into the foam. I always suggest checking an ultimate upholstery care guide for lasting freshness to see how ‘dry’ cleaning methods usually outperform the ‘soak and scrub’ approach.
The Stealthy Mistake That Turns Your Window Track Into a Mold Farm
Here is the advanced nuance: the weep holes. Most homeowners don’t even know their windows have a drainage system. Look at the exterior bottom of your window frame; you’ll see tiny rectangular slits. These are designed to let rainwater escape from the tracks. If you’ve just pushed a bunch of ‘cleaner sludge’ into these holes with your sponge, you’ve essentially created a dam. Water will sit in your tracks, and within a week, you’ll have a black mold colony thriving right where you just cleaned. This is why sanitizing hacks for safe house transitions are so vital; you have to ensure the infrastructure of the window is clear, not just the visible rail. If you are working through a move-out cleaning hacks ensure your deposit refund, use a can of compressed air or a thin wire to make sure those weep holes are breathing. #IMAGE_PLACEHOLDER_C#
Does Your Sanitizer Actually Kill Germs or Just Make Wet Dust?
This is the ‘Expertise’ level question. Many people spray a disinfectant and immediately wipe it away, thinking they’ve sanitized the area. They haven’t. According to the Centers for Disease Control and Prevention (CDC), most household disinfectants require a ‘dwell time’—often 3 to 10 minutes of remaining visibly wet—to actually kill pathogens. If you’re following effective sanitizing methods for a germ-free home, you know that cleaning (removing dirt) and sanitizing (killing germs) are two different steps. If you skip the ‘dry-vacuum’ phase we discussed earlier and go straight to sanitizing, you’re just making ‘germy mud.’ This mistake is exactly why some homes still feel ‘off’ or dusty even after a deep clean. Have you ever fallen into this trap? Let me know in the comments. Using these effective house cleaning secrets from cleaning experts will not only save your time but also ensure your home is actually healthy, not just ‘clean-looking.’ If you are looking for more ways to level up, check out my tips on upholstery cleaning tips for a fresh home revival to match your now-perfect windows.”,”image”:{“imagePrompt”:”A close-up shot of a person using a thin wire and a can of compressed air to clear out the small drainage weep holes at the base of a white vinyl window frame, preventing mold buildup.”,”imageTitle”:”Clearing window track weep holes for better drainage”,”imageAlt”:”A person cleaning the drainage weep holes in a window track to prevent mold and water damage.”},”categoryId”:1,”postTime”:””}Once you’ve achieved that satisfying silver shine, the real challenge begins: making it stay that way. If you just leave it alone, you’ll be back to square one in three months. I used to think I needed a massive arsenal of chemicals, but I’ve narrowed my kit down to two specific items that I swear by. First, a high-quality steam cleaner with a precision nozzle. I don’t mean a mop; I mean a pressurized handheld unit. Why? Because steam at 212°F melts the microscopic oils that trap dust before it can even form a crust. This is one of those effective house cleaning secrets from cleaning experts that actually works because it is physics, not just soap. Second, you need high-GSM microfiber cloths. If you have ever wondered why your microfiber cloths are leaving lint everywhere, it is usually because the fibers are low-grade and break down under heat. Investing in a professional-grade set prevents that annoying fuzz from settling back into your newly cleaned tracks.
How do I maintain these pristine tracks over the long haul?
The secret isn’t a deep scrub every six months; it is a touch-up integrated into your daily house cleaning routine to maintain perfection. Every time you vacuum the carpets, run the brush attachment over the window track. It takes ten seconds. According to the American Architectural Manufacturers Association (AAMA) technical documentation for residential windows, dirt buildup is the primary cause of premature weather-stripping failure. By removing the dry grit before it gets wet, you are literally extending the life of your home’s energy efficiency. If you are doing a move-out clean checklist to simplify your transition, this habit means you won’t have to spend hours scrubbing during the most stressful week of your life. 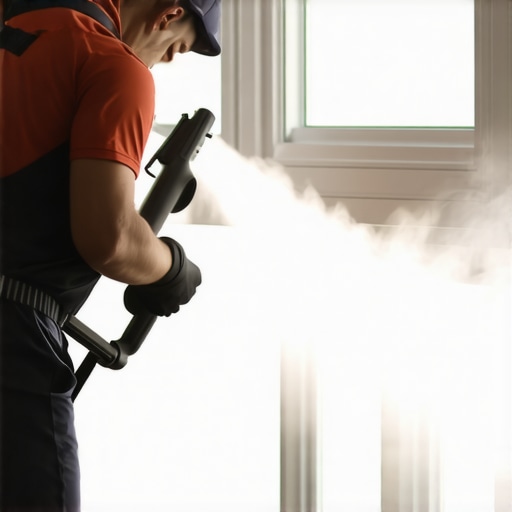 I predict that in the next few years, we are going to see more specialized robotics for this. We already have window bots that stick to the glass, but track-cleaning drones or automated rail-sweepers are likely the next evolution in house cleaning strategies for a sparkling home today. Until then, we have to rely on smart tools and even smarter timing. If your windows are done, why stop there? Use some upholstery cleaning tips for a fresh home revival to make sure the view outside looks just as good as the furniture inside. I challenge you to grab a toothpick or a thin wire today and check your weep holes. It takes thirty seconds and could save your window frames from rot. Seriously, go do it right now and tell me what you find!
The Hardest Lesson I Learned About Gritty Rails
After years of trial and error, I realized that the secret isn’t in how hard you scrub, but in how well you prep the surface. One of the biggest effective house cleaning secrets from cleaning experts is acknowledging that window tracks are a unique environment where outdoor grit meets indoor moisture. Here are the ‘lightbulb moments’ that changed my routine forever: First, never use a sponge that is too soft; you need the coarse, scouring side of a standard kitchen sponge to actually break the surface tension of years-old dust. Second, I learned that cleaning your tracks on a sweltering hot day is a mistake because your cleaning solution dries before you can wipe the sludge away, leaving behind a sticky film. Finally, I discovered that the ‘skritch’ sound we all hate isn’t always just dirt—it’s often dried-out weather stripping that needs a tiny drop of silicone lubricant after the cleaning is done.
My No-Fail Toolkit for Pristine Sills
You don’t need a professional van full of equipment to get professional results. I’ve refined my process down to these specific items that I keep in my cleaning caddy at all times. I always use 300 GSM or higher microfiber cloths to finish the job. If you’ve ever noticed why your microfiber cloths are leaving lint everywhere, it’s usually because the fibers are too cheap to handle the friction of a metal window rail. I also swear by using a simple bamboo skewer—it’s stronger than a toothpick and won’t scratch the finish of your windows like a screwdriver might. Lastly, I keep a small spray bottle of 70% isopropyl alcohol for those greasy tracks near the kitchen; it cuts through cooking grease that regular soap just smears around.
Bring Back the Sunshine and the Fresh Air
There is a profound sense of peace that comes from a home that functions exactly the way it was designed to. When your windows slide open with a silent, effortless glide, the whole room feels lighter. This small project is a core part of any daily house cleaning routine to maintain perfection because it prevents the buildup that leads to expensive repairs down the road. Don’t let the fear of a little grit keep you from enjoying the breeze. Grab a sponge, cut those notches, and take back your view today. You’ll be amazed at how such a small change can make your entire house feel brand new again. Have you ever found something truly bizarre hidden in your window tracks during a deep clean? Let me know in the comments below!