
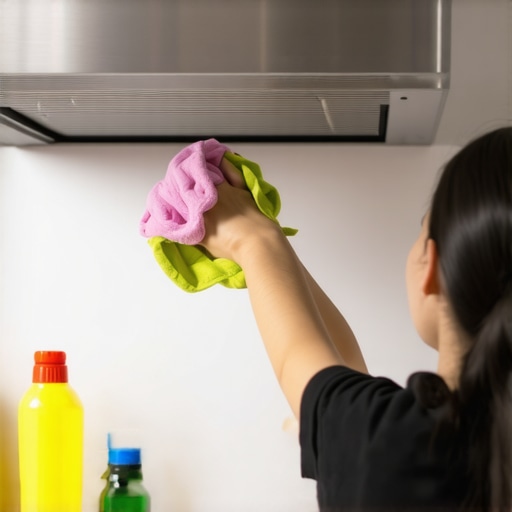
Ever noticed that stubborn grease stripe above your stove that just wouldn’t budge, no matter how many times you wiped? Or maybe you didn’t realize how much grime was hiding underneath your range hood until it started to smell strange during your last dinner party. I once ignored this part of my kitchen cleaning routine, thinking a quick wipe-down of the surfaces was enough. But I was so wrong. A little oversight turned into a big headache—and an embarrassing moment when my prospective buyers pointed it out. That was my lightbulb moment: the underside of your range hood needs attention too, especially before you pack up and move.
Today, I want to share why this seemingly tiny area is a crucial component of your cleaning ritual, particularly when you’re getting ready to move. Not only does it affect the overall cleanliness and hygiene of your kitchen, but neglecting it can also cost you your security deposit or worse, leave behind unpleasant odors that linger long after you’ve left. We’ll explore exactly how to tackle this task with confidence and efficiency, turning a dreaded chore into a manageable habit—and I’ll guide you through some common pitfalls to avoid along the way.
The Hidden Dirt That Could Surprise You
When I first moved out of my apartment, I assumed that wiping the exterior of the range hood was enough to demonstrate my diligence. But during the final inspection, the landlord pointed out the thick layer of grease and dust accumulated underneath. I had missed my move-out cleaning checklist, especially this lesser-known area, which had become a silent trap for grime. This mistake taught me that the underside isn’t just a hidden nook; it’s the face of your cleanliness effort. According to experts, neglected grease build-up can lead to reduced appliance lifespan and even pose fire hazards, especially in kitchens prone to heavy cooking use. So, skipping this step isn’t just about appearances—it’s about safety and saving money in the long run.
Is the Underside of Your Range Hood Actually Worth the Hype?
When I first heard about scrubbing the underside, I questioned whether it was a real necessity or just an overhyped cleaning myth. Trust me, I’ve faced the skepticism myself. After one particularly greasy kitchen incident, I learned this lesson the hard way. Simply wiping with a cloth wasn’t enough—grease and dust clung stubbornly to the metal surfaces, creating a layer of grime that was challenging to remove later. This common mistake made me realize that thorough cleaning requires dedicated effort, which is why I now advocate for a targeted approach. Interestingly, studies show that kitchens are among the top spots for hidden bacteria and mold, especially in unnoticed areas like the range hood’s underside. Keeping this part pristine is a small investment of time that offers huge benefits for your health and your property’s value.
Having shared my experience, I hope you see that paying attention to the underside isn’t just about aesthetics—it’s about safety, hygiene, and ensuring you leave your old home in perfect condition. Ready to learn how to tackle this task efficiently? Let’s dive into the steps that will make scrubbing the underside of your range hood painless and effective, so you can move out confident and stress-free.
Gather Your Tools and Prepare
Begin by collecting all necessary cleaning supplies: a sturdy step ladder, microfiber cloths, a degreasing spray or homemade solution with dish soap and warm water, a scrubbing brush or sponge, and protective gloves. Wearing gloves protects your skin from harsh grease and chemicals. Set up your ladder on a stable surface—think of it as setting the stage for a surgical operation, where stability ensures efficiency and safety. Remember, safety first; make sure the area around your workspace is clear to avoid accidents.
Accessing the Hidden Zone
Place your ladder securely beneath the range hood. Climb to a comfortable height, ensuring you can reach underneath without overextending. Carefully remove any filters or detachable components according to the manufacturer’s instructions—these can often be cleaned separately for a more thorough clean. Think of this step as peeling back the layers of an onion; exposure to the grime reveals the real challenge. Once exposed, inspect the area for loose debris or excessive grease buildup, which can be wiped away with a dry cloth before applying any cleaning solution.
Applying the Cleaning Solution
Spray your degreasing solution generously over the entire underside surface. For stubborn grime, let the solution sit for 5-10 minutes—like giving a marinade time to penetrate, this softens the grease, making it easier to remove. Use your scrub brush or sponge to agitate the surface, focusing on corners and edges where grease accumulates. Think of your scrubbing motion as polishing a car; the more deliberate and consistent, the more effective the cleaning. Remember, avoid aggressive scrubbing that might scratch delicate surfaces—gentle but firm is the key.
Wiping and Rinsing
Use a clean microfiber cloth dampened with warm water to wipe away the loosened grease and residue. Rinse and wring out your cloth frequently to prevent spreading dirt. For areas with heavy buildup, repeat the spray-and-scrub process. As you work, imagine you’re chiseling away at a stubborn sculpture—progressive, careful, and precise. If your solution leaves streaks, a second wipe with plain water or a vinegar solution diluted with water can help restore a spotless shine without residue. This step ensures no harmful chemicals linger, maintaining a safer kitchen environment during your move.
Drying and Final Touches
After wiping, dry the area thoroughly with a clean, dry microfiber cloth. Moisture can attract dust or lead to rust in metal parts, so dryness is crucial. Replace any filters or components you removed earlier, ensuring they’re also cleaned or replaced if needed. Think of this as giving your work a professional polish—details matter. Now, take a moment to inspect your work. A clean underside will not only impress move-out inspectors but also extend the life of your appliance by preventing grease fires and corrosion.
Implementing Routine Maintenance
To make future cleaning easier, establish a routine: wipe the underside of the range hood with a damp cloth weekly, and perform a deep clean like this once a month. Regular maintenance prevents grease from hardening and accumulating in hard-to-reach areas, turning a daunting task into a quick, manageable chore. Keep in mind, this isn’t just about appearances—cleanliness impacts your kitchen’s safety and hygiene. For more insights on comprehensive cleaning strategies, consider exploring effective sanitizing methods.Many homeowners believe that a quick wipe-down with disinfectant spray is enough to ensure a truly sanitized space, but in my experience, this common misconception can leave behind lingering germs and bacteria. The truth is, effective sanitization requires a nuanced approach, especially when dealing with high-touch areas or upholstery. A prevalent myth is that chemical disinfectants alone do the job; however, studies show that improper application and neglecting thorough cleaning can significantly reduce their effectiveness. For instance, simply spraying sanitizer on surfaces without prior cleaning can trap dirt and organic matter underneath, shielding germs from disinfectants and allowing them to survive. This oversight often results in a false sense of security and inadequate hygiene.
Another nuanced aspect many overlook involves the role of contact time. Experts emphasize that disinfectants need a specific duration to effectively neutralize pathogens, but many people rush the process, wiping off solutions prematurely. This mistake diminishes the disinfectant’s potency. Moreover, certain disinfectants are ineffective against emerging strains of bacteria and viruses; it’s crucial to stay informed about the latest recommended products—something I constantly keep up with through sources like professional sanitizing hacks.
Beware of the trap of ignoring upholstery and soft furnishings, which can harbor dust mites, pet dander, and bacteria—especially in homes with pets or allergies. Many assume that vacuuming or tossing cushions in the wash suffices, but deep cleaning methods like hot water extraction or professional upholstery sanitizing can make a significant difference. For detailed upholstery care tips, check out this comprehensive guide.
Have you ever fallen into this trap? Let me know in the comments. Remember, mastering the subtleties of house cleaning not only boosts hygiene but also extends the lifespan of your furnishings and preserves your home’s value. Investing time in understanding the right cleaning protocols ensures you’re truly making your living space safer and healthier.
Investing in the right tools is crucial, but equally important is maintaining them properly to ensure they continue performing at their best over time. I personally swear by high-quality microfiber cloths and commercial-grade degreasers because they withstand repeated use without losing effectiveness, unlike cheaper alternatives which tend to fray or lose their cleaning power after a few washes. Regularly inspecting your tools for signs of wear, such as torn fibers or buildup, allows you to replace or deep clean them before they compromise your sanitation efforts. For example, I recommend soaking microfiber cloths in a mixture of white vinegar and warm water monthly to remove product residues and restore absorbency—this simple step extends their lifespan and maintains their cleaning efficacy.
Using the right tools properly also means understanding their specific maintenance routines. For instance, a steam cleaner should be descaled monthly using manufacturer-approved solutions to prevent mineral buildup that can diminish steam quality. I’ve found that setting a recurring calendar reminder for tool maintenance helps me stay consistent, ensuring my equipment continues working efficiently. Looking ahead, I believe that advancements in cleaning technology, such as self-cleaning vacuum heads and IoT-connected scrubbers, will make maintenance even more automated, freeing homeowners from manual upkeep while enhancing results.
How do I maintain my cleaning equipment for optimal performance?
To keep your tools working effectively, always follow manufacturer instructions for cleaning and storage. For example, replacing vacuum filters regularly and cleaning spray nozzles prevent clogs and ensure consistent spray patterns. Additionally, storing your equipment in a dry, sheltered area minimizes exposure to dust and humidity that can cause damage or mold growth. Implementing a routine, such as the monthly microfiber soak I mentioned earlier, guarantees your tools stay ready for any cleaning scenario. Remember, well-maintained tools reduce the effort required and improve the longevity of your investment, ultimately making your house cleaning routine more efficient. For more detailed strategies, review my daily house cleaning routine.
If you want to take your maintenance a step further, consider investing in a descaling system especially for your steam cleaner, which kits like Clorox’s descaling solution recommend for maximum lifespan. According to industry experts, proper upkeep not only prolongs equipment life but also ensures hygienic cleaning, which is vital when preparing a home for move-out or deep sanitation. As technology evolves, I predict a shift towards smart cleaning tools that monitor their own wear and notify owners when maintenance is due, reducing guesswork and enhancing reliability.
Start by setting up a basic maintenance schedule for all your essential equipment—like your vacuum, steam cleaner, and microfiber cloths. Regular care can prevent costly repairs or replacements down the line, saving you money and stress. Don’t forget to document or digitalize your routine, so it becomes an effortless part of your cleaning regimen. A good habit here will pay off in the long run, especially when you’re gearing up for that move-out cleaning or upholstery refresh. If you’re eager to optimize your process, try incorporating a monthly microfiber soak and see how your cleaning results improve over time. For additional tips, visit my comprehensive cleaning guides, and make your equipment last longer while delivering impeccable cleanliness.
Lessons Learned From My Deep-Cleaning Mishaps
- I used to believe wiping once was enough, only to realize grease and grime stubbornly hide in the tiniest corners—making me wish I had started cleaning the underside of my range hood earlier. That small oversight cost me extra time and stress during move-out, teaching me the importance of thoroughness.
- Failing to recognize the health risks of neglected grease buildup was a wake-up call. I discovered that a clean range hood isn’t just about appearance but also crucial for air quality and fire safety—reminding me that some details truly matter for long-term safety.
- My skepticism about cleaning the underside being a myth vanished when I saw how much dirt accumulated beneath the hood after neglecting it for months—an eye-opening experience that changed my house cleaning routine forever. Now, I prioritize this often-overlooked area to maintain hygiene and preserve my home’s value.
My Go-To Toolkit for a Spotless Kitchen
- Quality Microfiber Cloths: I trust these for their durability and ability to trap grease without scratching surfaces. Regularly soaking them in vinegar and water keeps them effective for deep cleaning.
- Degreasing Spray: A good commercial-grade degreaser cuts through stubborn grime effortlessly. I prefer one with natural enzymes to avoid harsh chemicals—my family’s health is worth it.
- Extendable Scrubbing Brush: Reaching beneath the range hood is tricky; this tool gives me the flexibility to clean thoroughly without risking safety. Pair it with my step ladder for maximum reach.
Your Next Step Toward a Safer, Cleaner Home
Don’t let panic or procrastination hold you back from mastering your house cleaning at a professional level. Embracing efficient techniques for sanitizing, like tackling the underside of your range hood, not only boosts safety but also enhances hygiene and property preservation. Imagine confidently moving out, knowing your home exceeds inspection standards because you paid attention to those hidden areas. I encourage you to start today—set your tools, plan your approach, and take that first step. Remember, every effort you make today prepares you for a healthier, safer living space tomorrow. What’s one small cleaning habit you’re going to implement this week to keep your home pristine? Let me know below.