
I remember the day vividly. I was hosting friends for a weekend get-together when I suddenly sneezed for the tenth time. That itchy, uncomfortable feeling in my nose and eyes made me realize something was seriously wrong. It wasn’t just the dust floating around; it was my own mattress, hosting an invisible army of dust mites and allergens that I had neglected to clean properly. That moment was a lightbulb for me—how could I have been so careless about one of the dirtiest spots in my home?
Why Your Mattress Might Be Polluting More Than Just Your Sleep
Over time, mattresses collect sweat, skin flakes, pollen, and yes, dust mites, which thrive in that warm, humid environment. These microscopic creatures and particles aren’t just nuisances; they can trigger allergy attacks, asthma, and disturb your sleep quality. I learned this the hard way, by ignoring my mattress’s hidden mess. Early on, I made a mistake I see many others do—simply vacuuming the surface or tossing it in the laundry without thorough sanitization. This approach is only scratching the surface. According to the Asthma and Allergy Foundation of America, effective mattress cleaning and sanitizing can significantly reduce allergen levels and improve health outcomes. If you’re like me, you’ve probably faced the challenge of dealing with these allergens and wondered if there’s a real, effective way to tackle them once and for all. Today, I’ll share the proper method I’ve discovered to clean your mattress, removing dust mites and allergens for good. But first, let’s address a common skepticism I’ve heard time and again.
Is Mattress Cleaning Actually Worth the Hype?
I used to think that weekly vacuuming was enough. I believed that throwing my sheets in the wash every couple of weeks would get rid of the worst. But I was wrong. A mistake I made early in my cleaning journey was neglecting to strip the mattress and treat it with proper sanitizing solutions. Vacuuming alone only reduces surface dust; it doesn’t eliminate those tiny bugs lurking deep inside. Once I realized this, I began to understand that a real mattress detox requires a more thorough approach, combining cleaning with targeted sanitization. If you’re skeptical, I get it. It sounds tedious and expensive, but trust me: the payoff is worth it. Better sleep, fewer allergy symptoms, and peace of mind. Plus, a clean mattress can last longer, saving you money in the long run. Curious how to do it? Let’s move forward and break down the exact steps I follow to keep my mattress fresh and allergen-free. For more house-cleaning tips that go beyond the mattress, you might find useful strategies at our home cleaning strategies page, designed to give your entire house a health boost.
Start with a thorough move-out checklist to ensure no corner is missed
Before diving into cleaning, I recommend reviewing a comprehensive move-out cleaning checklist. When I moved last summer, following this checklist helped me catch hidden spots like behind appliances and inside crevices that often get overlooked. Clear out all furniture and personal items to give yourself unrestricted access and create a sanitized environment ready for deep cleaning.
Strip the mattress and prepare for deep sanitization
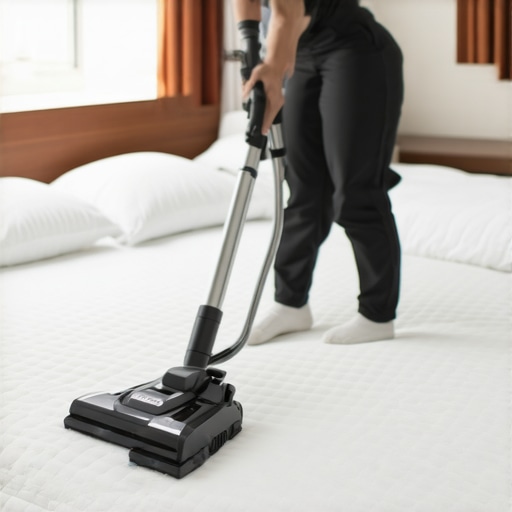
Removing all bedding, pillows, and mattress protectors is essential. Once stripped, vacuum the mattress surface thoroughly using an upholstery attachment. This step removes surface dust, dead skin, and dust mites. I once skipped this initial step and noticed dust still lingering in my linens afterward. Think of it like cleaning your yard—you first clear the surface before treating the soil beneath.
Apply specialized sanitizing solutions carefully
Next, target the mattress with a sanitizing spray designed for allergens. I use a mixture of distilled water and a few drops of tea tree oil—known for its natural disinfectant properties—diluted in a spray bottle. Lightly spritz the entire surface, focusing on seams and edges where allergens hide. Remember, avoid overly wetting the mattress, as excess moisture can foster mold growth. For deep cleaning of upholstery, check out our upholstery care guide.Many assume that a quick sweep or wipe is enough for effective move-out cleaning, but the reality is far more nuanced. A common myth is that superficial surface cleaning guarantees that your landlord won’t find dirt or grime. In fact, thorough sanitization involves targeting hidden spots and understanding the science behind proper disinfection. For instance, some overlook the importance of cleaning behind appliances or inside ventilation covers, which can harbor mold, dust, and bacteria. Skipping these areas risks losing your security deposit and leaving your new tenants with a less-than-clean environment. An often underestimated aspect is the difference between cleaning and disinfecting; cleaning alone removes visible dirt, but disinfecting reduces microbial load — a crucial step especially during flu season. Experts recommend products containing EPA-registered disinfectants, which are effective against viruses and bacteria; relying solely on natural remedies can be ineffective. Additionally, many underestimate the importance of patience and correct application—spraying disinfectant without allowing it to sit for the recommended contact time drastically reduces effectiveness. A trap many fall into is assuming that choosing a generic cleaner suffices, but tailored solutions like EPA-approved sanitizing sprays ensure safety and efficacy. When it comes to upholstery or carpets, using the wrong cleaning methods can damage fibers or cause mold growth. For example, over-wetting upholstery can trap moisture, leading to mildew, while under-wetting may not remove deep-seated dirt. To avoid these pitfalls, follow expert guidelines found in our sanitizing hacks for safe house transitions. Because move-out cleaning has financial implications—potentially costing or saving hundreds of dollars—it’s vital to understand the nuances. Additionally, many underestimate the value of a move-out checklist. This comprehensive approach ensures no corner is missed and aligns with landlord expectations, enhancing your chances of securing your deposit. I highly recommend reviewing a detailed move-out cleaning checklist. Remember, the devil is in the details: neglecting overlooked areas like air vents or baseboards often leads to complaints or deductions. Want to elevate your move-out game? Prioritize proper sanitization, use the right cleaning tools, and follow expert-tested methods to ensure you leave nothing behind. For specialized tips on upholsteries or carpets, our ultimate upholstery care guide is a great resource.
Are There Hidden Risks in Common Cleaning Practices?
A common mistake is over-reliance on chemical cleaners without understanding their contact requirements. Many believe that spraying and wiping immediately is enough, but EPA studies indicate that disinfectants need sufficient contact time—usually around 10 minutes for maximum efficacy—to neutralize pathogens effectively. Skipping this step can leave your home vulnerable. Moreover, some believe that natural alternatives like vinegar or baking soda are equally effective, but scientific data, such as from the study on natural disinfectants, shows their limitations against certain bacteria and viruses. Another sneaky trap is neglecting to clean high-touch surfaces such as light switches, doorknobs, and remote controls, which are critical touchpoints for disease transmission. Regularly sanitizing these can drastically reduce bacterial spread. Also, some underestimate the importance of proper drying after cleaning, as moisture fosters bacteria and mold growth—an oversight that can cause long-term hygiene issues. Remember, move-out cleaning isn’t just about convenience; it’s a health safeguard and financial investment. By paying attention to these finer points, you elevate your cleaning from average to expert. If you’d like a comprehensive plan tailored to your specific home, don’t hesitate to contact us through our contact page. Have you ever fallen into this trap? Let me know in the comments.Maintaining a spotless home requires the right tools that deliver professional results without the constant expense of hiring help. Over the years, I’ve tested various equipment and software, and I’ve narrowed down the essentials that truly make a difference in my cleaning routine. One game-changer has been my **HEPA-certified vacuum cleaner**. Unlike standard vacuums, models equipped with HEPA filters trap 99.97% of dust particles, allergens, and bacteria, ensuring my house stays healthier, especially during allergy season. I personally rely on the **Dyson V11** because of its powerful suction, cordless convenience, and smart diagnostics that tailor the cleaning cycle to my home’s needs. For upholstery deep cleaning, I recommend the **Lemi Shine Upholstery Steamer**. It’s portable, heats quickly, and uses steam to naturally disinfect fabrics without harsh chemicals—perfect for maintaining furniture in top condition and prolonging its lifespan. When it comes to sanitizing high-touch surfaces like door handles and electronics, I use **EPA-approved disinfectant sprays** such as **Microban 24**. These sprays are scientifically tested by the EPA to effectively neutralize pathogens, as supported by their official documentation. I especially appreciate their quick drying time, which allows me to disinfect frequently touched spots between deep cleaning sessions. For long-term results, integrating **software tools** has proven invaluable. I use **Tody**, a cleaning management app that schedules and tracks tasks, ensuring I stay consistent without feeling overwhelmed. Its user-friendly interface and reminder alerts keep my cleaning routine on track, allowing me to focus on optimizing the process rather than remembering tasks. Looking towards the future, I predict that **smart home integration** with robotic vacuums and IoT-connected disinfectants** will revolutionize maintenance routines, providing real-time alerts and on-demand sanitation. Embracing these innovations will help homeowners maintain optimal cleanliness with minimal effort.
Ever Wonder How to Keep Tools in Peak Condition?
Proper maintenance of your cleaning equipment extends their lifespan and ensures they perform effectively. Regularly clean and replace filters in vacuum cleaners according to manufacturer instructions, typically every 3-6 months. For steamers, flush out residual water weekly to prevent mold buildup, and check hoses and seals for signs of wear. Investing in **high-quality tools and performing routine upkeep** not only saves money in the long run but also guarantees that your home remains truly clean and safe. I also recommend scheduling professional deep cleans periodically, especially for carpets and upholstery, to remove accumulated dirt and pathogens that DIY methods can’t reach. For tips on maintaining upholstery specifically, our ultimate upholstery care guide offers detailed advice. Remember, consistency is key: set a schedule using apps like Tody or a physical calendar to maintain these tools and routines effectively. Don’t forget to inspect and replace worn-out supplies, such as microfiber cloths or scrub brushes, to ensure every cleaning effort yields optimal results. To kickstart your tool maintenance, try periodically adding a few drops of natural disinfectant like tea tree oil to your vacuum filters, which can supplement HEPA filtration and provide an extra layer of antimicrobial defense—just ensure your vacuum is compatible with natural additives. This small step can significantly improve your home’s hygiene levels over time.
The Hidden Lessons I Wish I Knew Earlier About Moving and Cleaning
- One of the toughest realizations was understanding that superficial cleaning isn’t enough; effective move-out cleaning requires a meticulous approach, focusing on hidden spots and proper sanitization methods that most overlook.
- I learned that rushing through a move-out clean can jeopardize my security deposit—attention to detail, especially in areas like behind appliances and inside vents, can save money and future headaches.
- Discovering that disinfectants need adequate contact time was a game-changer; it’s not just about spraying and wiping but allowing solutions to sit and do their job effectively.
- The importance of a detailed move-out checklist became clear when I realized that small overlooked spots, like light switch plates and baseboards, can make or break the impression of a truly clean home.
- Investing in quality tools, such as HEPA vacuum cleaners and EPA-approved sanitizing sprays, significantly improved my cleaning efficacy and health safety—saving me time and effort in the long run.
Tools and Resources That Elevated My Cleaning Routine
- My Essential Toolkit for Move-Out Cleaning: Combining a HEPA-certified vacuum like the Dyson V11 with EPA-approved disinfectants like Microban 24 transformed my cleaning process, making it more effective and healthier.
- Books That Changed How I View Cleaning: The book ‘Effective Sanitizing Methods for a Germ-Free Home’ offers science-backed insights that enhanced my understanding and approach to proper disinfecting practices.
- Moving Out with Confidence: The move-out checklist available at our dedicated page helped me stay organized, ensuring no detail was missed for a spotless, deposit-secured exit.
Your Turn to Make the Leap Toward Spotless Success
Embarking on thorough move-out cleaning may seem daunting at first, but with the right knowledge, tools, and a confident mindset, it becomes an empowering routine that safeguards your finances and health. Remember, every detail counts—your home deserves nothing less. Are you ready to transform your move-out experience and leave behind a truly pristine space? Dive in, stay consistent, and watch the peace of mind follow. Have you ever missed a crucial spot during move-out cleaning? Share your stories below and inspire others to elevate their home cleaning game.