It was the weekend, and I was knee-deep in dust and cobwebs around the house when I realized—my blinds looked worse than when I started. A quick wipe turned into a mini dust storm, and I ended up with more mess on the floor than on the blinds. Ever been there? That frustrating moment when you just want clean, streak-free blinds but dread the thought of taking them down or making a gigantic mess? You’re not alone.
Today, I want to share a tried-and-true method I’ve perfected for cleaning blinds without the chaos. Whether you’re gearing up for a move, deep cleaning your home, or just want to keep things fresh without the hassle, this approach can save you time and frustration.
No More Dust Storms: How to Clean Your Blinds Hassle-Free
Is Spotless Cleaning Without the Dust Cloud a Dream or Reality?
When I first tried to clean blinds, my biggest mistake was using a wet cloth directly. Sure, it seemed straightforward—wipe, and you’d be done. Instead, I ended up with wet dust particles flying everywhere, and my floors looked like a winter wonderland of lint and dirt. It dawned on me then: success lies in the right tools and technique. I’ve since swapped out my old cloth for a microfiber duster, which traps dust without dispersing it into the air. Trust me, starting with the proper tools is key.
If you’re tired of spending hours and still not seeing the sparkle, my tips will turn your cleaning routine around. Ready for the secret? Let’s dive into how you can make this easier than ever.
Feel like you’ve tried everything but nothing sticks? Believe me, I’ve been there—experimenting with sprays, vacuums, and endless cloths. Early on, I even used furniture polish on my blinds, which only made them sticky and attract more dust. That mistake taught me that the best approach is simple, gentle, and using the right technique. Want to learn how I keep my blinds pristine without the headache? Keep reading, and I’ll walk you through exactly what works.
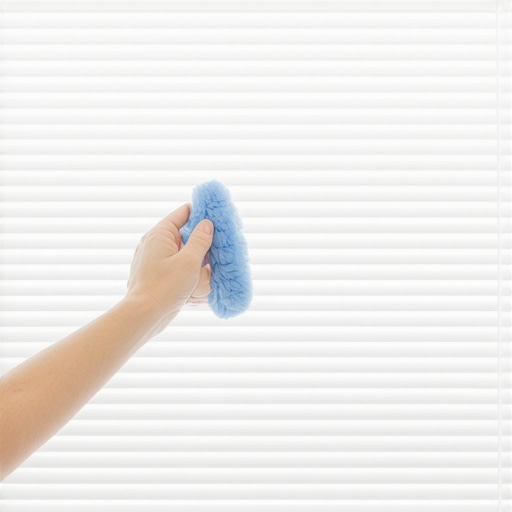
Get the Right Tools for the Job
Start with a microfiber duster, similar to the one I used during my messy first attempt. Unlike regular cloths, microfiber traps dust without dispersing it into the air, which prevents creating a airborne dust storm that lands everywhere. I recommend a extendable duster with soft, microfiber heads to reach all parts of your blinds without needing a step stool. Using the proper tools makes your cleaning faster and less messy. Once equipped, move to the next step.
Prepare Your Workspace and Protect Surfaces
Before cleaning, lay down an old sheet or towels beneath your blinds to catch dust and debris. This is crucial because even with the best tools, some dust will fall. When I cleaned my blinds in the living room, I kept a sheet on the sofa and floor, which simplified cleanup afterward. For hard surfaces, lightly dampen a microfiber cloth to wipe any accumulated dirt or stubborn spots on the blinds’ slats. Avoid over-wetting, which can cause streaks or damage. Now, with the setup ready, it’s time to tackle the dust.
Master the Dust Removal Technique
Gently slide the microfiber duster along the length of each slat, moving in one direction—preferably from top to bottom—like combing through hair. Initially, I thought I could quicken the process with a vigorous swipe, but that only kicked up dust and caused more mess. Instead, using light, steady strokes ensures dust sticks to the microfiber, preventing it from flying off. For blinds with intricate designs or hard-to-reach spots, wrap the microfiber around a sponge or use a small, soft paintbrush for detailed areas. This method minimizes dust dispersal and maintains a clean environment.
Address Stubborn Dirt and Grease
If you notice fingerprints, greasy smudges, or sticky spots, don’t reach for harsh chemicals right away. Instead, dampen a microfiber cloth with a mixture of water and a few drops of mild dish soap. Wipe gently along the slats, following the grain. I tried this on a particularly greasy window blind and was surprised how easily the grime lifted without leaving streaks. Remember, excessive moisture can warp the slats or damage delicate fabrics, so use as little liquid as necessary. For persistent stains, consider specialized upholstery or fabric cleaner, but always test on a small hidden area first.
Dealing with Dust and Dirt Accumulation in Tight Spaces
For the edges or corners where dust tends to settle—a small gap behind the cord or the side of the slats—use a narrow brush or an old toothbrush. I frequently overlooked these spots, resulting in less-than-perfect cleanliness. When I finally focused on these areas, my blinds looked almost new. Move slowly and methodically, ensuring no area is overlooked. With patience, your blinds will stay dust-free longer, reducing the frequency of deep cleanings needed.
Final Touches and Maintenance
After removing surface dust, give the blinds a quick pass with a dry microfiber cloth to remove any remaining particles. For a streak-free shine, lightly buff the slats with a clean, dry cloth. Regular maintenance—like dusting once a week—prevents buildup and makes deep cleanings less time-consuming. When I adopted this routine, I noticed my blinds stayed fresh and free of dust while reducing overall cleaning time. If your blinds are particularly stained or had heavy dust buildup, consider pairing this process with a gentle cleaning spray or sanitizing hack from this resource for optimal results.
Optional: Deep Cleaning for Persistent Dirt
Occasionally, blinds need a more thorough clean—especially if they’re greasy or have accumulated pet fur. Remove the blinds from their mounts if possible and immerse them in a bathtub filled with warm water and a mild cleaning solution. Gently scrub with a soft brush, rinse thoroughly, and hang to dry. This method is particularly effective for venetian blinds and fabric-covered options. Remember, always check manufacturer instructions before removing blinds to avoid damage.
By following these deliberate, step-by-step techniques, you’ll transform a dusty chore into a manageable task, saving yourself hours of frustration and creating a home environment that feels fresh and inviting.
When it comes to upholstery, house cleaning, or move-out preparations, many homeowners believe that basic routines are enough to keep things pristine. However, in my experience as a cleaning expert, there are nuanced misconceptions that can lead to less-than-ideal results or even damage. One common myth is that regular vacuuming alone suffices for deep dirt removal, but experts emphasize the importance of targeted stain treatments and proper technique to prevent permanent staining or fabric deterioration. For instance, using harsh chemical cleaners on delicate fabrics without testing can cause discoloration or fiber damage—something I witnessed firsthand when a client tried an aggressive spray on their velvet sofa, resulting in a dull, flattened surface. To avoid such pitfalls, always test cleaning solutions on hidden areas and choose products suited specifically for your upholstery type. Moreover, many assume that sanitizing is identical to disinfecting; while related, disinfecting requires specific contact times and EPA-approved solutions to effectively eliminate pathogens—a detail often overlooked during quick cleans. Incorporating advanced methods like steam cleaning can be beneficial but also risky if misused, especially on silk or wool, which are sensitive to heat and moisture. For thorough guidance, I recommend consulting professional resources like [effective house cleaning secrets](https://spotlesscarpetz.com/effective-house-cleaning-secrets-from-cleaning-experts) to understand which techniques yield real results without causing harm. An advanced mistake to avoid involves neglecting hidden or hard-to-reach areas during move-out cleaning; dirt lurking behind appliances or in vents can cause inspections to fail or deposits to attract damage over time. For comprehensive strategies, check out [move-out cleaning strategies](https://spotlesscarpetz.com/move-out-cleaning-strategies-to-secure-your-deposit). Have you ever fallen into this trap? Let me know in the comments.Maintaining a clean and fresh home doesn’t end with a single deep clean session; instead, it involves using the right tools that stand the test of time and make ongoing maintenance efficient. Over the years, I’ve refined my arsenal, selecting equipment and techniques that ensure longevity, effectiveness, and ease of use. One such tool I highly recommend is the **microfiber mop with washable pads**. Unlike disposable cloths or sponges, these mops can be washed hundreds of times, reducing waste and saving money, while their textured surface traps dust and dirt more effectively. I personally prefer the **O-Cedar EasyWring Spin Mop**, which features a foot pedal to wring out excess water, preventing over-wetting surfaces and potential damage—especially important for delicate fabrics or wood flooring. Incorporating such tools into your routine not only streamlines your cleaning but ensures your efforts provide lasting results.
How do I maintain my cleaning tools over time?
Proper maintenance extends the life of your equipment. For microfiber pads, rinse thoroughly after each use and wash in hot water with a mild detergent, avoiding fabric softeners that diminish their static charge and dust-trapping ability. This routine keeps them effective for hundreds of cleaning cycles. For vacuum cleaners, regular replacement of filters—preferably HEPA filters—optimizes airflow and prevents the spread of allergens. I prefer models with sealed HEPA systems, such as the **Dyson V11**, because they capture more microscopic particles, which is especially beneficial for households with allergy sufferers or pets. Additionally, keeping your upholstery tools like upholstery brushes or steam cleaners in good condition prevents damage and ensures optimal performance. For instance, cleaning the nozzles of your steam cleaner every few months with a vinegar rinse prevents mineral buildup that can clog jets, as outlined in detailed technical guides like [effective house cleaning secrets](https://spotlesscarpetz.com/effective-house-cleaning-secrets-from-cleaning-experts).
Future of Home Maintenance Tools and Techniques
Looking ahead, smart cleaning devices with app integration are gaining traction. Robots like the **iRobot Roomba** are increasingly sophisticated, capable of mapping and navigating complex spaces, and can be scheduled to operate when you’re away, maintaining floors effortlessly. Similarly, wearable ultraviolet sanitizers are emerging to disinfect high-touch surfaces quickly. Embracing these innovations can revolutionize home care, making it more seamless and less time-consuming. I recommend trying out a high-quality microfiber cleaning system combined with a reliable vacuum cleaner—it’s a proven way to keep your home in top shape with minimal effort, and it significantly extends the lifespan of your furnishings. For detailed insights into optimizing your move-out cleaning or upholstery maintenance, check out [move-out cleaning strategies](https://spotlesscarpetz.com/move-out-cleaning-strategies-to-secure-your-deposit). Don’t wait—evaluate your current tools and upgrade to these durable, performance-driven options today to make your home’s maintenance truly effortless.
Throughout my journey into house cleaning and upholstery maintenance, I realized that the true secret isn’t just about immediate results—it’s about building habits and understanding nuances that make ongoing upkeep effortless. The biggest lesson I learned was the importance of consistency paired with quality tools. For example, investing in a microfiber mop or HEPA-filtered vacuum might seem small, but these choices significantly reduce dust buildup and extend the lifespan of your furnishings. Additionally, I discovered that tackling hidden spots—like behind appliances or inside vents—can dramatically improve overall cleanliness, yet they’re often overlooked. Paying attention to these areas, combined with regular maintenance routines, transforms a daunting task into manageable moments, saving you time and frustration over the long run.