It was a typical Saturday afternoon when I reached for the light switch in my hallway, only to get a mild shock through my fingertips. That sudden jolt wasn’t just a wake-up call— it was a stark reminder of how risky DIY cleaning can be, especially when dealing with electrical fixtures. I realized I’d been so focused on disinfecting surfaces that I overlooked the delicate wiring behind those switches. That moment inspired me to find a safe, effective way to sanitize high-touch light switches without risking a short circuit or damaging the wiring.
Why Properly Sanitizing Light Switches Is More Important Than Ever
High-touch surfaces like light switches are notorious for harboring germs. The CDC estimates that common household objects, including light switches, can carry a volume of bacteria comparable to bathroom surfaces. During prolonged periods at home, especially in times of increased illness transmission, keeping these points sanitized is crucial. Yet, many of us hesitate because we fear damaging the wiring or causing electrical malfunctions, which can lead to costly repairs or safety hazards. That fear isn’t unfounded—incorrect cleaning can cause short circuits or even fires.
Is It Really Possible to Sanitize Light Switches Without a Fire Risk?
Early on, I made the mistake of using wet cloths soaked in disinfectants directly on the switches, forgetting that electricity and excess moisture are a dangerous combination. That quick fix actually increased my risk of short-circuiting or damaging the switch components. The key is to understand the electrical makeup of your switches and use cleaning methods that disinfect without introducing moisture into the wiring or electrical connections. With proper techniques, you can keep your home safe and germ-free—I’ll show you how.
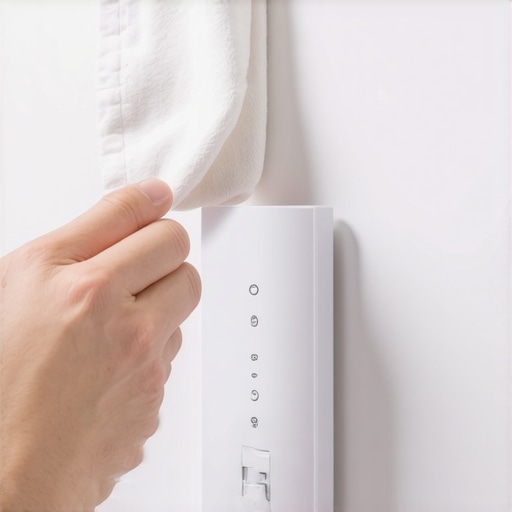
Turn Off Power Before Starting
Before any cleaning begins, flip the circuit breaker controlling your lights to the ‘off’ position. This step is crucial to eliminate the risk of electrical shock while working near wiring. Remember, never attempt to clean switches while the power is still on, as exposure to live current can be dangerous.
Use a Dry Microfiber Cloth for Routine Dusting
Start by gently wiping the switch faceplate with a dry microfiber cloth to remove dust and surface dirt. Microfiber’s fine fibers trap germs and dust effectively without the need for moisture. This simple step reduces contamination and keeps your switches looking new. I recall a time when I tried to skip this step, and dust particles made the subsequent cleaning less effective.
Prepare a Safe Disinfecting Solution
Mix a solution of 70% isopropyl alcohol with water in a spray bottle. This concentration is effective against most germs and dries quickly, minimizing moisture exposure. Avoid using bleach or full-strength disinfectants directly on electrical fixtures, as they can cause damage or corrosion over time.
Applying the Disinfectant Correctly
Lightly spray the solution onto a lint-free cloth—not directly onto the switch—to prevent excess liquid from seeping into electrical components. Wipe the switch face and edges thoroughly, focusing on high-touch areas. Do not saturate the cloth; a damp cloth is sufficient. In a past cleaning session, I used too much spray and ended up seeing moisture seep around the edges, which I later had to dry with a towel—an error best avoided.
Pay Attention to Crevices and Button Edges
Use a cotton swab dipped in the disinfectant to reach into small cracks and around buttons. This ensures thorough sanitation without over-wetting. Think of this as cleaning the nooks and crannies of upholstery; careful attention prevents the buildup of germs in hidden spots.
Allow Components to Dry Completely
After wiping, wait at least 10 minutes for all parts to air dry completely. Good ventilation speeds up this process. Never touch or turn the switch on before it’s fully dry, as residual moisture can cause short circuits or damage.
Reinstall and Restore Power
Once dry, flip the circuit breaker back to ‘on’ and test the switch. You’ll notice it operates smoothly, and you’ve minimized germ spread without risking electrical hazards. Remember, regular maintenance like this keeps your home safer and cleaner, echoing the effectiveness outlined in house cleaning secrets from experts.
When it comes to maintaining a spotless home, many assume they know the basics, but uncovering the nuanced mistakes can make all the difference between a sanitized space and one riddled with hidden dangers. One common myth is that using harsh chemicals like bleach on upholstery or delicate fabrics kills germs effectively. In reality, this approach can damage fibers and leave residues that attract dirt or pose health risks. Instead, professional cleaning experts recommend targeted, gentle solutions backed by research, such as those outlined in effective cleaning secrets from professionals. Another often-overlooked mistake is neglecting the proper drying process; residual moisture after cleaning can foster mold growth, a trap that is easily avoided by ensuring thorough air circulation and appropriate drying times.
Do many think that move-out cleaning simply involves superficial wiping? Think again. The real nuance lies in understanding the importance of deep cleaning overlooked areas like behind appliances, vents, and under furniture, which are crucial for securing your security deposit, as emphasized in move-out cleaning strategies.
What about the misconception that higher-priced cleaning products guarantee better results? Evidence suggests that the effectiveness of cleaning agents depends more on their application and the surfaces treated, not their price tags. Using low-cost, research-backed solutions like 70% isopropyl alcohol for sanitizing, as discussed in sanitizing hacks for house transitions, can be both economical and effective.
Understanding these hidden nuances and avoiding common pitfalls ensures your cleaning efforts are both safe and effective. Are you still falling for some of these traps? Let me know in the comments, and if you need expert assistance to navigate these complexities, don’t hesitate to reach out.
Keep It Running: Essential Tools for Effective House Cleaning
When it comes to maintaining a spotless home, selecting the right tools is as important as the cleaning techniques themselves. I personally swear by high-quality microfiber cloths because they trap dirt and germs effectively while reducing streaks on surfaces like stainless steel appliances. Unlike traditional paper towels, microfibers can be washed and reused countless times, making them an economical and eco-friendly choice that I recommend for delicate tasks such as cleaning glass or polishing surfaces. Additionally, investing in a HEPA-filter vacuum is crucial; it captures fine dust particles and allergens, ensuring better air quality—a benefit I’ve experienced firsthand, especially during allergy season.
How do I maintain these tools over time?
Regularly washing microfiber cloths in hot water and avoiding fabric softeners preserves their electrostatic properties, maintaining their cleaning efficiency. For vacuum filters, following the manufacturer’s cleaning schedule prevents dust buildup that could reduce suction power. I also use specialized brushes, like a ceiling fan duster, to reach high, often-overlooked areas, preventing dust accumulation that can lead to mold or allergies if ignored. Proper storage of cleaning tools in designated, dry places prolongs their lifespan and ensures readiness for your next spring cleaning or routine maintenance.
Incorporating Smart Solutions for Long-Term Results
Smart home devices, such as automated vacuum cleaners with app controls, have revolutionized the way I keep floors spotless. These gadgets allow scheduled cleans without manual effort, especially useful after move-outs or deep cleaning sessions. For sanitizing light switches and remote controls, I rely on UV sanitizers—a recent trend promising chemical-free disinfection—although I still prefer well-tested solutions like 70% isopropyl alcohol in a spray bottle for versatility and rapid drying. As technology advances, I predict a future where AI-powered cleaning robots adapt to your home’s unique layout for more personalized maintenance routines, reducing the need for intensive manual cleaning.
Make Your Maintenance Routine Smarter: Which Tools Will You Try First?
One practical tip I encourage everyone to implement is using a microfiber duster with extendable arms to reach behind appliances or high ceiling corners—areas often neglected but important for preventing dust buildup. Developing a schedule that includes these specialized tools ensures your home remains fresh and healthy over time. If you’d like personalized advice on integrating these tools into your routine, visit this page to connect with my team of experts. Incorporating the right equipment and maintenance practices now will save you time, money, and headaches down the line, especially when preparing for move-out inspections or long-term home care. As I always say, a house well-maintained with the proper tools is a house that stays beautiful and safe for everyone who lives in it.
The Hardest Lesson I Learned About Upholstery and Sanitizing
One of my biggest realizations came when I tried to save time by skipping the proper drying process after cleaning a heavily soiled sofa. Residual moisture not only caused a lingering musty smell but also led to mold growth, which I had to tackle with specialized products. It taught me that rushing through cleaning steps can backfire spectacularly, especially with upholstery that holds onto moisture and dirt alike.
3 Myths About House Cleaning That Held Me Back
I’d believed for years that using the harshest chemicals would guarantee germ-free surfaces. Turns out, professional cleaning experts emphasize targeted, gentle solutions like 70% isopropyl alcohol for sanitizing, which are just as effective without damaging delicate fabrics. Busting this myth opened up safer, more reliable cleaning methods for my home.
What Every Move-Out Cleaner Won’t Tell You About Deep Cleaning
I used to think superficial wiping was enough for move-out cleaning, but experienced cleaners know that detailed attention to hidden spots—like behind appliances and inside vents—secures that full deposit refund. Thinking beyond the obvious makes a real difference when preparing your home for inspection and ensures nothing is overlooked.
How I Discovered the Power of Proper Tool Selection
Switching to microfiber cloths and HEPA-filter vacuums transformed my cleaning routine. Microfibers trap tiny microbes effectively, and high-quality vacuums improve air quality drastically. Investing in these tools paid off over time, making my home healthier and easier to maintain. Regular maintenance of these tools, like washing microfiber cloths properly, keeps them performing at their best.
Turn Your Cleaning Routine Into a Strategy
Incorporating smart devices like scheduled robotic vacuums and UV light sanitizers can streamline and elevate your sanitation efforts. I’ve found that these tools not only save time but also fill gaps in manual cleaning, especially in high-traffic areas like light switches and remote controls. Setting a routine with the right tools ensures your home stays spotless and safe without the constant effort.
Your Turn to Transform Your Space
Applying these insider tips and tools can make a significant difference in your upholstery and move-out cleaning results. Don’t wait for a stain or odor to become a problem—start integrating expert-approved techniques today. If you’re ready to take your cleaning to the next level or need professional support, reach out here for personalized advice. Your fresh, sanitized home awaits!