Ever shoved aside your cozy headboard after noticing that stubborn layer of dust that just won’t vanish, only to realize there’s a whole world of hidden dirt lurking behind it? I used to think that cleaning my bedroom meant just dusting the surface and vacuuming the obvious spots. But one weekend, during a deep clean, I experienced a lightbulb moment: behind my headboard, a dark, dusty mess was waiting to be discovered. It was a wake-up call that changed my entire approach to cleaning.
Today, we’ll delve into the mysterious realm of dust traps behind your headboard—those sneaky spots that harbor dust, allergens, and grime, impacting your home’s air quality and your health. By the end of this guide, you’ll know exactly how to identify and clean these often-overlooked areas, turning your bedroom into a truly fresh sanctuary.
Why Hidden Dust Spots Are a Big Deal
Those concealed dust traps aren’t just unsightly—they can significantly affect your health. Dust buildup can aggravate allergies, asthma, and even lead to respiratory problems over time. According to the EPA, indoor air can be up to five times more polluted than outdoor air, partly due to accumulated dust and allergens in neglected spots like behind furniture and headboards. Regular surface cleaning won’t tackle these hidden offenders, which is why knowing their whereabouts and how to clean them is crucial. Have you ever wondered why, despite weekly cleaning, your bedroom still feels dusty or stuffy? I used to face this mystery myself until I tackled behind the headboard. It’s amazing how much dust can accumulate in those hidden corners!
Is Cleaning Behind Your Headboard Really Worth the Effort?
Early in my cleaning journey, I made the mistake of dismissing these hard-to-reach spots as insignificant. It wasn’t until I started experiencing allergy flare-ups that I realized neglecting behind the headboard could be making things worse. Professional cleaning experts emphasize that dust and allergens love these hidden areas, and tackling them can improve air quality and sleep quality significantly. If you’re skeptical, consider that even minimal dust accumulation can impact your health over time—so yes, cleaning behind your headboard is absolutely worth it. Are you ready to face that dusty guilty secret and reclaim your space? Let’s get started.
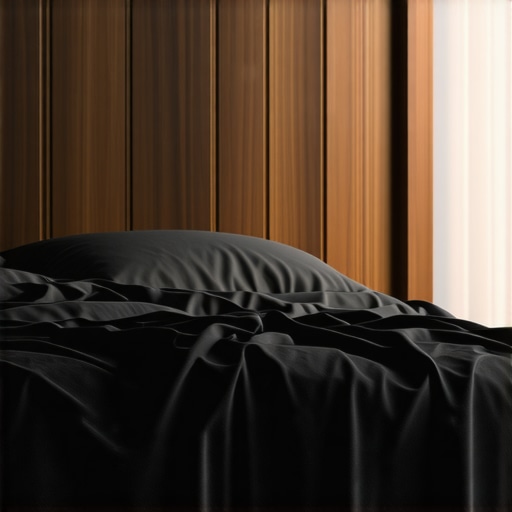
Remove the Headboard for Full Access
Start by carefully detaching your headboard from the wall or bed frame. Use a screwdriver if necessary, and place any screws or bolts in a safe spot. This step is crucial, as it grants you unobstructed access to the dust-collecting areas behind it. I once ignored this step, trying to clean around it, which only spread dust onto my bedding. When I finally removed the headboard, I was surprised at the thick layer of dust and allergens hiding there, making a noticeable difference after cleaning.
Vacuum the Dust and Debris Thoroughly
Use a vacuum cleaner with a hose attachment to carefully suck up loose dust, pet hair, and debris from behind the headboard and surrounding area. Pay special attention to corners and crevices where dust tends to settle. This initial vacuuming reduces airborne allergens and makes the subsequent cleaning steps more effective. I once used the upholstery attachment on my vacuum, which was perfect for reaching tight spots, and the difference was immediate—air felt cleaner in the room.
Scrub Surfaces with a Gentle Cleaner
Mix a mild cleaning solution—like warm water with a few drops of dish soap—and dampen a microfiber cloth. Wipe down all exposed surfaces, including the wall behind the headboard, the back of the headboard itself, and any nearby furniture. For stubborn grime or greasy spots, use a dedicated upholstery or furniture cleaner. Remember, avoid harsh chemicals that could damage your headboard’s finish. I tried using a vinegar solution initially, but it was too strong; switching to a gentle soap finally got rid of the old, stubborn stains without harming the material.
Address Upholstery and Fabric Components
If your headboard is upholstered, focus on deep cleaning the fabric. Use a fabric-safe upholstery cleaner or a mixture of mild detergent and water. Test in a small hidden area first to prevent discoloration. For non-porous upholstered headboards, a steam cleaner can be highly effective—just ensure it’s suitable for fabric. I remembered to check the manufacturer’s label: a quick online search confirmed my steam cleaner was safe, and after a thorough steam clean, my headboard looked revitalized and smelled fresh.
Sanitize and Deodorize to Finish
Spray a fabric-safe sanitizer or a mixture of water and a few drops of essential oil to eliminate bacteria and odors. Let it dry completely before reattaching the headboard. Consider using https://spotlesscarpetz.com/sanitizing-hacks-for-safe-house-transitions for more ideas on safe sanitizing techniques. I always add a few drops of lavender oil for a calming scent. After drying, reattach the headboard securely, and you’ll have a cleaner, healthier sleeping environment.
Prevent Future Dust Buildup
Implement regular maintenance by vacuuming behind the headboard monthly and dusting surfaces weekly. Rearrange furniture occasionally to prevent dust accumulation in hidden spots. Adding a washable cover to upholstered headboards makes routine cleaning easier, and a simple way to keep your space fresh longer. When I established this routine, I noticed significantly less dust and allergy symptoms, making my bedroom a true sanctuary.
Many homeowners assume that spot cleaning or quick wipe-downs are enough to keep their upholstery and home environment healthy. However, this belief often leads to overlooking the nuanced complexities of deep cleaning and sanitizing. One pervasive myth is that vacuuming alone can eliminate all allergens from furniture. While regular vacuuming with a HEPA filter is crucial, it doesn’t fully eradicate embedded dust mites and bacteria hidden deep within upholstery fibers. According to cleaning experts, combining vacuuming with periodic steam cleaning or professional upholstery treatment provides a more comprehensive approach to health and longevity of furniture. Another misconception is that all cleaning products are equally effective; in reality, using harsh chemicals can damage fabrics and pose health risks. Experts recommend specific, fabric-safe cleaners—sometimes even natural solutions—to maintain both appearance and safety.
A common mistake many make during move-out cleaning involves neglecting hidden or hard-to-reach areas, which can lead to losing deposit refunds or failing move-out inspections. For instance, overlooked spots like under appliances, behind radiators, or within cabinetry can harbor grime accumulate over time. To avoid this, detailed checklists and professional strategies, such as those outlined on [move-out cleaning guides](https://spotlesscarpetz.com/move-out-cleaning-strategies-to-secure-your-deposit), can make a significant difference.
When it comes to sanitizing household surfaces, many underestimate the importance of proper contact time and appropriate disinfectants. The misconception that spraying disinfectant quickly and wiping immediately is enough can leave germs behind. Scientific studies highlight that effective sanitization requires disinfectants to remain wet on surfaces for a specified period—often 4-10 minutes—to kill pathogens effectively, as discussed in [effective house cleaning secrets](https://spotlesscarpetz.com/effective-house-cleaning-secrets-from-cleaning-experts).
For advanced cleaning, especially during health crises, understanding the limitations of DIY methods and knowing when to seek professional help becomes crucial. For example, high-level sanitation of upholstery or carpets with bacteria and mold issues benefits from certified deep cleaning, which often involves steam or specialized equipment. This ensures the removal not just of visible dirt but also microscopic contaminants that can cause health issues.
Don’t fall prey to these common pitfalls. Recognizing that superficial cleaning isn’t enough—especially for hygiene-critical areas—can save you money, time, and health risks in the long run. Have you ever fallen into this trap? Let me know in the comments.
Keeping Your Cleaning Equipment in Top Shape
Investing in quality tools is the foundation of effective home maintenance. I personally swear by my high-efficiency HEPA vacuum, which not only removes dust more thoroughly but also prevents the recirculation of allergens. Regularly replacing filters—at least every six months—is crucial to keep it performing at its best. Remember, a vacuum that smells like dust upon startup, as discussed in this guide, indicates a filter in need of change.
Leveraging Technology for Better Results
Smart home devices can revolutionize your cleaning routine. I recommend using Wi-Fi-enabled air purifiers in bedrooms and living rooms, which can be monitored and adjusted remotely. Also, scheduling your robot vacuum to run when you’re away ensures consistent maintenance without hassle. Apps provided by reputable brands offer insights into filter status and maintenance reminders, extending the lifespan of your devices and ensuring peak performance. These tools help maintain a healthier environment and minimize long-term cleaning efforts.
Mastering Deep Cleaning for Long-Term Benefits
Focus on periodic deep cleans, especially of upholstery and carpets. I regularly use steam cleaners certified for fabric, which effectively eliminate bacteria, dust mites, and allergens—key to maintaining a fresh, healthy home environment. When selecting a steam cleaner, look for models that generate at least 90°C (194°F) steam and have attachments suitable for your furniture, as advised by experts in upholstery cleaning tips. These tools don’t just clean surface dirt; they reach deep into fibers for superior sanitation.
How do I keep my home tools functioning well over time?
Regular maintenance is key. For example, cleaning your vacuum filters after every use and checking hoses for blockages prevents loss of suction. For steam cleaners, descaling with a vinegar solution every few months ensures effective cleaning without residue buildup. Always read the manufacturer’s instructions—many recommend specific cleaning routines, and neglecting them can reduce your equipment’s lifespan. Additionally, storing tools properly—dry and away from direct sunlight—prevents damage. Over time, these practices save money and ensure your tools are always ready to deal with whatever mess pops up.
Envisioning the Future of Home Cleaning
Looking ahead, I believe we’ll see even smarter cleaning devices that adapt to our lifestyles, with AI-powered sensors that detect dirt levels and automatically optimize cleaning routines. Integration with home health monitoring systems may soon allow real-time alerts if certain allergens or bacteria levels spike. Staying informed about advancements like these will allow you to keep your home in optimal condition with less effort, ensuring long-term comfort and hygiene.
For those eager to jump into advanced cleaning techniques, trying out a steam cleaning session with a certified model can make a noticeable difference. Not only does it improve sanitation, but it also extends the lifespan of your furniture and carpet fibers. Ready to elevate your home maintenance? Start by scheduling a deep steam clean this month and see the results firsthand.
Lessons the Dust Didn’t Want Me to Learn
- I used to believe that quick surface dusting was enough, but the moment I removed my headboard, I realized how much additional grime I had been missing. That insight pushed me to deep clean more strategically, leading to a healthier bedroom environment.
- I discovered that neglecting behind the headboard not only worsens allergies but also impacts sleep quality. This lightbulb moment taught me that hidden dust can secretly sabotage your well-being.
- It took me several attempts to perfect my cleaning routine, realizing that each layer of grime has a story—trust me, the buildup behind your headboard is more than just dust; it’s a testament to long-term neglect.
My Secret Weapon for Dust-Free Living
Over time, I’ve come to trust tools that make this task less daunting. My go-to is a high-quality microfiber duster paired with a flexible, long-reach cleaning tool, which allows me to access those tricky spots without unnecessary hassle. Using a HEPA-filter vacuum ensures I trap dust effectively instead of recirculating it into the air. For detailed cleaning of upholstery, I rely on recommended products from upholstery cleaning tips. These tools and resources have become my allies in maintaining a truly spotless and healthy home environment, and I encourage you to explore similar options for your own space.