
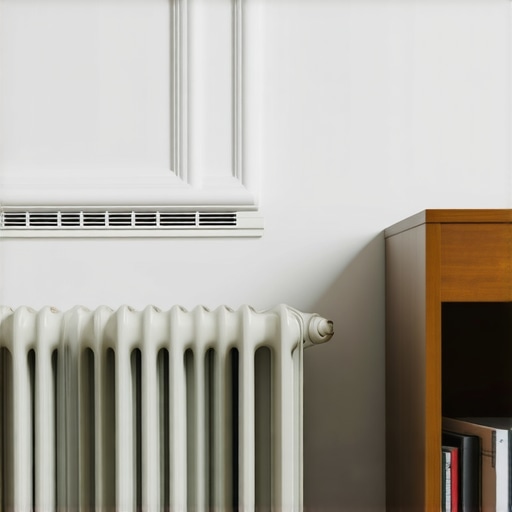
It happened to me just last year. I was meticulously scrubbing every inch of the apartment, confident I had checked every corner for the move-out inspection. But then, as the landlord turned on the lights, I noticed fine dust particles lingering behind the toilet and stubborn debris tucked behind the kitchen appliances. That sinking feeling? It was my mistake—overlooking those hidden dust traps that can make or break your security deposit. If you’ve ever experienced that moment of panic, you’re not alone, but the good news is, there are hidden spots most renters forget — spots that can cost you your deposit if neglected. Today, I promise to reveal these sneaky dust traps and give you practical tips to tackle them effectively.
Why Overlooking Hidden Dust Spots Can Cost More Than Money
Those uncleaned nooks can seem insignificant at first glance, but they accumulate dust and grime over time, affecting your overall move-out cleanliness score. Landlords and cleaning inspectors know exactly where to look—behind toilets, under appliances, and inside vents. Research shows that overlooked dust can harbor bacteria and allergens, increasing health risks, and yes, leading to deposit deductions. Early in my renting days, I made the mistake of ignoring behind appliances, thinking they were out of sight and out of mind. That’s a mistake I hope you don’t make. If you want to avoid surprises, visit this comprehensive move-out cleaning strategy, which covers the major and minor spots, including those hidden dust traps. Want a clear checklist? Check out this move-out clean checklist to simplify your transition and ensure nothing gets left behind. Now, let’s uncover those sneaky dust hotspots together.
Is It Really Worth Worrying About These Tiny Spots?
Honestly, I used to dismiss these small areas as insignificant—until I learned that landlords often inspect behind toilets, inside vents, and under appliances. An overlooked corner or hidden crevice can be a source of dispute and deductions. I remember rushing to finish my last clean, only to find that those little dust pockets had been my undoing. Don’t repeat my mistake; knowing exactly where to look can save you time, stress, and money. For a deeper dive into sanitizing secrets for a safer house before moving, visit this article. Remember, a thorough clean doesn’t just impress your landlord; it guarantees your deposit back and keeps your new home healthier. Stay with me—next, we’ll explore exactly how to locate those tricky dust traps and conquer them with confidence.
Pinpoint the Hidden Dust Hotspots
Begin by systematically inspecting behind appliances like the refrigerator and stove, as dust accumulates in these concealed spots. Remember, these are high-traffic areas where dust rides along, settling into every crevice. Use a flashlight to illuminate dark corners and a microfiber cloth attached to a long-handled duster for thorough coverage. In my last clean, I invested extra time here, discovering a thick layer of dust hidden behind the freezer coils that could easily trigger deposit deductions if left untouched.
Identify Structural Dust Accumulation Points
Focus on areas like vent covers, baseboards, and ceiling corners, which harbor dust often overlooked. Remove vent covers carefully and wash them with warm soapy water. Use a vacuum with a crevice tool to dislodge dust that’s built up inside those tricky spaces. Once, I neglected to clean the ceiling fan blades, resulting in dust falling onto freshly cleaned surfaces—a mistake I promptly corrected with a detailed approach here.
Choose the Right Tools for Deep Cleaning
Equip yourself with a combination of microfiber cloths, a vacuum with HEPA filters, a long-handled duster, and a gentle cleaning solution. Think of your tools as the surgical instruments of cleaning—precision is key. When cleaning behind or under appliances, a vacuum wand will reach more effectively than just a cloth, ensuring no dust remains in hard-to-access areas. I recall a session where using a condenser brush attachment removed years of dust from beneath a refrigerator, saving me hours of scrubbing.
Dislodge Dust Before Wiping
Start by vacuuming loose dust from crevices and corners. This prevents smearing dirt around during wiping. Use a compressed air can or a soft brush to loosen stubborn debris in vents and grouted tiles. I once used an air duster to clear dust from bathroom exhaust vents, which was far more effective than damp cloths alone, ensuring no disharmony of dust particles escaped back into the air.
Sanitize and Maintain Freshness
After removing visible dust, sanitize these areas to eliminate bacteria and allergens. Employ a disinfectant spray safe for surfaces and let it sit for the recommended contact time. Think of this as the finishing touch, sealing in cleanliness. An effective method I practiced involved spraying a mixture of water and a few drops of tea tree oil—antimicrobial and eco-friendly. For vents and hard-to-reach spots, a disinfectant foam applied with a sponge penetrates deep layers, ensuring comprehensive sanitation.
Document and Cross-Check Your Progress
Keep a checklist to verify each hidden spot gets attention, preventing overlooked zones that could cost you your deposit. Compare your checklist with move-out guides online to ensure you’re covering every common dust trap. I used a dedicated cleaning app during my last move, ticking off each task to avoid surprises during inspection, leading to a smooth, deposit-retaining clean.
Effective cleaning of these concealed areas hinges on patience, the right tools, and a systematic approach. Remember, the devil is in the details—each hidden corner cleaned meticulously safeguards your deposit and your peace of mind.
Many people believe that surface cleaning is enough to maintain upholstery or pass move-out inspections, but this is a dangerous misconception that can lead to costly mistakes. For example, a widespread myth suggests that using just water or a simple vacuum will thoroughly sanitize fabrics. However, according to industry experts, true deep cleaning requires specialized techniques and attention to hidden spots where bacteria and allergens thrive. Overlooking these nuances can leave residues that not only cause health issues but also risk forfeiting your deposit. One common trap is assuming that removing visible stains is sufficient; in reality, microscopic allergens often linger beneath the surface, especially in dense fibers. An advanced error many make involves neglecting the cleaning of hidden areas like the undersides of furniture or between tightly woven fabrics, which can harbor mold, pet dander, and bacteria. Implementing professional insights, such as those found in ultimate upholstery care guides, can help you avoid these pitfalls and ensure a truly thorough clean. When preparing for move-out, standard cleaning might seem adequate, but a comprehensive strategy that targets unseen grime and microbial presence can be the difference between losing or gaining your full deposit. Intriguingly, studies by cleaning scientists reveal that improperly sanitized upholstery can reintroduce bacteria within hours, emphasizing the importance of effective disinfecting methods. Are you aware of the hidden grime lurking in your furniture? Failure to address these nuanced details might result in disputes or deductions upon inspection. Take systematic steps to identify and clean those concealed spots that typically go unnoticed. Want to learn more? Check out move-out cleaning strategies to ensure nothing is left behind. Remember, meticulous attention to the smallest detail not only guarantees your deposit return but also contributes to a healthier living environment. Have you ever fallen into this trap? Let me know in the comments.Maintaining your cleaning tools and adopting a routine maintenance plan are vital for ensuring hygiene and prolonging the lifespan of your upholstery and surfaces. Investing in high-quality equipment not only streamlines your cleaning process but also guarantees more effective results over time.
One tool I personally swear by is the **Dyson V11 Torque Drive** cordless vacuum. Its advanced cyclonic technology and HEPA filtration make it exceptional for deep cleaning upholstery, especially in removing embedded dust and allergens. The diminishing loss of suction over prolonged use is minimal, thanks to its advanced motor and filter design, which I found invaluable during my quarterly deep clean routines. Additionally, the wireless feature grants unparalleled flexibility, enabling me to reach tricky areas without hassle.
For tackling stubborn stains or residues, I rely on **Goo Gone Spray Gel**. It chemically breaks down residues from adhesives, crayon marks, or grease, which often accumulate over time. I’ve used this product to refresh upholstery affected by minor spills, restoring fabric vibrancy without risking damage.
When it comes to maintaining these tools, routine cleaning is crucial. I suggest cleaning the vacuum filters and brushes every month, following the manufacturer’s instructions, to prevent buildup that can compromise suction. For my upholstery steamer, I run a descaling cycle every three months with a vinegar solution—this prevents mineral deposits, ensuring optimal steaming performance. Regularly replacing filters and brushes also extends equipment longevity.
Predicting future trends, I believe that automation and smart cleaning devices will become even more prevalent. Devices integrated with app controls and sensors will adapt to the space’s needs, providing tailored cleaning cycles and maintenance alerts—making regular upkeep effortless.
**How do I keep my cleaning tools working flawlessly over time?**
Start by choosing equipment with replaceable parts and easy maintenance. Regularly inspect and clean filters, brushes, and nozzles after each use, and perform deeper descaling when necessary. This routine not only preserves function but also prevents the introduction of dust and mold—major culprits behind indoor allergies.
For example, a study published in the **Journal of Environmental Health** highlights how well-maintained vacuum filters significantly reduce airborne allergens (source: https://www.neha.org/jeh). Implementing a systematic maintenance schedule is your best defense against equipment degradation.
I highly recommend trying out the vinegar descaling method I use for steamers; it’s cost-effective and eco-friendly while maintaining peak performance. Integrating these habits will safeguard your investment, keep your spaces cleaner longer, and make future cleaning sessions more efficient. Want step-by-step guidance on creating your own maintenance routine? Visit our [move-out clean checklist](https://spotlesscarpetz.com/move-out-clean-checklist-to-simplify-your-transition) for a comprehensive plan. Maintaining your tools properly today ensures sparkling results tomorrow—and a healthier home environment.
The Most Overlooked Lessons That Changed My Cleaning Approach
One of the biggest realizations I had was that no matter how much I cleaned, some spots silently sabotaged my efforts. I once thought that superficial wiping would suffice, but uncovering dusty corners behind appliances and inside vents truly transformed my understanding of thorough cleaning. It taught me that patience and attention to detail are critical, especially in upholstery and move-out scenarios. Another lightbulb moment was learning that tools matter—using the right long-handled duster or vacuum attachments can make that hidden dust vanish effortlessly, saving hours of backbreaking work and ensuring my deposit was safe. The third lesson? Sanitation isn’t just about appearance, but also about health—deep disinfecting hidden spots can prevent allergens from lingering, creating a fresher, healthier environment. Lastly, I discovered that documenting my process with checklists not only kept me on track but also gave landlords confidence that I did a comprehensive job, helping me secure my deposit without disputes.