
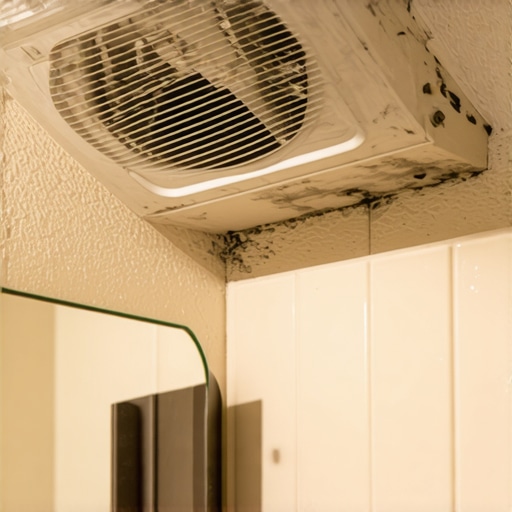
Ever had a moment where you walk into your bathroom, turn on the fan, and suddenly realize a fine layer of dust has settled on the blades? It’s one of those sneaky annoyances that seem harmless at first but can impact your home’s air quality and even the longevity of your ventilation system. I remember the first time I noticed the dust buildup—it was during a routine cleaning, and thinking I’d just give the fan a quick wipe. Big mistake. The dust was so thick I almost added it to my list of household disasters.
Why Dust Accumulates So Fast on Your Bathroom Fan
Bathroom fans are designed to vent moisture and odors effectively, but they often become dust magnets. This is because they draw air from the room, pulling in tiny particles, pet dander, and, unfortunately, dust. Over time, these particles settle on the blades and housing. In fact, a study from the National Air Duct Cleaners Association reveals that indoor air can be two to five times more polluted than outdoor air, partly because of dust and debris circling inside our homes (source: [Effective House Cleaning Secrets from Cleaning Experts](https://spotlesscarpetz.com/effective-house-cleaning-secrets-from-cleaning-experts)).
Many homeowners don’t realize that neglecting this dust buildup can lead to less efficient ventilation. The fan has to work harder to push air through a layer of grime, which not only consumes more energy but also increases wear and tear—potentially turning your once-quiet fan into a noisy nuisance.
But here’s the truth: the dusty build-up isn’t just surface-deep. It can harbor mold spores, bacteria, and allergens that compromise your indoor air quality. I made the mistake early on of just cleaning the visible dust, skipping the internal components. That’s like wiping the surface of a dirty mirror without tackling the smudges behind it. Want to get your bathroom fan truly clean and ensure it works efficiently? Keep reading, because I’ll walk you through the exact steps I use to keep my ventilation system dust-free and functioning at its best.
Have you experienced this kind of dust buildup? If so, you’re not alone, and the good news is that a little preventative maintenance can go a long way. Let’s dive into how to properly clean your bathroom fan and maintain a healthier, fresher home environment.
Gather Your Tools and Prepare for Action
Start by turning off the power supply to your bathroom fan at the circuit breaker to ensure safety. Collect essential cleaning supplies: a sturdy step ladder, a screwdriver, microfiber cloths, vacuum with brush attachment, stiff bristle brush, mild detergent, and a disinfectant spray. Having all tools ready streamlines the process and prevents multiple trips to the toolbox.
Remove the Fan Cover Carefully
Use the screwdriver to unscrew the cover or grille. Remember, some covers are clipped in; gently pry them off with a flat-head screwdriver or a plastic pry tool to avoid damage. As I did during my last cleaning, this step sometimes reveals stubborn dust clumps that stick to filters or grilles. Lower the cover gently to prevent dust from dispersing into the air.
Note:
Take a photo before removal to recall how components fit back together. Keep screws in a small container to avoid losing them.
Clean the Fan Blades and Housing
Use the vacuum’s brush attachment to remove loose dust from the blades and housing. This step minimizes airborne debris. Then, dip a microfiber cloth in a mix of warm water and mild detergent, wring it out thoroughly, and wipe down all accessible surfaces. Be meticulous, especially around the blades and motor housing, to prevent buildup that hampers performance.
Tip: A stiff brush can dislodge stuck dust on blades—think of it as brushing away stubborn pet fur from upholstery. For deeper grime, dampen a cloth with a solution of equal parts water and vinegar, which acts as a natural disinfectant. Let the vinegar solution sit for five minutes before wiping clean to cut through grease and grime.
Sanitize and Deodorize Internal Components
Spray a disinfectant on the cleaned surfaces, focusing on areas prone to mold and bacteria—these are common in humid bathroom environments. If you spot mold, treat it promptly with a mixture of baking soda and water or a specialized mold remover, following the product instructions carefully.
This is a good time to check for any signs of damage or wear on the motor or wiring. If you notice issues, consult a professional to prevent future malfunctions and ensure safety.
Reassemble and Test the Fan
Once all parts are dry and thoroughly cleaned, reattach the cover, ensuring it snaps or screws back into place securely. Restore power at the circuit breaker and turn on the fan to verify proper operation. You should notice quieter, smoother airflow, indicating a successful cleaning.
Perform this maintenance every 6 to 12 months to prevent excessive dust buildup. Regular upkeep prolongs the lifespan of your fan and maintains optimal indoor air quality.
Additional Tips for Long-Term Dust Control
Install a fine mesh screen or filter over the fan grille to trap incoming dust particles before they settle on blades. Regularly vacuum and wipe down the grille, and consider using [effective sanitizing methods](https://spotlesscarpetz.com/effective-sanitizing-methods-for-a-germ-free-home) to keep the entire bathroom environment clean and dust-free.
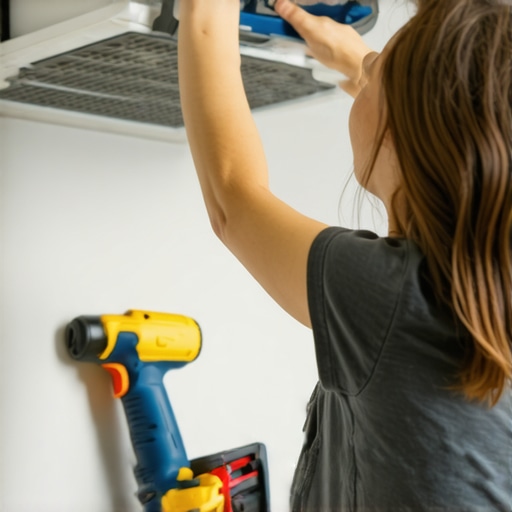 Many homeowners believe that simply wiping surfaces with a disinfectant or quick vacuuming suffices for thorough cleaning, but this overlook some critical nuances. For instance, a prevalent myth is that store-bought disinfectants alone can eliminate all germs, yet studies show that certain bacteria and viruses can survive on surfaces even after treatment if not applied correctly or left to dwell long enough (source: [Effective Sanitizing Secrets for 2025](https://spotlesscarpetz.com/sanitizing-secrets-for-a-safer-house-in-2025)).
Another misconception concerns upholstery care: many assume that using bleach or harsh chemicals on fabric furniture is safe or effective. In reality, these substances can degrade fibers or cause discoloration over time. Instead, professional-grade upholstery cleaning solutions, combined with proper tools like steam cleaners, preserve fabric integrity and ensure hygiene. Regularly neglecting this can lead to a buildup of allergens and bacteria, silently affecting your family’s health.
When moving out, countless people rush to wipe down appliances and surfaces but forget about hidden spots, such as behind or beneath appliances, or inside ventilation ducts. This oversight can result in deposits that foster mold or attract pests. Proper long-term cleaning involves detailed strategies, like using specialized tools or techniques, to address these concealed areas effectively. For in-depth insights, I recommend reviewing move-out cleaning hacks that prevent costly deposit deductions.
Now, let’s address a common mistake in general house cleaning—overusing disinfectant sprays. Excessive application can harm your indoor air quality by introducing chemical residues, especially if not ventilated properly. Instead, focus on cleaning to remove dirt and grime first, then disinfect high-touch surfaces, following guidelines from cleaning experts. This approach ensures a safer environment without the risks associated with chemical overexposure.
Have you ever fallen into this trap? Let me know in the comments. Remember, mastering the nuances of proper sanitizing and cleaning isn’t just about what product you use but understanding how, where, and why to apply it effectively. For advanced tips on maintaining a truly hygienic home, check out sanitizing hacks for safe house transitions.Maintaining your home’s cleanliness and functionality over time requires more than just occasional cleaning sessions. Investing in the right tools and adopting effective methods can save you both time and money while ensuring your home remains a healthy, inviting space. One of my favorite investments is a high-quality, cordless, handheld vacuum like the Dyson V7 Absolute, which I use daily to quickly remove dust from tricky spots like behind appliances or on ceiling fans. Its cordless design offers portability and ease of use, making regular maintenance simpler and more consistent. Additionally, a microfiber duster with an extendable handle allows me to reach high or awkward areas without the need for ladders, reducing the risk of falls and ensuring thorough dust removal. When it comes to delicate upholstery, I rely on a steam cleaner like the Bissell SteamShot, which effectively sanitizes fabrics without harsh chemicals, preserving the integrity of the materials. For deeper cleans, especially before move-out or long-term storage, a professional-grade carpet cleaner such as the Mohawk Floor Care Maxima series provides the deep extraction needed to eliminate stubborn stains and allergens. Incorporating these tools into your routine not only extends the lifespan of your furnishings and fixtures but also maintains optimal indoor air quality. Looking ahead, I predict that smart cleaning devices, such as robotic vacuums integrated with home automation systems, will become more sophisticated, allowing for scheduled and more efficient maintenance routines. These advancements will enable homeowners to keep their homes pristine with less hands-on effort, making home upkeep more effortless than ever.
How do I maintain my cleaning tools over time?
Regular maintenance of your cleaning equipment is essential for sustained effectiveness. For vacuum cleaners, empty the bin after each use, replace filters as recommended by the manufacturer (usually every 3 to 6 months), and check brush rolls for tangled hair or debris. Steam cleaners should be descaled periodically—using a mixture of white vinegar and water helps prevent mineral buildup. Keep all tools dry and store them in a cool, covered area to avoid damage. Think of your tools as investments; just like your home, they require attention to perform their best long-term. To see detailed maintenance routines tailored for each device, visit our comprehensive guide on effective sanitizing methods for a germ-free home. Remember, consistent upkeep not only preserves tool efficiency but also reduces the need for costly replacements. Incorporate monthly checks into your cleaning schedule, and you’ll notice your equipment functioning optimally for years. For a professional touch or more advanced maintenance tips, don’t hesitate to contact us through our contact page. Maintaining your tools isn’t just about preservation; it’s about ensuring your entire home stays spotless and safe in the long run. So, try scheduling a quick monthly tune-up for your cleaning devices—you’ll thank yourself with each spotless room!Every time I thought I knew everything about cleaning, a mistake or surprise taught me a new lesson that improved my approach. Learning not just the how, but the why behind each step changed my perspective on maintaining a fresh home environment. These insights became my secret weapon for long-term results.
- Less is more with disinfectants: I used to believe more chemical meant cleaner, but I found that overusing disinfectants can leave residues that affect indoor air quality. Proper cleaning with minimal products actually yields better health and better floorings.
- Deep cleaning is an investment, not a chore: Focusing solely on surface dirt led me to neglect hidden dust and mold behind appliances or inside vents. Deep, detailed cleaning saved me from costly repairs and health issues.
- Understanding machine maintenance boosts longevity: Regularly servicing my vacuum and steam cleaner kept them working efficiently, which saved me money and time in the long run. It’s a reminder that tools are investments worth caring for.
- Every surface has a story: Recognizing the importance of different fabrics and materials altered how I cleaned, opting for gentle yet effective methods for upholstery or textured walls, say, instead of harsh scrubbing or chemicals.