
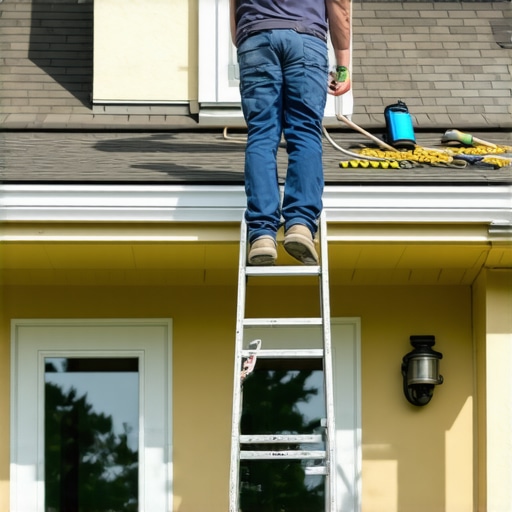
Have you ever stood in front of your dryer, hearing that frantic clunking noise, only to realize it’s struggling to push out hot, humid air? That sinking feeling of knowing your appliance isn’t running efficiently, but you can’t quite pinpoint why. I remember cracking open my dryer vent cover after a particularly sluggish laundry day, only to find a tangled mess of lint and debris blocking the exit. That lightbulb moment made me realize: I had been neglecting a crucial part of my home maintenance—cleaning the outside of my dryer vent.
Why the Outside of Your Dryer Vent Deserves Attention
When it comes to dryer maintenance, most folks focus on lint traps and internal cleaning. But the outside of the vent plays a vital role in the overall efficiency and safety of your laundry setup. A clogged or dirty exterior vent not only causes longer drying times but also increases the risk of lint buildup, which is a common fire hazard. According to the U.S. Fire Administration, failure to clean dryer vents is a leading cause of house fires, accounting for nearly 3,000 incidents annually.
The biggest mistake I made early on was thinking that a quick exterior wipe or brush-through was enough. However, dirt, dust, leaves, and even small pests can lodge themselves deeply within the vent cover and pipe, creating a sluggish airflow. By neglecting this, I was essentially suffocating my dryer from the outside, leading to higher energy bills and potential safety risks.
If you’ve ever noticed your laundry taking twice as long or your dryer overheating, it could be time to give the outside vent a thorough cleaning. Keeping this part of your home pristine ensures your appliance operates smoothly and minimizes fire hazards.
Ready to learn how to effectively clean your dryer vent from the outside? Let’s dive into the simple steps that can save you time, money, and peace of mind.
Is Outside Vent Cleaning Really Worth the Effort?
Initially, I doubted whether a quick clean of the exterior vent would make a noticeable difference. I used to think that my internal lint trap was enough, and the outside could wait. But skipping this step was a costly mistake, one that I learned the hard way. Properly cleaning the outside vent is an essential part of home safety and efficiency. Want to see the difference for yourself? Check out the effective methods I’ve used and trusted over the years, which you can find on [this detailed guide](https://spotlesscarpetz.com/sanitizing-hacks-for-safe-house-transitions).
Gather Your Tools and Prepare
Start by collecting a sturdy ladder, a screwdriver, a cleaning brush with firm bristles, and a garden hose with a spray nozzle. Ensure the dryer is unplugged for safety. Climb the ladder carefully, positioning yourself comfortably to access the vent cover. Removing the cover reveals the buildup of lint, dust, and debris that restrict airflow. I remember once balancing on my stepladder, face close to the vent, scraping away a nest of leaves and lint that had accumulated over months. It was messy but eye-opening, providing immediate results in dryer performance.
Detach the Exterior Vent Cover
Use your screwdriver to remove the vent cover from the wall or the mounting bracket. Keep a container handy to catch any loose debris. Examine the cover for clogs and damage—if it’s cracked, replace it to restore proper airflow. Clear away any remaining obstructions by hand or with the brush. I once found a small spider web lodged deep inside, which I carefully dislodged using the brush, improving airflow significantly. If the cover is rusty or broken, consider replacing it through a hardware store—this step can prevent future blockages and pests.
Clean the Duct and Pipe Internally
Insert the brush into the duct, twisting it to loosen lint and debris lodged along the pipe walls. For ducts longer than a few feet, connect your brush extension or use a flexible rod. Carefully pull out accumulated lint and wipe the inside with a damp cloth. For deep cleaning, connect a garden hose to the outside of the pipe and flush with water, ensuring you spray from the inside out if possible. Be cautious to prevent water from entering the dryer. I once used this method and watched a torrent of dust and leaves spill out, noticeably improving drying times afterward and reducing fire risk.
Flush the Vent with Water and Reassemble
After removing debris, spray water into the duct to wash away residual lint. Use your brush to agitate stubborn spots, ensuring the pipe is clear. Let everything dry thoroughly before reassembling. Check the vent cover for functionality, replacing any that are damaged. Secure everything back in place and restore power. A clean vent outside allows air to flow freely, substantially cutting down drying times and lowering energy bills. For complete safety, schedule this maintenance biannually, especially if you notice longer drying cycles or overheating.
Double-Check and Maintain
Once reassembled, turn on your dryer and observe the airflow from the outside vent. It should be vigorous and steady. Keep the exterior vent free of leaves, snow, or nests to maintain peak performance. Regularly inspecting the outside vent prevents lint buildup and reduces fire hazards. During my last clean, I noticed a small twig lodged in the grille, which I promptly removed. This proactive step pays off by ensuring safe and efficient operation for years to come. If you’re uncertain about DIY cleaning or notice persistent issues, contact professionals through this contact page. Proper maintenance not only extends your dryer’s lifespan but also safeguards your home against potential fires.When it comes to keeping our homes spotless and safe, many assume that following standard routines suffices. However, as an expert in home sanitation and cleaning, I can tell you there’s more beneath the surface that most people overlook. A common misconception is that using commercial disinfectants universally guarantees a germ-free environment. But in reality, many of these products can be ineffective against specific microbes if not used properly or if the contact time isn’t long enough. For example, a study published in the Journal of Applied Microbiology highlights that certain disinfectants need a minimum of five minutes to effectively kill pathogens, which many overlook during quick cleaning sessions. Therefore, understanding the right products and procedures is crucial for true sanitation.
Another frequent error involves neglecting the nuances of upholstery cleaning. Many believe that a simple vacuuming or spot clean is enough to refresh furniture. Yet, deep-seated dirt and bacteria can embed within fabrics, requiring specialized techniques. According to the
ultimate upholstery care guide, professional deep cleaning or appropriate steam methods not only prolongs fabric life but also ensures healthier indoor air quality. Overlooking this step can lead to persistent odors and allergen buildup.
When preparing for move-out cleaning, a prevalent mistake is focusing solely on visible dirt and ignoring structural or hidden issues. Many forget to inspect and clean behind appliances, inside vents, or beneath flooring. These areas can harbor mold, pests, or bacteria, risking deposit deductions or tenant complaints. The move-out cleaning strategies emphasize comprehensive inspections and cleaning of often-overlooked spots to ensure a spotless, compliant move. Neglecting this can lead to costly re-cleaning or loss of security deposits.
**What about the common myths that can trip us up?** One widespread belief is that bleach disinfects everything without harm. While bleach is potent, its overuse or improper application can damage surfaces, fabrics, and even breathing air. An expert from effective sanitizing methods warns against blind reliance on bleach, advocating for a balanced approach with less abrasive, more effective alternatives for different surfaces.
Finally, don’t fall into the trap of assuming that a one-size-fits-all cleaning strategy works equally well for every material or area. Wood furniture, delicate fabrics, and high-touch electronics each require tailored products and techniques. The house cleaning strategies guide highlights customized routines that prevent damage while maximizing cleanliness.
Are you guilty of these common mistakes? Recognizing and correcting them can significantly improve your home’s hygiene and safety. Remember, effective cleaning isn’t just about appearances; it’s about thoroughness, technique, and knowledge. Want a deeper dive? Check out sanitizing secrets for a safer house and elevate your cleaning game. Have you ever fallen into this trap? Let me know in the comments.
Tools That Stand the Test of Time
Investing in quality cleaning tools is essential for maintaining a spotless home efficiently. I personally swear by a high-grade cordless vacuum with a HEPA filter—like the Dyson V11—because its powerful suction and battery life make quick daily drops of dust and pet hair effortless. Additionally, a versatile steam cleaner, such as the Bissell SteamShot, is invaluable for sanitizing surfaces without harsh chemicals, ensuring deep disinfection especially in high-touch areas. These tools have proven their durability and effectiveness over years of rigorous use, reducing the need for frequent replacements and saving money in the long run.
Mastering Maintenance for Consistent Performance
Routine upkeep of your cleaning equipment prolongs their lifespan and efficiency. Regularly emptying vacuum filters and replacing bags or HEPA filters prevents loss of suction power. For steam cleaners, descaling with vinegar every few months prevents mineral buildup that can impede performance. I also recommend inspecting the brushes and nozzles periodically for wear and tear—replacing components as needed ensures optimal operation. By integrating these simple maintenance routines, I’ve maintained my tools in peak condition, enabling flawless cleaning sessions every time.
Embracing Technology for Smarter Cleaning
Advancements in cleaning technology continue to evolve rapidly. Smart robotic vacuums, like the iRobot Roomba i7+, feature self-emptying bins and mapping capabilities, allowing automated maintenance of your floors. Using companion apps, I can schedule cleanings during off-hours and monitor my home’s cleanliness remotely. These innovations mean less manual effort and consistent results, which aligns perfectly with my busy lifestyle. As these technologies develop, I predict a future where personal cleaning devices will become even more intuitive and customizable, further simplifying home sanitation.
How do I keep my cleaning tools performing flawlessly over time?
Implementing a dedicated maintenance schedule is key. This involves cleaning filters, brushes, and nozzles after every few uses, and performing deep cleans or descaling every few months depending on your equipment. For example, the effective sanitizing methods recommend vinegar-based descaling for steam cleaners, which I practice regularly. Keeping a maintenance log can help ensure no step is overlooked, ensuring your tools remain reliable. I encourage you to try my favorite routine of monthly filter checks combined with biannual deep cleanings—this small effort yields big results in equipment longevity and performance.”} If you want to elevate your cleaning game even further, consider upgrading to smart devices that monitor and report on their own maintenance needs. This proactive approach helps prevent unexpected breakdowns and keeps your home consistently clean and sanitized.
My Hidden Lessons About Effective Home Sanitization
One of the biggest revelations in my cleaning journey was realizing that superficial wiping or spraying often leaves behind unseen germs and residues. The moment I started truly deep cleaning, with proper technique and attention to detail, I noticed a dramatic improvement in my home’s health and freshness. I learned that patience and knowledge are key—rushing through cleaning tasks can mean missing hidden pitfalls that compromise safety.
Another lightbulb moment came when I discovered how overlooked areas like behind appliances or inside vents harbor microbial growth and debris, contributing not just to odors but also to potential health hazards. Addressing these spaces regularly, with specialized tools and safe methods, has transformed my approach from reactive to proactive, ensuring a genuinely sanitized environment.
Finally, I realized that using the right products is crucial; not all disinfectants are created equal, and understanding their proper contact time and usage can make or break your sanitation efforts. This insight saved me from wasting money on ineffective chemicals and gave me confidence in creating a truly safe home.
Tools and Resources That Changed My Routine
I swear by my high-quality vacuum with HEPA filtration, like the Dyson V11, which captures fine dust and allergens that can aggravate health issues. For deep sanitizing, a versatile steam cleaner such as the Bissell SteamShot has been invaluable—it’s chemical-free and effective against bacteria and viruses when used correctly. For professional guidance, the Ultimate Upholstery Care Guide helped me extend the life of my furniture while keeping it hygienic. Additionally, regular consultation of trusted cleaning tips from industry experts keeps my routine sharp and effective.
Let Your Home Sparkle with Confidence
Embarking on a thorough, well-informed cleaning journey is empowering—your home deserves it, and your loved ones will thank you. Don’t hesitate to invest in the right tools, learn new techniques, and stay curious about how to improve your routine. Remember, a truly sanitized space isn’t just about appearances—it’s about creating a haven of safety and well-being. Are you ready to elevate your home cleaning game and uncover hidden health benefits? Share your experiences below and join the conversation!