
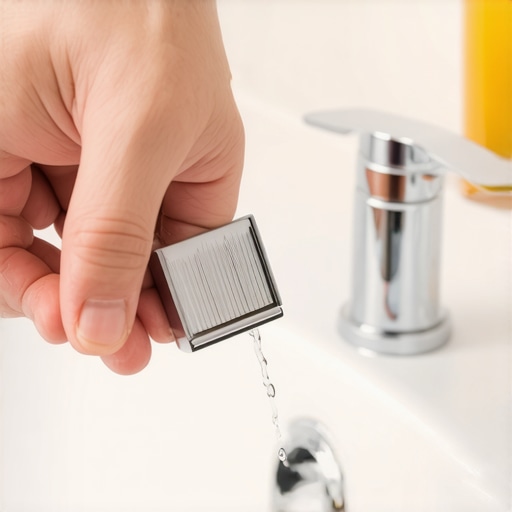
Ever spent extra time scrubbing stubborn white deposits off your kitchen or bathroom faucets, only to see them come back inch by inch? I sure have. I remember the frustrating moment when I finally realized that the thick, crusty build-up wasn’t just unsightly—it was a sign of hard water causing real damage. That lightbulb moment led me down a path to discovering a surprisingly simple yet effective trick involving a razor blade that changed everything.
Why Hard Water Buildup on Faucets Drains Your Patience and Your Decor
Imagine turning on your tap, expecting a shiny, pristine faucet, only to be greeted by a white, chalk-like crust that stubbornly clings to the fixtures. It’s more than just an annoyance; it’s a sign that mineral deposits are slowly corroding your fixtures and potentially limiting water flow over time. Hard water deposits are caused by calcium and magnesium build-up, and they thrive in areas with high mineral content, especially where the water source is rich in these elements.
Not only do these deposits make your space look neglected, but they also impact the function of your faucets. Frequent cleaning with chemical cleaners may seem like a quick fix, but it’s often a messy, smelly, and maybe even ineffective battle. That’s when I stumbled upon a life-saving technique that doesn’t involve harsh chemicals—using a razor blade. It’s been a game-changer in my routine, saving me both time and money while restoring the faucet’s gleam.
But before we dive into the how-to, let’s address some common doubts that might be holding you back.
Is Scraping with a Razor Blade Really Safe?
Initially, I was skeptical about using a razor blade. I worried about scratching or damaging my fixtures. Early on, I made the mistake of applying too much pressure, which could have gouged the chrome. The key is gentle, steady strokes—think of it more like shaving rather than gouging. When done carefully, this technique strip away the mineral crust without harming the surface.
If you’re still unsure whether this method is right for you, I encourage you to check out more detailed house cleaning strategies that are designed for safe and effective results. A good resource I’ve found is [this comprehensive house cleaning strategy guide](https://spotlesscarpetz.com/house-cleaning-strategies-for-a-sparkling-home-today). It’s packed with practical tips to maintain your home’s pristine look.
Now, are you ready to take control of those stubborn faucet deposits? Keep reading, because I’ll walk you through the exact steps that turned my bathroom and kitchen fixtures from crusty to glossy in no time.
Prepare Your Workspace and Tools
Before you start, clear the area around the faucet to prevent any debris from falling into the sink or bathtub. Gather a single-edged razor blade, white vinegar, microfiber cloths, a small brush, and gloves. I remember the first time I tried this: I was nervous about scratching the finish, but wearing gloves and applying gentle pressure made all the difference. Protect your hands and ensure your tools are clean to avoid spreading dirt.
Apply Vinegar for Initial Loosening
Pour enough white vinegar into a small bowl or fill a plastic bag with vinegar, then secure it around the faucet with a rubber band or tape. The acidity dissolves mineral deposits. I once left vinegar on a stubborn area for 15 minutes, and the crust softened enough to remove easily. This step reduces the amount of scraping needed, making the process safer and quicker.
Use the Razor Blade Gently
Carefully hold the razor blade at a shallow angle—around 30 degrees—and gently scrape along the surface. Think of it as shaving off the hardened crust without digging into the finish. Apply light, steady pressure, and work in small sections, moving from top to bottom. I once made the mistake of pressing too hard and scratched the chrome, so start lightly and increase pressure gradually if needed. The key is patience and finesse.
Tackle Stubborn Areas
If some deposits remain, reapply vinegar and wait a few minutes, then continue scraping. For tight spots, use the edge of a small brush or an old toothbrush dipped in vinegar to loosen deposits before scraping again. I found that this combination ensures minimal damage while maximizing cleanliness.
Wipe and Buff for Shine
Once deposits are removed, wipe the faucet with a damp microfiber cloth to remove residue. Finish by buffing with a dry cloth to restore the shine. I like to do this last step immediately after cleaning, so the faucet looks spotless. If streaks or water spots persist, a spritz of glass cleaner can help achieve a glossy finish.
Maintain Your Results
To prevent future buildup, regularly wipe faucets with a vinegar-dampened cloth—once a week is enough. Consider installing a water softener if hard water is a persistent issue. This proactive approach keeps fixtures looking new with minimal effort. For comprehensive house maintenance tips, see the house cleaning strategies guide.
Many homeowners and tenants assume that basic surface wiping suffices for thorough cleaning or that sanitizing chemicals alone guarantee a germ-free home. However, these assumptions can lead to overlooked beneath-the-surface issues, costly mistakes, and subpar results.
Why Do Most People Misjudge Effective Cleaning Strategies?Achieving a spotless home isn’t just about one-time efforts; it’s about sustained maintenance with the right tools and routines. As someone who’s been through countless cleaning phases, I can attest that investing in quality equipment makes a difference not only in efficiency but in preserving your surfaces over time. One tool I swear by is a high-quality microfiber mop with electrostatic properties—these are leaps and bounds ahead of traditional mops when trapping dust and dirt, especially on hardwood and tile surfaces. They don’t just push dirt around; they capture particles, reducing the need for repetitive cleaning and decreasing wear on your floors. For upholstery, I rely on a portable steam cleaner that heats water to 200°F, which effectively sanitizes fabric fibers without chemical residues, aligning with effective sanitizing methods I often recommend in my guides (see here). The difference late-night spills or pet accidents make when you address them with the right tool is astonishing—your furniture stays fresh longer. Additionally, relying on a dual-action vacuum with HEPA filters ensures you’re not just cleaning visibly but reducing allergen and dust buildup that can trigger allergies or respiratory issues. For long-term results, I suggest establishing a weekly schedule incorporating these tools—generate a maintenance rhythm that keeps surfaces pristine without overwhelming your routine. Prediction-wise, the trend is tilting towards smart cleaning devices that can be programmed and monitored remotely, offering even more convenience and consistency in maintaining cleanliness at scale. How do I keep upholstery looking new over time? Regularly using a dedicated upholstery cleaner and deep-cleaning with hot steam every few months prevents deep-set stains and odors (see our upholstery tips). For your floors, applying a protective sealant every couple of years can protect against water damage and stains, ensuring longevity and maintaining your investment. Ultimately, choosing tools that match your specific needs—whether it’s pet hair or stubborn stains—streamlines your routine, saving time and money. I highly recommend trying an advanced routine using a microfiber mop paired with a steam cleaner for upholstery—notice the immediate difference in cleanliness and surface preservation. Ready to upgrade your cleaning arsenal? Dive deeper into how these tools can complement your entire move-out cleaning process with our comprehensive move-out checklist.
Reflecting on my journey through countless house cleaning tricks, I realized that some of the most effective methods aren’t widely shared. The lesson that stands out vividly is the importance of patience and technique when tackling hard water deposits. Rushing or relying solely on chemical cleaners can cause more harm than good, making me appreciate the power of gentle scraping combined with natural solutions. The real breakthrough came when I understood that consistency outweighs aggressive scrubbing, and using tools like a razor blade with finesse preserves the fixture’s finish. This insight transformed my cleaning routine, saving both time and money, and underscored the value of learning from experienced sources beyond the typical advice. Keep exploring new methods, and you’ll discover that even stubborn mineral buildup can become a manageable task with the right mindset and tools.