
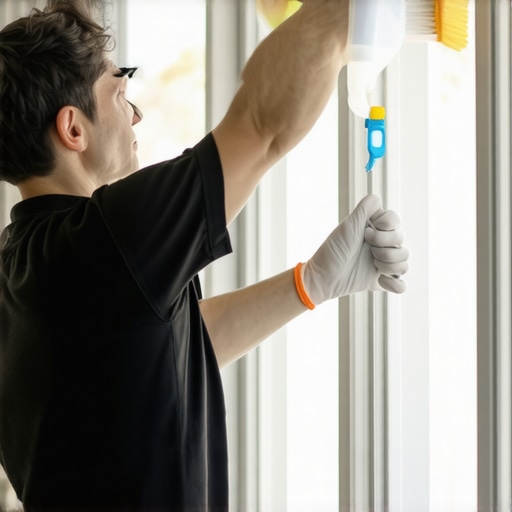
Have you ever pulled back your curtains after a long week only to be greeted by filthy, grimy window tracks that seem impossible to clean? I remember the first time I faced this messy problem — I thought a simple wipe with a cloth would do the trick. But no matter how much I scrubbed, the dirt stubbornly clung on, making my window sills look worse than before. It was frustrating, and I wondered if I was missing something.
That lightbulb moment hit me when I realized that typical cleaning methods just aren’t enough for those caked-on window tracks. Today, I’m going to share with you a proven approach that really works — one that transformed my cleaning routine and can do the same for you. Trust me, once you get this technique down, those gross tracks won’t stand a chance.
Why Your Regular Clean Isn’t Cutting It
Many people, including myself early on, make the mistake of just running a cloth over the surface and calling it a day. The problem? Dirt and grime accumulate deep inside the narrow crevices and corners of window tracks, especially in homes with pets or high dust levels. These tiny particles are like cement, sticking stubbornly and resisting normal cleaning efforts.
Trying to fix this without the right tools or techniques often leads to frustration, wasted time, and an even messier window frame. Plus, neglecting thorough cleaning can lead to mold or bacteria buildup, which isn’t just unsightly — it’s unhealthy. According to the Environmental Protection Agency, mold and dust can adversely affect respiratory health, especially in sensitive individuals.
Once I realized my usual approach was doomed to fail, I started researching better methods. That’s when I discovered a surprisingly simple but powerful trick: using an effective cleaning solution combined with a few household tools that most people overlook. This technique doesn’t require expensive gear or harsh chemicals, just a bit of know-how and a willingness to get into those hard-to-reach spots.
If you’ve faced this frustrating struggle, stay tuned. I’ll walk you through every step to ensure your window tracks are spotless and dirt-free, leaving your entire home feeling fresh and inviting. From cleaning hacks to preventative tips, you’ll never dread window cleaning again.
Gather Your Tools and Prepare the Area
Before diving into cleaning, assemble essential tools: an old toothbrush, a plastic scraper, microfiber cloths, a spray bottle, and a degreasing cleaner or white vinegar diluted with water. Clear the area around your window to prevent any accidents or drips onto furniture. Protect nearby surfaces with a cloth or paper towels. I recall the time I started this process, only to realize I’d forgotten my microfiber cloths — causing me to fumble mid-clean, making the task messier than it needed to be. Proper preparation ensures efficiency and safety.
Apply a Cleaning Solution to Loosen Dirt
Spray the degreasing cleaner or vinegar solution directly into the window track, focusing on areas with visible grime or buildup. Let it sit for 5-10 minutes to break down stubborn dirt, much like a marinade tenderizes meat. I once attempted this step without allowing the solution to sit — the dirt remained firmly attached, and I wasted additional effort trying to scrub it off. Patience here pays off, making the subsequent removal steps much easier.
Scrape and Loosen Embedded Grime
Use a plastic scraper to gently loosen the thick, caked-on dirt inside the track. Think of it as chipping away ice from a frozen windshield — gentle firm pressure avoids damaging the surface. Work systematically along the track, focusing on corners and seams where dirt collects. During my first attempt, I used a metal tool and scratched the surface — a mistake that taught me the importance of using non-abrasive tools. This step ensures that the majority of buildup is loosened and ready for removal.
Scrub Deep into Crevices
Dip the toothbrush into your cleaning solution and scrub along the entire length of the track, paying special attention to corners and seams. Use circular motions to dislodge dirt embedded in tiny crevices, similar to a dentist cleaning between teeth. I remember fighting with the stubborn grime in my window tracks and feeling frustrated — until I adopted this scrubbing method, which significantly improved results. Consistent, thorough scrubbing ensures all loose dirt is lifted from hard-to-reach areas.
Wipe and Rinse for a Spotless Finish
After scrubbing, wipe away loosened dirt with a damp microfiber cloth. For stubborn spots, reapply the cleaning solution and repeat the scrubbing process. Use a clean, damp cloth to remove any residual grime and cleaner, leaving your tracks gleaming. I once skipped this rinsing step and ended up with streaks and leftover residue, which I had to clean again. Proper wiping removes remaining debris and prevents future dirt accumulation.
Dry and Prevent Future Buildup
Finally, dry the track thoroughly with a clean towel or microfiber cloth to prevent moisture accumulation, which can lead to mold or further grime. To keep your window tracks cleaner longer, consider applying a light coat of silicone spray or a protective sealant. A quick maintenance routine once a month can keep dirt from settling in, much like a regular skincare regimen preserves freshness. After completing this process, I noticed my window operates more smoothly and stays cleaner for longer periods.
If you want to make this task even easier, check out how to remove stubborn residues efficiently. Remember, consistency is key — a little effort now saves a lot of trouble later, whether you’re preparing for move-out inspections or just maintaining household cleanliness.
Many assume that following standard cleaning routines guarantees a perfectly spotless home or secures the full deposit back after moving out. But often, overlooked nuances and misconceptions can trip up even seasoned homeowners. Let’s dig deeper into these hidden traps, debunk myths, and share advanced insights that will elevate your cleaning game.
Are You Falling Into the Ultimate Cleaning Myth? Think Scrubbing Is Enough
Contrary to popular belief, vigorous scrubbing alone doesn’t ensure complete sanitation or remove deeply embedded grime. Many rely solely on surface cleaning, neglecting the importance of targeted disinfection, especially in high-touch areas like door handles or light switches. According to cleaning expert Donna Smallin-P hib, superficial cleaning misses microscopic germs that can cause health issues. Incorporate proper disinfectants and follow manufacturer instructions for effective sanitization, rather than just relying on soap and water. This nuance often separates a quick tidy from a genuinely sanitized space, particularly crucial during flu seasons or in households with vulnerable members.
Beware of the Heavy-Duty Chemical Trap
Another misconception is that harsher chemicals automatically lead to cleaner results. While strong disinfectants are effective, they can be overused or misapplied, risking surface damage or health hazards. For example, using bleach on natural stone surfaces without proper dilution can strip sealants and cause discoloration. Opting for eco-friendly alternatives like diluted vinegar or hydrogen peroxide, backed by research indicating their germ-killing efficacy, can be safer and equally effective when used correctly. Proper application techniques matter; more chemical isn’t always better. For comprehensive guidance, check out our ultimate upholstery care guide to understand proper product usage.
Advanced Mistake: Neglecting Hidden Corners and Behind Large Appliances
Many overlook the little corners, behind the refrigerator, or under cabinets during move-out cleaning, thinking they’re minor spots. These neglected areas can harbor bacteria, mold, and accumulated dust, which may result in inspection failures and lost deposits. Using specialized tools like grout brushes or vacuum attachments designed for tight spaces can make a big difference. For additional step-by-step strategies, our move-out cleaning strategies article offers detailed checklists to ensure no spot is missed.
Why You Need a Sanitation Strategy — Not Just Cleaning
Cleaning aims to remove visible dirt, but sanitizing reduces microbial presence — a crucial distinction often ignored. Recent studies from the CDC highlight that proper sanitization protocols can drastically decrease pathogen transmission. Incorporate proven methods, like using effective sanitizing solutions, and ensure contact time is sufficient for disinfection. Skipping this step might leave your home looking clean but still harbor harmful germs. If you’re serious about safety, explore our sanitizing hacks that make a real difference.
Keep It Working: Essential Tools and Maintenance Tips
Maintaining your cleaning tools and routines is crucial for sustained cleanliness and efficiency. I personally rely on high-quality equipment like the Vapamop Steam Cleaner, which uses hot steam to sanitize surfaces without chemicals. This versatility allows me to tackle everything from upholstery to stubborn grout lines, ensuring deep cleanliness with minimal effort. Regular maintenance of my steam cleaner, such as descaling monthly, prolongs its lifespan and guarantees optimal performance. For long-term results, investing in reliable tools is a game-changer, and I recommend selecting equipment based on your specific needs rather than opting for the cheapest options.
Another essential tool I swear by is a detailed move-out cleaning checklist. Using a comprehensive list, like the one found at this guide, ensures I don’t miss critical areas, keeping my home in top shape and preventing deposit disputes. Keep your tools clean and well-maintained; dirty cloths, clogged vacuums, or dull brushes can undo your efforts and lead to additional work. Regularly inspecting and replacing worn-out equipment ensures cleaning remains effective and safe.
How do I maintain my cleaning tools and routines over time?
Consistency is key. Set aside time monthly to perform routine maintenance on your equipment—descaling your steam cleaner, sharpening brushes, or replacing worn mop heads. Additionally, consider investing in quality attachments, like upholstery-specific tools, that streamline cleaning processes. As technology advances, smart cleaning devices are becoming more popular, offering automated software updates and maintenance alerts, which can streamline your upkeep. The trend suggests a move toward integrated systems that minimize manual intervention while maximizing cleanliness. Staying informed and proactive about tool maintenance not only extends their lifespan but also ensures you achieve the best cleaning results every time.
Also, don’t forget to clean your cleaning tools! Regularly washing microfiber cloths, vacuum filters, and scrub brushes prevents the spread of germs and maintains their effectiveness. For instance, washing microfiber cloths at 60°C (140°F) removes bacteria and trapped dirt, as recommended by industry experts. Make a habit of inspecting your tools after each big cleaning session to detect wear early and replace items before they become ineffective.
Lastly, having a versatile toolkit can save you time and effort when unexpected messes occur. Consider a multi-purpose handheld steamer or a compact vacuum for quick cleanups. These tools are invaluable for maintaining high-traffic areas and preventing dirt from building up. By combining high-quality equipment with scheduled maintenance routines, you’ll keep your home sparkling and your efforts sustainable in the long run.
To explore more about effective sanitizing methods that complement your tool maintenance, check out this resource. Remember, investing in your tools and routine upkeep today pays dividends in cleanliness and peace of mind tomorrow. Try scheduling a monthly check-in for your equipment, and watch how your cleaning results improve over time.
What I Wish I Knew About Deep Cleaning That Changed Everything
One of the biggest lessons I learned was the importance of inspecting every nook and cranny before starting. I used to rush through a quick wipe, only to realize later that behind appliances or in hidden corners were unseen dirt traps. Taking a moment to identify these hidden spots saved me hours of redo work and ensured my cleaning was thorough. Additionally, investing in quality tools like a grout brush or a narrow nozzle attachment made a substantial difference, proving that the right equipment can elevate your cleaning results more than you might expect.
Tools and Techniques That Transformed My Approach
After trial and error, I found that a versatile toolkit is essential—especially items like a microfiber steamer, detailed move-out checklists, and natural disinfectants. I trust this upholstery care guide because it offers strategies to keep furniture looking and smelling fresh without harsh chemicals. Regular maintenance of your tools, like descaling my steam cleaner or replacing worn-out brushes, ensures consistent, effective cleaning sessions. These small habits have significantly extended the life of my equipment and improved my overall results, making move-out cleaning less stressful and more predictable.
Breaking Free From Common Cleaning Myths
One myth I once fell for was the idea that scrubbing vigorously was enough to sanitize surfaces. I learned that combining proper disinfectants with appropriate contact times is crucial—not just elbow grease. Also, I used to rely on aggressive chemicals, but eco-friendly alternatives like vinegar solutions, when used properly, can be just as effective and safer for both my family and the environment. Recognizing these misconceptions helped me develop smarter, safer cleaning routines that truly tackle germs and grime.
Uncovering Tiny Details That Make a Big Difference
Neglecting behind large appliances or forgotten corners can sabotage your efforts, especially when securing your deposit. Using little tools like a grout brush or vacuum attachments makes these hidden spots accessible. For detailed strategies, I recommend checking this comprehensive move-out checklist. Small investments in targeted tools and a keen eye for overlooked spots ensure nothing is left behind, protecting your investment and giving you peace of mind.
Sanitize Smart, Not Just Clean
Sanitizing is a step often skipped but essential for a truly fresh home. While a spotless surface looks appealing, microbes can linger and cause health issues, especially in high-touch areas. Incorporating proven protocols, like using effective sanitizing solutions, can make a visible difference. This extra layer of cleanliness provides safety and reassurance that your home isn’t just clean-looking but genuinely healthy.
Keeping Your Equipment in Prime Condition
Long-term success relies on regular maintenance of your cleaning tools. Simple tasks like washing microfiber cloths at high temperatures or inspecting vacuum filters prevent bacterial buildup and keep tools performing at their best. I also recommend setting a monthly reminder to descale steam cleaners—small efforts that yield big results. Investing in durable attachments and cleaning or replacing worn parts ensures your equipment remains reliable, making each cleaning session easier and more effective.
The Unexpected Power of Routine and Mindset
Finally, consistent routines and a positive mindset transformed my move-out cleaning experience. Seeing it as an opportunity to refresh not just the space but also my environment kept me motivated. When I approached each session with patience and appreciation for progress—rather than frustration—I became more efficient and less stressed. Remember, a well-maintained home isn’t just about the aesthetic—it’s about fostering a space that genuinely supports your wellbeing and peace of mind.