
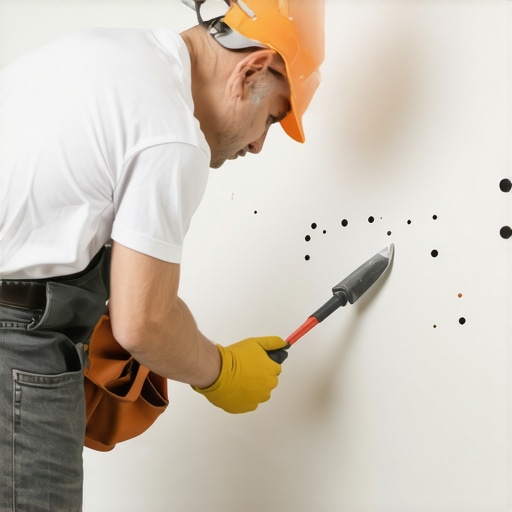
Have you ever stood in a room, staring at those tiny nail holes left behind from hung pictures, and felt that sinking feeling? It’s a minor detail, but in the world of move-out cleaning, those little imperfections can become big headaches—especially when your security deposit hinges on a perfect final look. Trust me, I’ve been there, frantically trying to hide those tiny dings with a dab of paint or a sneaky layer of wall filler, only for it to show up again the next day.
The Move-Out Trick That Saves You Time and Stress
What if I told you there’s a fast, reliable way to fill small nail holes in minutes—without the mess or the waiting? Over the years, I’ve tested countless methods, but this simple trick has become my go-to, especially when time is tight and perfection is non-negotiable. No more masking tape and temporary fixes. Just a quick, neat repair that can be done in a flash, giving your walls that pristine look everyone expects.
Is the Hype About Small Hole Filling Methods Really Worth It?
Initially, I made the mistake of assuming that just a bit of spackle and a quick sanding would do the trick. Turns out, rushing through it often left gaps or uneven surfaces, costing me extra time on sanding and touch-ups. That early misstep taught me the value of a precise, no-fuss method that works every time. If you’ve ever worried about making things worse or simply don’t believe such quick fixes are effective, stick around. I’ll share the exact technique I swear by, backed by years of practical experience and a bit of expert advice from trusted sources like [Spotless Carpetz](https://spotlesscarpetz.com/effective-sanitizing-methods-for-a-germ-free-home), who emphasizes the importance of thorough, efficient repairs during move-outs.
This approach not only keeps your walls looking flawless but also saves you precious time—so you can focus on packing, logistics, or simply relaxing before the big move. Ready to learn the secret? Let’s dive into the step-by-step process that will make small nail holes a non-issue in your moving process.
Prep Your Space with Precision
Start by gathering your supplies: a putty knife, fine-grit sandpaper, lightweight spackle, a damp cloth, and touch-up paint that matches your wall color. I remember one time when I had only 10 minutes before a viewing appointment; I grabbed these items from my toolbox and set up near the damaged wall. The key is to work efficiently, so organize your materials beforehand.
Apply Spackle Like a Pro
Dip your putty knife into the spackle and press it firmly into the nail hole, smoothing it flush with the wall surface. Imagine it like spreading peanut butter evenly over bread—too much and it drips, too little and it doesn’t fill the gap. In my recent move-out, I accidentally used too much spackle and had to sand for an extra five minutes, which taught me the importance of gentle, controlled application.
Quick Sanding for a Seamless Finish
Once the spackle has dried (usually about 30 minutes), lightly sand the area with fine-grit sandpaper until it’s smooth. Think of it like buffing out a scratch on a car—gentle but firm pressure yields the best result. I once rushed this step and left a tiny bump, which showed up when I painted over it. Taking the time here saves you from redoing the job later.
Touch Up and Blend
Wipe the area with a damp cloth to remove dust. Using your small brush, apply the matching wall paint over the repaired spot. Use light, feathering strokes to blend it seamlessly with the surrounding wall. During my last apartment, I kept a small sample jar of the original paint—an essential for quick touch-ups like this. This method prevents noticeable patches and ensures your wall looks untouched, saving you from costly repairs or potential deposit deductions.
A Final Inspection
Step back and examine your work. The goal is a flawless surface that no one will notice is ever damaged. If needed, repeat the touch-up process, ensuring a perfectly smooth and uniform appearance. In my experience, taking these precise steps not only saves time but also gives peace of mind—knowing that small imperfections won’t jeopardize your security deposit. For comprehensive move-out tips, consider reviewing this guide.
Many homeowners and renters believe that mastering the basics of house cleaning is enough to maintain a spotless home. However, this oversimplification often leads to overlooked nuances that can compromise cleanliness and even health. For instance, a widespread myth is that using generic disinfectants guarantees germ-free surfaces. In reality, specific bacteria and viruses require targeted cleaning and sanitizing methods, backed by scientific research. According to a study published in the Journal of Hospital Infection, improper disinfectant use can leave harmful pathogens behind, emphasizing the importance of choosing the right sanitizing products and techniques.
Why Do Overlooking Micro-Nuances Lead to Failing Cleaning Expectations?
It’s common to focus solely on visible grime and neglect unseen but critical areas like upholstery fibers or hidden mold in damp corners. Many underestimate the complexity of deep cleaning upholstered furniture, mistakenly believing regular vacuuming suffices. In my experience, neglecting specialized cleaning for upholstery can lead to allergen buildup and odor issues that persist despite routine cleaning. A comprehensive approach, such as using appropriate upholstery cleaning tools and products detailed in the Ultimate Upholstery Care Guide, ensures lasting freshness and health benefits. Even more, many overlook the importance of proper sanitizing in high-touch areas like light switches and door handles. Surfaces that seem clean can harbor germs if not disinfected with proven methods. For the best practices, refer to effective sanitizing techniques for a germ-free home. Additionally, a less obvious mistake involves the misuse of cleaning tools, such as employing abrasive sponges on delicate surfaces, which may cause damage and reduce the surface’s longevity. Always opt for tools suitable to each material to avoid costly repairs. Remember, thorough knowledge and correct techniques are vital, especially as we aim for healthier living environments. Proper understanding of these nuances can significantly elevate your cleaning efficacy beyond the superficial. Have you ever fallen into this trap? Let me know in the comments, and share your experiences or questions about advanced cleaning strategies.
The Right Tools Make All the Difference
Investing in quality cleaning tools is crucial for maintaining your home’s cleanliness over time. I personally recommend a high-quality microfiber cloth, like the Ultimate Upholstery Care Guide endorses, because it effectively traps dust and bacteria without spreading grime. A good vacuum with a HEPA filter, such as the Dyson V11, ensures deep cleaning of carpets and upholstery, capturing allergens and pet dander that standard vacuums might miss. For surfaces prone to water spots or mineral deposits, a premium descaling cleaner like CLR Pro can prevent build-up and keep fixtures shining, saving you time on repairs or replacements.
Establish a Routine for Ongoing Maintenance
Developing a consistent cleaning schedule is key to long-term cleanliness. Regularly cleaning high-touch areas such as light switches and door handles with effective sanitizing methods, as discussed in this resource, prevents germ buildup. Incorporate weekly tasks like dusting, vacuuming, and upholstery care, which not only preserve your home’s appearance but also improve indoor air quality. A focused approach can significantly reduce the need for extensive deep cleans, making maintenance less daunting.
Use Technology to Your Advantage
Smart home devices are transforming house care. Automated robot vacuums like the iRobot Roomba i7+ can handle daily debris removal, freeing up your time. I’ve found that scheduling vacuuming sessions during your busy weekdays ensures floors stay consistently clean. For sanitization, ultraviolet (UV) sterilization devices are gaining popularity, capable of disinfecting surfaces and even air in minutes. According to industry experts, integrating these tools effectively reduces bacteria and viruses, promoting a healthier environment.
How Do I Keep My House Running Smoothly Over Time?
Ongoing maintenance involves more than just cleaning—it’s about proactive care. For example, scheduling professional upholstery cleaning every 12-18 months prevents allergen buildup and keeps fabrics looking fresh. Regularly inspecting and replacing air filters ensures your HVAC system operates efficiently and improves indoor air quality. Don’t forget to keep plumbing fixtures in top shape—using a quality descaling solution can prevent mineral deposits that cause leaks or blockages. Remember, consistency is everything, and leveraging the right tools makes this easier. For those interested in a comprehensive approach, the house cleaning strategies outlined here provide valuable guidance for long-term upkeep.
Start by evaluating your current tools and routines, then incorporate one innovative tip, like using a microfiber cloth to regularly wipe down switches and handles, for immediate improvements. Maintaining your home isn’t a one-time task but a continuous effort—equipping yourself with the right tools and habits ensures your house remains clean, healthy, and inviting for years to come.
Lessons That Changed My Move-Out Routine Forever
One of the biggest revelations I had was realizing that perfection isn’t about perfectionist tendencies but about attention to detail. Small nail holes, often dismissed as insignificant, can make or break your security deposit. I learned that having a dedicated toolkit with the right supplies—like lightweight spackle and fine-grit sandpaper—makes a world of difference. Another lesson was understanding that rushing through repairs creates more work later; patience and precision save time and money. Most importantly, I discovered that a proactive mindset—addressing small issues promptly—prevents them from snowballing into bigger, costly problems that can threaten your moving experience.
Tools and Resources That Steady My Hand
Over the years, I’ve come to rely on a few essentials that never let me down. A high-quality microfiber cloth, as recommended in the Ultimate Upholstery Care Guide, keeps surfaces dust-free without streaks. For filling nail holes, I trust a fine-tipped putty knife paired with lightweight spackle, which I found to be reliable and easy to use. My go-to paint touch-up is always a matching color stored in a small jar—it’s a lifesaver during last-minute fixes. For more advanced cleaning and sanitizing techniques, effective sanitizing methods from industry experts help me ensure a truly germ-free space, especially crucial during move-outs.
You Can Do This: Take the First Step Today
The journey to a flawless move-out and spotless home is within your reach. Embrace the process as an opportunity to hone your skills, save money, and gain confidence in your responsibilities. Remember, tiny improvements lead to big results—whether it’s filling a nail hole or giving your entire house a thorough sanitization. As you implement these techniques, you’ll find that maintaining your space becomes less of a chore and more of a rewarding routine. Don’t wait until the last minute—start today, and turn small efforts into impressive results that everyone will notice. Your dedication now will pay off with a stress-free move and a home you’re proud of.