
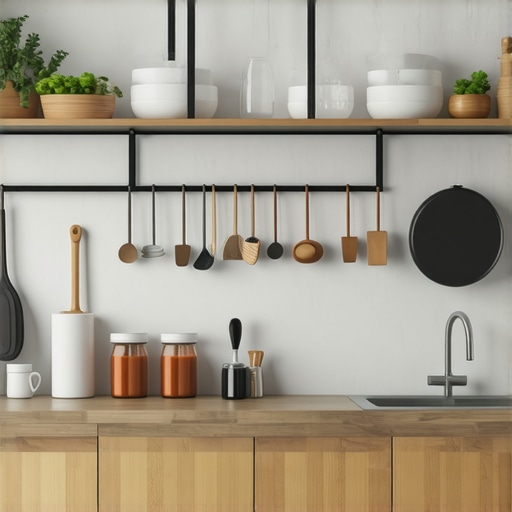
I remember moving into my new apartment and thinking I could skip a thorough cleaning. I was tired, eager to settle in, and honestly, I just wanted to skip to the fun part—decorating. But then, a strange smell hit me as I opened the cabinets. Turns out, some previous tenant’s mess was hiding in plain sight, and I had unknowingly invited bacteria into my sanctuary. That was my lightbulb moment. I realized that without a proper move-in checklist, my kitchen would never truly be germ-free, no matter how many sprays or wipes I used.
The Vital First Step: Think Like a Germ Hunter
Every corner and surface in a new home can harbor unseen germs—especially in the kitchen, where food preparation occurs. Early on, I made the mistake of assuming a quick wipe-down was enough, only to discover mold behind the fridge and grime under the sink after a few weeks. That mistake could have been prevented with a comprehensive approach from the start. To truly safeguard my health—and yours—I’ll walk you through a move-in checklist that ensures your kitchen is not just clean, but meticulously sanitized.
Is Your Kitchen Really Safe? The Skeptic’s Dilemma
Many folks, including myself initially, think a quick spray of disinfectant does the trick, but it’s often not enough. Especially if previous tenants didn’t bother with deep cleaning, bacteria, mold spores, and hidden grime can remain lurking. I once skipped inspecting and disinfecting the dishwasher filter, which later caused a foul odor and potential bacterial build-up. Trust me, it’s a rookie mistake that’s easily avoidable if you’re aware of the common pitfalls. Proper checklists and methods make all the difference.
For a proven strategy on effective sanitizing, I recommend checking out [Effective Sanitizing Methods for a Germ-Free Home](https://spotlesscarpetz.com/effective-sanitizing-methods-for-a-germ-free-home). Now, let’s dive into specific steps to make this process straightforward and stress-free, ensuring your new kitchen is a safe haven from day one.
Start with a Detailed Inspection
Kick off your cleaning by examining every corner of your new kitchen. Use a flashlight to uncover hidden grime behind appliances or in dark corners. Remember, bacteria thrive in unseen spots. During my first move-in, I found mold behind the refrigerator’s kickboard because I hadn’t checked thoroughly. This step ensures you don’t miss any sneaky germ hideouts and lays the foundation for effective cleaning. For comprehensive techniques, refer to cleaning secrets from experts.
Identify High-Touch Areas
Focus on handles, switches, and knobs—these are hotspots for bacteria transmission. I once sanitized the stove knobs but ignored the fridge handles, only to realize the germs persisted. Use a list to mark these spots and prepare your disinfectants accordingly. This targeted approach guarantees thorough germ removal in crucial areas.
Disassemble and Clean Appliances Thoroughly
Remove detachable parts like shelves and filters from your fridge, microwave, and dishwasher. Think of this like cleaning a jewelry box—you remove the clutter to clean every crevice. I once ignored the dishwasher filter, leading to foul odors down the line. Deep cleaning these parts prevents bacterial buildup and improves appliance longevity. Check how to clean dishwasher filters for detailed steps.
Use the Correct Cleaning Agents
Select sanitizers proven to eliminate germs. Regular soap isn’t enough; opt for EPA-approved disinfectants or natural options like diluted bleach or vinegar. However, beware: vinegar isn’t as effective as many believe and may damage certain surfaces, so use it selectively. For effective disinfectant methods, explore sanitize secrets. During my first sanitization, I used a proper disinfectant spray and noticed immediate freshness and peace of mind.
Pay Special Attention to Hidden Spots
Scrub behind and beneath appliances, inside drawers, and on top of cabinets. These overlooked areas can harbor mold and bacteria. Imagine wiping the countertop but missing the area behind the stove—germs will just migrate back. Use disinfectant wipes or cloths to reach these tight spots. For tricky areas like window sills or behind appliances, specialized tools can make the process cleaner and faster.
Sanitize Soft Surfaces and Textiles
Upholstered furniture, curtains, and fabric mats can trap dust and microbes. I learned this the hard way when a quick vacuum didn’t eliminate pet dander and bacteria; I had to do a deep upholstery clean. Refer to upholstery care guide for expert tips. Regularly clean and sanitize these surfaces to prevent microbial reservoirs from forming.
Final Disinfection and Air Quality Boost
Finish by wiping all surfaces with a high-grade disinfectant. Use a microfiber cloth to avoid streaks and ensure even coverage. Open windows to ventilate the space, helping to remove lingering chemical odors and improve air quality. I found that airing out the kitchen after cleaning made a noticeable difference in freshness and scent. This step seals the cleaning process, creating a safe and inviting environment from the moment you move in.
While many believe that a quick wipe-down suffices for household cleanliness, seasoned cleaners understand there are subtler aspects that can undermine your efforts. One widespread misconception is relying solely on natural cleaning agents like vinegar or lemon for disinfection. While these may tackle odors or surface grime, studies show they are often insufficient against certain bacteria and viruses, which require EPA-approved disinfectants for effective eradication. Skipping the use of proper sanitizers can give a false sense of security, leaving behind microbes that could cause illnesses.
Another advanced mistake many make is neglecting the importance of time in disinfecting processes. For instance, applying a sanitizer and wiping immediately might not allow enough contact time for the disinfectant to work effectively. Following the manufacturer’s recommended dwell time is crucial; otherwise, you risk incomplete sanitation. It’s a nuance that even experienced homeowners might overlook in their rush to finish cleaning.
A common myth specifically about upholstery is believing that vacuuming alone is enough to eliminate germs. While vacuuming removes surface dust and allergens, it does not kill bacteria or viruses. Deep cleaning with steam or appropriate fabric-safe disinfectants significantly improves hygiene. Proper upholstery care is a nuanced process that many overlook, leading to lingering odors and hidden germs.
For move-out cleans, there’s a trap in focusing only on visible dirt and neglecting hidden grime in less accessible spots—behind appliances, inside vents, or under cabinets. These areas often harbor mold spores or bacteria, which can cause issues for new occupants and even jeopardize your deposit recovery. Implementing a detailed move-out cleaning strategy, as outlined in effective move-out strategies, helps prevent these pitfalls.
Let’s dig deeper into an advanced question: How do microbial reservoirs persist despite routine cleaning?
Research indicates that microbes can form biofilms—structured communities that adhere strongly to surfaces—making them resistant to standard disinfectants. This is why rotating cleaning agents and employing mechanical actions like scrubbing are effective strategies. A study published in the Journal of Applied Microbiology emphasizes the importance of combining chemical disinfectants with physical removal to break down biofilms and ensure comprehensive sanitation.
Remember, achieving a truly clean and germ-free home requires understanding these nuanced factors. Are you aware of how contact time, biofilms, or hidden spots might be compromising your cleaning efforts? Share your experiences in the comments! For detailed tips on effective sanitizing methods, visit expert-approved cleaning secrets and elevate your routine.
Tools I Recommend for Keeping Your Space Hygienic
Investing in the right equipment can transform your cleaning routine from a chore into a science-backed process. I personally swear by using high-quality microfiber cloths, which trap dust and microbes more effectively than traditional textiles, reducing chemical use and preventing streaks. For disinfection, an EPA-approved spray like Clorox Healthcare Bleach Germicidal wipes ensures bacteria and viruses are eliminated thoroughly, especially on high-touch surfaces. Additionally, a handheld steam cleaner offers a chemical-free option for deep sanitation of upholstery and hard-to-reach areas, preserving fabric integrity while killing microbes at high temperatures.
Why I favor steam cleaning for upholstery: Unlike aggressive chemical treatments, steam penetrates deep into fibers, lifting dirt and microbes without residue. Regular use of a steam cleaner prolongs the life of your furniture and prevents microbial buildup, which is often overlooked. For detailed guidance, check this upholstery care guide that covers steam cleaning techniques.
Advanced Equipment for Long-Term Results
To maintain your home’s sanitation over time, a cordless, rechargeable UV-C light wand can be a game-changer. UV-C light can disinfect surfaces swiftly, making it perfect for daily touch-up of electronics, door handles, or appliance surfaces. I use one after each deep clean to ensure residual microbes are destroyed, reducing the chances of microbial resurgence. Remember, UV-C is effective but must be used carefully—avoid direct exposure to skin and eyes. Look for units with safety features and proper alignment guides.
How do I keep my tools functioning well?
Proper maintenance is crucial. Regularly clean your microfiber cloths with hot water and a mild detergent, avoiding fabric softeners that can leave residues, compromising their effectiveness. Steam cleaners should be descaled periodically to prevent mineral buildup, which impairs heat transfer. For UV-C devices, ensure they are stored in a dry place and check for bulb degradation every few months—most bulbs need replacement after around 10,000 hours of use. Keeping your equipment in top shape ensures consistent performance and long-lasting results.
Looking ahead, the evolution of cleaning technology points toward smarter, connected devices integrating sensors to monitor microbial levels or surface cleanliness in real-time. The future might bring AI-controlled cleaning systems that automatically target high-germ zones, just like the latest innovations in home automation.
Make Your Maintenance Routine Count
Want a step-by-step approach? Incorporate these tools into your daily routine for sustained hygiene and peace of mind. Regular disinfection, combined with proper tool care, not only keeps your home safe but extends the lifespan of your appliances and furniture. Don’t skip on maintenance—your health depends on it!
Explore the detailed effective sanitizing methods to learn which tools fit your needs best. Start testing one advanced tip today—try using a UV-C wand in your high-touch areas and notice how quickly microbial numbers drop. Your home will thank you for it!
Cleaning and sanitizing a new home isn’t just about appearances—it’s an investment in your health and peace of mind. My journey taught me that behind every sparkly surface lies a need for deeper awareness. Incorporating expert-backed techniques and the right tools made all the difference, but it was the small lessons—like understanding microbial resilience and the importance of contact time—that truly refined my routine. Remember, a home free of hidden germs is a home that nurtures well-being; every detailed effort counts more than you might think. For ongoing inspiration, explore comprehensive methods and the latest tools at this trusted resource. Start your own cleaning revolution today, because your health deserves nothing less.