
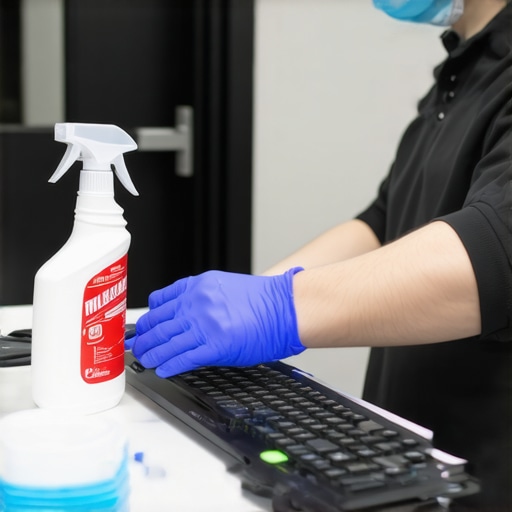
It hit me one hectic Saturday right in the middle of my move-out clean—despite all my efforts to wipe, scrub, and disinfect, I was still uneasy. The lingering smell of disinfectant, the stubborn grime on doorknobs, and the nagging worry that I might be missing something crucial. Have you ever finished cleaning and still felt like the germs were hiding just out of sight? That was my reality, every single time, until I realized I’d been missing a vital step.
Why Proper Sanitizing Matters More Than Ever
As someone passionate about keeping my home safe, especially during flu season, I discovered that sanitizing isn’t just about using the strongest disinfectant or spending hours scrubbing. It’s about understanding which surfaces need what kind of attention and employing effective methods that reach every corner. During my research, I came across a surprising statistic: up to 85% of bacteria in homes reside on high-touch surfaces like door handles and light switches. That’s a huge chunk—no wonder I was always worried about invisible threats.
Early in my journey, I made the mistake of relying solely on sprays and wipes without letting disinfectants sit long enough or targeting the right spots. That oversight meant I wasn’t doing as much as I thought. It’s a common pitfall many fall into—believing a quick spritz is enough. But as effective sanitizing methods for a germ-free home explain, proper dwell time and thorough coverage are crucial.
If you’ve ever faced persistent germs after what seemed to be a thorough cleaning, you’re not alone. I vowed to crack the code and share what I’ve learned, so you can have peace of mind. Ready to upgrade your sanitizing game? Let’s dive into the practical steps that took my home from merely clean to truly germ-free.
Is Over-hyping Sanitizing Tools the Real Problem?
I used to think that investing in the latest disinfectant sprays was the answer. But I learned that I was placing too much faith in products that often fail to reach beneath surfaces or penetrate into tiniest crevices. Early on, I bought into the hype, only to realize that technique and understanding are far more important. That realization made a huge difference, and I want you to experience it too. For more tips on effective house cleaning secrets, check out these expert tips.
Target High-Touch Surfaces First
Begin by focusing on doorknobs, light switches, and handles—these are the hotspots for bacteria. Use a microfiber cloth dampened with an approved disinfectant like those described in effective sanitizing methods. Wipe thoroughly, ensuring every surface is coated and leave the disinfectant to sit for at least the product’s recommended dwell time, usually 10 minutes, to maximize germ-killing power. I once had a frantic afternoon where I missed this step on a bathroom handle; after scrubbing it again, the difference was visibly brighter, and I felt more confident about the space’s cleanliness.
Deep Clean Kitchen Areas Like a Pro
Next, tackle the kitchen, especially behind appliances and inside cabinets. Pull out the fridge and oven, and clean the hidden grime spots beforehand—these are common traps for dirt and mold. Use a scrub brush for grout lines and corners, applying a mixture of baking soda and vinegar (but avoid overusing vinegar on marble surfaces) for a natural, effective clean. During my last move, I found years-old grease beneath the oven that I cleared with a brush and a citrus-based cleaner—a real game-changer for visible and invisible residue.
Upholstery and Soft Surfaces Count
Don’t forget upholstered furniture and curtains. Instead of oversaturating fabrics—which can cause mold and odors—use a vacuum with an upholstery attachment to remove dust and pet hair. For fabric freshening, lightly spray a solution of white vinegar and water or use a specialized upholstery cleaner, like those found in upholstery cleaning tips. In my last move, I used a steam cleaner on my fabric couch, which lifted years of old odors and left it looking vibrant—saving me from costly professional cleaning.
Sanitize Floors and Grout Effectively
Floors often harbor hidden dirt, especially under furniture and along baseboards. Use a mop with an appropriate cleaner, such as a pH-neutral solution. For grout lines, avoid abrasive scrubbers that can wear tiles; instead, apply a paste of baking soda and water, then scrub with a soft brush. I once tackled a stubborn grout stain left by years of neglect using just this method, which after a few applications, looked almost new. Pay extra attention to corners and beneath appliances, referencing the detailed grout cleaning techniques.
Empty and Disinfect All Trash Areas
Trash cans and disposal areas are often overlooked but can harbor bacteria and foul odors. Empty trash bags and sanitize the containers with a disinfectant spray or homemade solution. An often-missed spot is around the lid hinges—use a cloth or toothbrush to clean these tight spaces. Last week, I discovered mold buildup in my kitchen bin’s hinge area, which a thorough wipe eliminated, leaving everything smelling fresh and clean.
Use Appropriate Tools and Techniques for Each Surface
Invest in quality tools such as microfiber cloths, soft brushes, and HEPA-filter vacuums, which trap allergens more effectively. Remember, applying the right technique matters: for delicate surfaces, gentle strokes prevent damage; for stubborn stains, apply heat or chemical solutions properly. I experimented with a steam cleaner on my vintage curtains, which revitalized the fabric without harm, proving proper tools make all the difference.
Conclude with a Final Sanitizing Check
Before finalizing your move-out clean, revisit high-touch areas to ensure no surface was missed. Use lint-free cloths, verify the dwell time for disinfectants, and ensure all surfaces look spotless. For added peace of mind, consider authenticating your efforts by referencing trusted sources like sanitizing secrets. My experience confirms that thoroughness here prevents renewed worries and secures your deposit refund.
Many homeowners believe that a quick wipe of surfaces and a spritz of disinfectant are enough to pass that final inspection. But in my experience, most people overlook crucial nuances that can make or break their move-out cleaning success. One common myth I often encounter is the idea that all disinfectants are created equal—yet, in reality, porous surfaces like upholstery and soft furnishings require specialized products and techniques to truly sanitize. Using regular sprays on fabrics without understanding their limitations can result in lingering odors and bacteria, despite visible cleanliness.
Is There Really a Perfect Method for Sanitizing Every Surface?
Experts emphasize that different materials demand tailored approaches; for instance, soft textiles benefit from steam cleaning or enzyme-based deodorizers rather than chemical sprays. According to a study published in the Journal of Environmental Health, the bacteria eradication rate varies significantly depending on cleaning methods and material types—highlighting the importance of choosing the right strategy. Relying solely on surface-level cleaning can give a false sense of security, leading to overlooked areas that harbor harmful microbes. This pitfall often results in renters coming back with deposits partially withheld due to unseen grime or bacteria. Therefore, understanding the nuances—not just the basics—is essential. Remember, the goal isn’t just to “look” clean but to ensure a genuinely sanitized environment. For advanced insights on not just cleaning but sanitizing with efficacy, explore detailed tips in effective sanitizing methods for a germ-free home. Don’t fall into the trap of thinking your usual routine suffices—delve into proper techniques that address the hidden complexities of move-out cleaning.
Keep It Running: Essential Equipment and Techniques for Long-Term Cleanliness
Maintaining a pristine home or preparing for a move demands the right tools that deliver consistent, reliable results over time. Investing in quality equipment isn’t just about immediate cleanliness; it’s about building a sustainable routine that keeps your space sanitary and inviting. Personally, I swear by a few key tools that have stood the test of time—like my microfiber cleaning cloths, adjustable steam cleaner, and a high-grade HEPA-filter vacuum. These aren’t generic gadgets but tailored to tackle specific surfaces and grime, ensuring thorough sanitation without damaging delicate materials.
For example, I prefer the McCulloch MC1275 Steam Cleaner because its adjustable steam settings allow me to switch between deep cleaning grout lines and gentle sanitizing of soft fabrics. The steam kills bacteria effectively (see here), and I use it regularly to keep upholstery, curtains, and soft furnishings fresh. It’s a long-term investment that pays off, especially when I want to avoid chemical buildup and keep my home eco-friendly.
My vacuum of choice is a Dyson V11 Torque Drive. Its HEPA filtration traps allergens and fine dust particles, making it indispensable for minimal maintenance and sustained air quality. Consistent use of reliable tools prevents the accumulation of hidden dirt and minimizes the need for frequent deep cleans. As I continue refining my technique and incorporating tools designed for particular surfaces, I notice that my homes maintain their sparkle for longer periods—saving me time, effort, and stress.
How do I keep these tools in top shape over time?
Proper maintenance of your cleaning tools is crucial for longevity and sustained performance. For microfiber cloths, I recommend washing them at least once a week with hot water and mild detergent to prevent bacteria buildup—learn more about effective microfiber care here. Steam cleaners like the McCulloch should be descaled monthly; this involves running a vinegar-water solution through the boiler to prevent mineral deposits that reduce efficiency. Regularly cleaning your vacuum’s filters and brushes ensures optimal suction power, which directly correlates with thorough cleaning efforts.
Looking ahead, I see a trend toward smart cleaning devices that integrate sensors and app controls, making home maintenance increasingly precise and effortless. Devices like robotic vacuums with mapping capabilities are evolving rapidly—they will be game-changers for maintaining consistency without physical effort. Future tools will likely offer integrated sanitizing and maintenance schedules, ensuring your home stays pristine with minimal manual intervention.
If you want to elevate your cleaning game, try the advanced tip of descaling your steam cleaner with vinegar monthly. This simple step can extend its lifespan and improve performance, ensuring every sanitization session is as effective as the first. For moving forward, integrating proven equipment with consistent maintenance routines will keep your home looking and feeling fresh long-term. To explore more about effective tools and techniques, check out these strategies and start building your arsenal today.
Lessons from the Trenches: What I Wish I Knew About Final Cleaning
One of the toughest truths I uncovered is that superficial cleaning creates a false sense of security. It wasn’t until I started targeting hidden spots with tailored techniques—like deep grout scrubbing or upholstery steaming—that I realized the importance of understanding surface-specific needs. The biggest lightbulb moment? Recognizing that not all disinfectants are equal—porous materials like fabric or wood require specialized products and longer dwell times to truly sanitize.
Another lesson learned was the power of patience. Rushing through a move-out clean often leaves behind unseen bacteria or grime that can cost you your deposit. Taking the time to revisit high-touch surfaces and double-check those obscure corners ensures your home is genuinely spotless. It’s a reminder that thoroughness beats speed when the goal is to confirm a sanitized space.
The final insight: investing in the right tools transforms your results. A quality HEPA vacuum, a versatile steam cleaner, and microfiber cloths are game changers. Each is an extension of a smarter approach—one that combines technique, patience, and the correct equipment. Trust me, the peace of mind that comes with knowing you’ve done a comprehensive job is worth every extra minute spent.
Tools and Resources That Amplify Your Sanitizing Success
Over the years, I’ve curated a set of tools that ensures every cleaning session hits the mark. For instance, I rely heavily on the ultimate upholstery care guide because it teaches me how to refresh fabrics without harm, extending their lifespan while maintaining hygiene. The effective sanitizing methods article is my go-to resource for understanding dwell time and surface-specific cleaning techniques, making sure no bacteria slip away.
For tools, the house cleaning strategies page offers insights into the best equipment for long-term maintenance—from microfibre cloths to steam cleaners. Lastly, the move-out cleaning hacks help streamline your process, ensuring you meet every landlord expectation without unnecessary stress. These resources have become my trusted companions on the path to a truly sanitized home.
Take Action and Keep Moving Forward
Getting move-out cleaning right isn’t just about meeting standards; it’s about cultivating a mindset of care and precision that lasts beyond the move. Each time you prioritize tailored techniques and quality tools, you’re investing in your peace of mind and a healthier living environment. Remember, the effort you put into proper sanitizing today will pay dividends in avoiding deposit disputes and creating a home that feels fresh long after the last box is unpacked. So, gear up, stay curious, and keep refining your approach. Your clean, sanitized home is within reach—just take that first thoughtful step.
Have you ever found yourself overlooking a hidden corner or using the wrong product? Share your experience below—I’d love to hear how you tackle those tricky spots!