
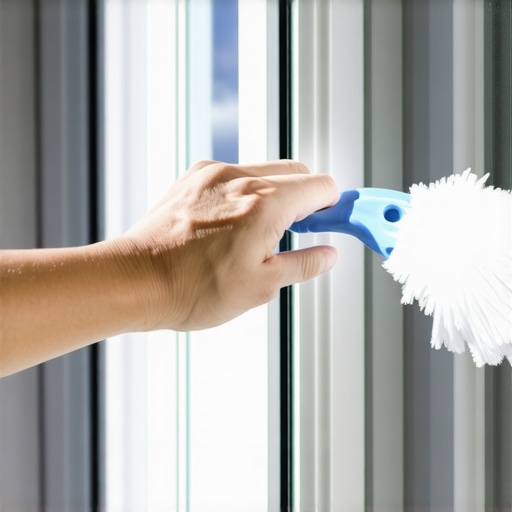
Ever been interrupted mid-cleaning to wrangling with stubborn grime in your window tracks? I sure have. There’s nothing quite like the frustration of trying to slide open a window only to have it stick because of years’ worth of dirt and debris. It hits differently when you realize that fresh, clear windows are not just about the glass—they’re also about those sneaky tracks lurking beneath the surface. And honestly, I used to ignore them, thinking they’d clean up easily with a quick wipe. Turns out, that’s a huge mistake. I learned this the hard way when I finally got fed up with my windows sticking before a weekend get-together, and I discovered that those tracks were the silent culprits keeping my view dull.
Why Clean Window Tracks Matters More Than You Think
Are You Overlooking the Hidden Dirt That Stains Your View?
When I first started noticing my window sashes not sliding smoothly, I thought it was just a matter of lubrication or maybe replacing the tracks altogether. But after some deep diving into cleaning tips, I realized that most people, including myself, make a critical mistake early on: they overlook those tiny crevices filled with dust, hair, and grime. Regular cleaning doesn’t cut it—those tracks need a thorough scrub to bring back their original glide. Did you know that according to cleaning experts, neglecting these areas can trap bacteria and mold, which not only hampers window operation but also affects indoor air quality? That was my lightbulb moment, and it made me realize how much I’d been missing at the back of my mind.
Ready to finally conquer those dirty tracks, restore your windows to their former glory, and save yourself future headaches? In the sections ahead, I’ll walk you through my proven methods—ones I wish I knew when I started—to make those tracks look and function like brand new. If you’ve ever stared at stubborn grime and wondered whether it’s worth the effort, I promise you, this isn’t just about aesthetics; it’s about maintaining the health of your home and making your cleaning routine more effective. Let’s roll up our sleeves and get those tracks shining again!**
Start with the Right Tools
Gather a firm toothbrush, a small flat-head screwdriver, microfiber cloths, a bucket of warm water, mild dish soap, and a vacuum cleaner with a brush attachment. Having these at hand makes the cleaning process efficient and thorough. I learned this the hard way when I started without the right tools, ending up with more mess and frustration. Once equipped, proceed to loosen and remove debris for a clear workspace.
Remove Loose Dirt and Debris
Use the vacuum’s brush attachment to suck out loose dust, hair, and dirt from the tracks. Pay close attention to corners and crevices where debris tend to accumulate. I vividly remember my initial attempt—using only a cloth—that left stubborn dirt behind. Vacuuming first prevents spreading grime further when scrubbing, and ensures you target the stubborn build-up more effectively.
Scrub the Tracks Thoroughly
Mix a few drops of mild dish soap into warm water. Dip a toothbrush into this solution and scrub along the tracks, focusing on stubborn spots. For particularly caked-on grime, gently pry with a flat-head screwdriver to open up crevices. Think of it like exfoliating your skin—gentle but firm pressure removes the dead cells and dirt, revealing a smoother surface. Repeat until the tracks look visibly cleaner, being careful not to scratch or damage the surface.
Wipe Away Residue and Debris
Use a damp microfiber cloth to wipe away the loosened dirt and soap residue. For tight corners, use cotton swabs dipped in cleaning solution to reach difficult areas. I remember after scrubbing, a simple wipe made a massive difference—leaving the tracks shiny and almost new-looking. Make sure to rinse and wring the cloth frequently to avoid spreading dirt back onto the tracks.
Dry and Lubricate the Tracks
Thoroughly dry the tracks with a clean towel or cloth to prevent rust. Once dry, apply a silicone-based lubricant or a specialized window track spray to enhance glide and prevent future build-up. Imagine the tracks as a fast lane—lubrication reduces friction, making window operation smooth and effortless. Avoid petroleum-based lubricants, which can attract more dirt over time, and consider using an old toothbrush to work the lubricant into the crevices.
Optional Deep Clean for Recalcitrant Grime
If tracks remain stubbornly dirty, create a paste with baking soda and water, apply it to the grime, and let sit for 10-15 minutes. Scrub with a toothbrush, then rinse with a damp cloth. This method is like giving your tracks a detox, breaking down hardened grime naturally. Just ensure you wipe away all residue to prevent future dirt sticking around.
Regular Maintenance to Keep Results
Schedule a bi-monthly cleaning, repeating this process to prevent dirt from building up. Regular upkeep saves time and keeps your windows functioning smoothly. For quick tips on maintaining your entire house, visit this guide, which includes essential cleaning routines that extend beyond window tracks.
Myth Busting: The Truth Most Cleaners Get Wrong
Many homeowners assume that routine surface cleaning is sufficient to maintain a truly healthy home environment. However, this misconception overlooks the importance of targeting hidden and less obvious areas. For instance, while shampooing carpets or wiping countertops is common, neglecting deep cleaning of upholstery can lead to continued dust and allergen buildup, as highlighted in the ultimate upholstery care guide. This oversight often results in lingering odors and reduced air quality, emphasizing the need for specialized cleaning techniques.
The Overlooked Risks of Incomplete Sanitization
Another widespread mistake involves underestimating the necessity of comprehensive sanitizing. Many believe that using disinfectant wipes or sprays on visible surfaces suffices, but bacteria and viruses often hide in cracks, porous materials, and beneath surfaces. Studies, such as those published in the Effective Sanitizing Methods for a Germ-Free Home, show that thorough sanitization requires attention to high-touch areas and proper contact time with cleaning agents. Rushing this process can create a false sense of security and allow harmful pathogens to persist.
Advanced House Cleaning Techniques You Might Be Missing
Many seasoned cleaners still rely on traditional wiping and vacuuming, missing out on innovative methods that can elevate hygiene standards. For example, electrostatic cleaning and ozone treatments are cutting-edge options gaining popularity for their superior ability to eliminate germs from large surfaces and deep fibers. These techniques are particularly useful during move-out cleanings, where landlords expect thorough sanitation to justify deposit refunds. To maximize results, consult professional insights or explore resources like move-out cleaning hacks.
It’s worth noting that the misconception that all cleaning products are equally effective can be detrimental. Certain disinfectants, such as those containing quaternary ammonium compounds, have been proven to be more effective against a broader spectrum of microbes. Skimping on quality or misusing products can leave behind viable bacteria, which is why understanding proper application and product selection is crucial. Experts emphasize that combining different cleaning modalities and investing in high-quality supplies significantly improves hygiene outcomes.
Have you ever fallen into this trap? Let me know in the comments. Remember, effective cleaning isn’t just about appearances—it’s about deep, intentional action that protects your health and prolongs the life of your home furnishings. For a comprehensive approach, check out house cleaning strategies designed to tackle these nuanced challenges.
Maintaining a clean and healthy home isn’t a one-time effort; it requires investing in the right tools and developing a routine that keeps everything functional over time. From specialized cleaning equipment to smart solutions, choosing the right arsenal can make your maintenance easier and more effective. One of my go-to tools is a high-quality cordless vacuum with a HEPA filter, like the Dyson V11. Its powerful suction and advanced filtration help trap allergens and dust, which is crucial for long-term air quality, especially if you have pets or allergy sensitivities. I personally prefer models with detachable handheld units for quick spot cleans on upholstery and tricky corners, which you can learn more about in this ultimate upholstery care guide.
For deep sanitation, an ultrasonic cleaner has become invaluable. I use one for sanitizing small items and some cleaning tools, ensuring bacteria and viruses are eradicated without harsh chemicals. These devices are especially pertinent in today’s climate, where germ control is paramount. Predicting future trends, I believe integrating IoT-enabled cleaning gadgets that sync with your smartphone will become standard, providing alerts for maintenance needs and scheduling cleanings proactively.
When tackling long-term results, consistency is key. To maintain the efficacy of your tools, regular calibration and replacement of accessories, like filters and brushes, are essential. For example, forgetting to replace vacuum filters can undermine the entire cleaning process by dispersing dust back into the air. Building a schedule—perhaps monthly for filter replacements—helps sustain optimal performance.
How do I keep my cleaning tools working flawlessly over time? I double down on regular maintenance routines. For my vacuum, I clean filters weekly and replace them every three to six months, depending on usage. I also ensure brush bars are free of hair and debris. For upholstery, I use a dedicated extractor with adjustable suction and heat settings; I follow manufacturer guidance and avoid over-wetting to prevent mold growth. Also, investing in a set of microfiber cloths ensures surface safety and an effective wipe without scratching.
Don’t underestimate the power of a good storage system—using labeled bins or wall-mounted organizers keeps your tools accessible and protected from dust and damage. Plus, it encourages more frequent use, preventing the buildup of neglected equipment. Remember, maintenance isn’t just about cleaning the surface—preserving your tools maximizes their lifespan and keeps your home cleaner longer.
For an extra layer of protection, consider implementing a sanitizing station near your entrance, equipped with sprays and wipes to disinfect hands and cleaning implements before use. This small addition fosters a healthier environment and extends the life of your tools.
By choosing durable, high-quality equipment and adhering to a disciplined maintenance schedule, you can ensure your home stays not only pristine but also safe for everyone. Curious about advanced home sanitizing techniques? Explore effective sanitizing methods for comprehensive insights.
Try incorporating a professional-grade ultrasonic cleaner into your routine—it’s a game-changer for hygiene and long-term tool health. Regularly check and replace filters, and keep your equipment clean, so you’re always ready for the next cleaning challenge. Trust me, this small investment pays off with cleaner air, healthier living spaces, and peace of mind.
Lessons the Dirt Taught Me About Real Cleanliness
The biggest takeaway from my deep cleaning journey is that some of the most crucial spots—like those sneaky window tracks—are often overlooked, yet they hold the secret to a truly fresh home. I used to believe surface cleaning was enough until I realized that grime accumulates where I can’t see, affecting air quality and inviting germs. It was a lightbulb moment when I discovered that regular maintenance isn’t just about appearances; it’s about health and longevity. Another lesson was that tools matter—investing in quality equipment like a cordless vacuum or ultrasonic cleaner saved me hours and boosted results. Lastly, I learned that consistency beats intensity. Scheduling regular cleanings prevents build-up and keeps everything running smoothly. These insights transformed my approach from casual tidying to a strategic defense against household grime, ensuring my home stays healthier and more inviting for everyone.
Tools and Resources That Elevated My Cleaning Game
Over the years, I’ve curated a toolkit that makes house cleaning more effective and less stressful. My top choice is the Dyson V11 cordless vacuum because of its powerful suction and HEPA filtration, which traps allergens—crucial for allergy sufferers. For upholstery deep cleaning, I rely on the Ultimate Upholstery Care Guide, which offers tips on maintaining fabric freshness without damage. To sanitize small items or tricky tools, I use an ultrasonic cleaner—an often-overlooked device that kills germs efficiently. For quick daily maintenance, microfiber cloths with a good disinfectant spray help me wipe surfaces and keep germs at bay. These tools combined have transformed my cleaning routines, making home hygiene more achievable and enjoyable.
Your Turn to Embrace the Power of a Truly Clean Home
Taking your house cleaning beyond superficial efforts can significantly improve your living environment and wellbeing. Remember, effective sanitizing isn’t just about surface appearance—it’s about targeting hidden areas, using the right tools, and establishing a routine that makes deep cleaning second nature. Every small step, like cleaning those window tracks or sanitizing high-touch surfaces, adds up to a healthier home. So, I challenge you to pick one new cleaning habit today—be it using an ultrasonic cleaner or applying a silicone lubricant to window tracks—and see the difference it makes. Cleanliness is a journey, and with dedication, your home can become a sanctuary of pure, wholesome comfort. Let’s start today—your future self will thank you!