
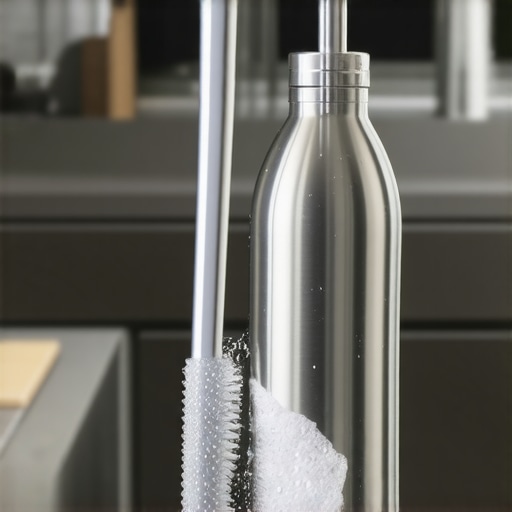
I will be the first to admit it: I used to be that person who simply topped off my water bottle for three days straight without ever letting a drop of soap touch the inside. It seemed fine until one Tuesday afternoon when I took a big swig and noticed a distinct, earthy taste—kind of like a damp basement. When I finally peered inside with a flashlight, I found a fuzzy ring of black mold tucked right under the silicone seal. It was a wake-up call that my hydration habit had become a health hazard. We carry these bottles everywhere, from the gym to the office, yet we often treat them like they are self-cleaning. Today, I am going to walk you through exactly how to break that cycle of grime and ensure your water stays as fresh as it looks.
The Hidden Science of That Weird Bottle Smell
If you have ever caught a whiff of something funky coming from your bottle, you are not smelling the water. You are smelling a biofilm—a complex colony of bacteria and fungi that clings to surfaces and thrives in moist environments. I learned the hard way that a quick rinse with cold water does absolutely nothing to disrupt this microscopic fortress. To really get things clean, you need to employ effective sanitizing methods for a germ-free home that actually break down those stubborn proteins. Many people assume that if the bottle looks clear, it is safe, but a study by Treadmill Reviews found that the average reusable water bottle can harbor over 300,000 colony-forming units of bacteria per square centimeter, which is often more than a pet’s food bowl.
Does it actually matter if I skip a day?
I used to think that as long as I was the only one drinking from it, the germs were ‘my germs’ and therefore harmless. That was a huge mistake. Bacteria from your mouth travel back into the bottle and multiply rapidly at room temperature. This is why learning sanitizing secrets for a safer house in 2025 is so vital; it is about preventing that buildup before it becomes a colony. Have you ever noticed a slimy film on the bottom of your bottle and wondered if you were actually drinking mold? If so, you are definitely not alone, and it is time for a deep clean.
Why Your Dishwasher Might Be Failing You
One of the biggest blunders I made early on was assuming the dishwasher was a magic cure-all. While the heat is great, the spray arms often cannot reach the narrow depths of a tall bottle or the tiny crevices of a complex lid. You often have to take matters into your own hands, especially when it comes to accessories like straws. I found that knowing how to sanitize reusable straws without a special brush saved me so much frustration when I realized my dishwasher was leaving behind a grey residue inside the tubes. Real sanitization requires a combination of the right temperature and getting into those hidden gaskets that most of us ignore. We are going to dive into the specific steps to dismantle your bottle and tackle those germ-traps once and for all.
Strip Your Bottle Down to the Bare Bones
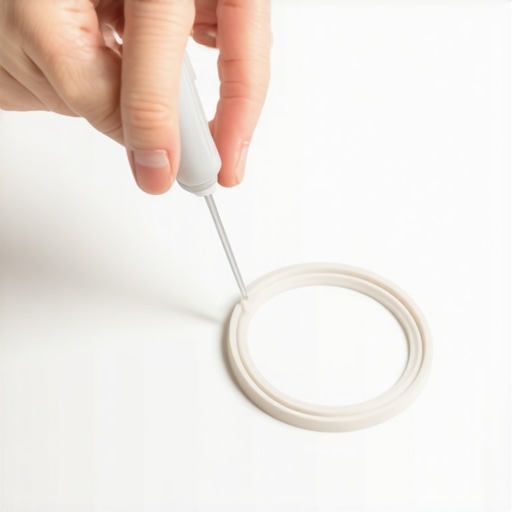
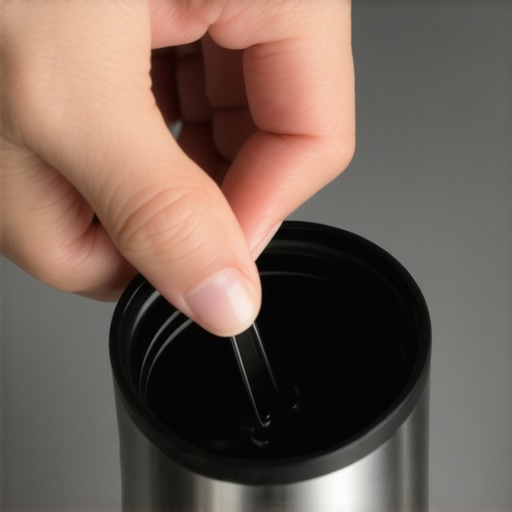
The biggest mistake I ever made was thinking a bottle was just two parts: the container and the lid. It’s not. Most high-end bottles have three or four hidden components, including silicone gaskets and pressure-release valves. To get a truly deep clean, you have to perform a full teardown. I remember one specific Saturday when I decided to ‘really’ clean my favorite travel mug. I used a small pick to pop out the clear O-ring in the lid and was horrified to find a layer of grey sludge hiding underneath. It didn’t matter how many times I ran it through the dishwasher; the water couldn’t reach that pocket. This is similar to how you need to clean the gaskets in your fridge to prevent mold; if you aren’t physically removing the barrier, the bacteria just keeps growing.
Pop the seals every single time
If your lid has a rubber ring, it needs to come out. Use a blunt tool like a spoon handle or a dedicated cleaning pick to gently pry it loose. Be careful not to tear the silicone, but be firm. Once it’s out, you’ll likely see the biofilm I mentioned earlier. Just as you follow a daily house cleaning routine to maintain perfection, you should make this gasket-pulling a weekly habit. Once removed, soak these small parts in a bowl of warm, soapy water while you focus on the main body of the bottle.
Kill the Biofilm with Heat and Friction
Soap is great for breaking down oils, but for a bottle that has developed that ‘earthy’ smell, you need something more aggressive. I found that a simple mixture of white vinegar and baking soda works wonders for loosening mineral deposits and killing surface-level bacteria. However, friction is the real hero here. You cannot rely on soaking alone. You need a bottle brush that can reach the bottom and scrub the ‘shoulders’ of the bottle—the area where the neck narrows. When I first started doing this, I realized my brush was too short, and I was leaving a ring of grime at the very base. I had to upgrade to a long-handled stiff brush to see real results.
Sanitize like the pros
After scrubbing, it’s time to sanitize. If your bottle is stainless steel and not vacuum-insulated (check the manufacturer’s label first!), you can use boiling water. For insulated bottles or plastic ones, stick to a diluted bleach solution or a specialized cleaning tablet. This level of detail is one of those effective house cleaning secrets from cleaning experts that separates a ‘rinse’ from a true ‘disinfection.’ Much like following an ultimate upholstery care guide for lasting freshness, the goal isn’t just to make it look clean, but to ensure the environment is hostile to future mold growth. If you are moving houses, these house cleaning strategies for a sparkling home today will help you keep all your kitchenware in top shape.
Dry it or lose the progress
The final, and most ignored, step is the drying phase. If you put a wet bottle back together and close the lid, you have just created a perfect, dark, humid incubator for the very bacteria you just killed. I always prop my bottles upside down on a drying rack with the lids off and gaskets separated for at least four hours. I once rushed this process, snapped the lid on while it was still damp, and by Monday morning, that ‘wet basement’ smell was already back. Don’t waste your hard work by trapping moisture inside.
Stop Treating Vinegar Like a Magic Bullet
In the world of “green” cleaning, everyone says vinegar is the ultimate solution. In my experience, while it is a fantastic descaler for hard water, it is a mediocre disinfectant at best. I’ve seen people use it exclusively on their water bottles for years and then wonder why they still get a scratchy throat every few weeks. The nuance here is that vinegar is only effective against a limited range of pathogens. If you really want to clear out the heavy hitters like E. coli or salmonella, you need effective sanitizing methods for a germ-free home that include EPA-registered disinfectants or high-heat sterilization. Relying on vinegar for everything is one of those sanitizing secrets for a safer house in 2025 that the all-natural crowd often gets wrong; it’s better than nothing, but it’s not a complete shield.
Why do some bottles still stink after a bleach soak?
This is a common frustration for advanced cleaners. You’ve done the soak, you’ve used the bleach, and yet that “old gym bag” smell persists. This happens because of the “contact time” or “dwell time.” According to the CDC, a disinfectant must stay wet on a surface for a specific period—often up to ten minutes—to actually kill the bacteria. A quick dip won’t cut it. Furthermore, if you haven’t physically scrubbed the biofilm away first, the sanitizer only kills the top layer, leaving the base of the colony intact. This is exactly why you should why you should always vacuum your mattress before you sanitize it; you have to remove the physical debris before the chemical can reach the germs. Have you ever fallen into this trap where you skip the scrub and go straight to the soak? Let me know in the comments.
Don’t Kill Your Gaskets with Direct Spraying
One of the most expensive “oops” moments I see involves the way people apply cleaning products. There is a huge why you should never spray cleaning products directly on surfaces, especially those with rubber or silicone components. When you spray directly into a bottle lid, the pressure can force liquid into areas it can’t easily evaporate from, leading to mold growth *inside* the seal itself. This same logic applies to your home; if you are performing a move-out clean checklist to simplify your transition, spraying directly on cabinets or electronics can cause permanent damage. Instead, spray your cloth and then wipe. This controlled application ensures you are sanitizing without saturating delicate gaskets.
The Direct Connection to Your Living Room
You might think your water bottle has nothing to do with your couch, but the principles of biofilm and bacteria transfer are identical. If you are following an ultimate upholstery care guide for lasting freshness, you’ll realize that moisture management is the most critical factor in sanitation. Just as a damp bottle lid breeds mold, an over-saturated sofa cushion becomes a breeding ground for bacteria during a deep clean. Whether you are using move-out cleaning strategies to secure your deposit or just trying to keep your daily gear fresh, the goal is the same: mechanical cleaning followed by targeted, dry-fast sanitization. Mastering these small nuances is what makes your house cleaning strategies for a sparkling home today truly professional-grade.
The Gear That Actually Makes a Difference
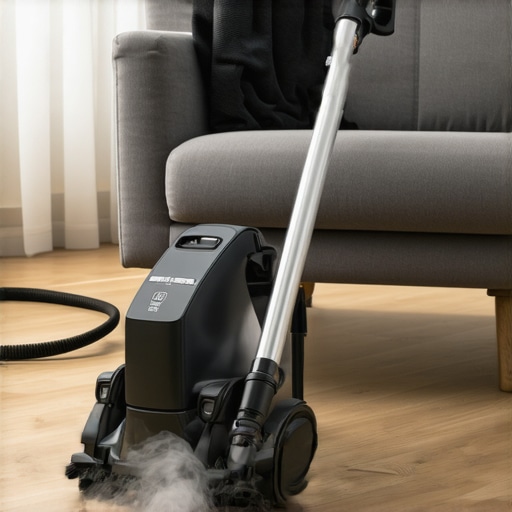
I have spent a small fortune on gadgets, but only a few have earned a permanent spot in my utility closet. If you are serious about more than just surface-level sparkles, you need a high-temperature steam cleaner. I personally use a canister model that reaches 275°F because heat is the only way to ensure true disinfection without leaving behind sticky chemical residues that actually attract more dirt. I use mine for everything from how to sanitize your bathroom floor using steam alone to lifting embedded oils from furniture. When you see the steam pulling grime out of a crevice you thought was clean, it changes your entire perspective on hygiene. This tool is a cornerstone of any upholstery cleaning tips for a fresh home revival because it treats the fibers and the air inside them simultaneously.
How do I maintain these high standards over time?
The secret to long-term results isn’t a 10-hour cleaning spree every six months; it is the integration of small, high-impact habits. For instance, I keep a dedicated set of micro-brushes right next to my dish rack. These aren’t just for water bottles; I use them for the gaskets in my blender, the seals on my food storage containers, and even the edges of my sink drain. According to the NSF/ANSI 184 standard for residential dishwashers, a machine must reach a final rinse temperature of 150°F to be certified for sanitization, yet many home units fail to sustain this heat. This is why manual intervention is so critical. If you are preparing for a transition, using sanitizing hacks for safe house transitions ensures that the high standards you set today don’t degrade by the time you move in. It is about creating a protective barrier through consistency.
Self-Cleaning Homes and the Future of Hygiene
I predict that in the next five to ten years, we will see a massive shift toward photocatalytic coatings in residential kitchens and bathrooms. These are surfaces treated with titanium dioxide that essentially use ambient light to break down organic matter and bacteria on contact. Until then, we have to be the primary ‘engine’ of cleanliness. If you are currently dealing with a rental, following move-out cleaning hacks ensure your deposit refund while also protecting the health of the next tenant. It’s a win-win that requires the right mindset and the right brushes. My favorite method for keeping it simple is a daily house cleaning routine to maintain perfection that focuses on high-touch points first.
The Pro Tip You Can Try Tonight
If you take away nothing else, try this: go to your kitchen right now and pull the silicone ring out of your most-used travel mug or water bottle lid. If it feels slimy or looks discolored, soak it in a 50/50 mix of hot water and white vinegar for 20 minutes, then scrub it with a firm toothbrush. This simple act of mechanical friction is more effective than any ‘quick rinse’ cycle. Once you see the difference, apply that same logic to the rest of your home. Whether you are using move-out cleaning strategies to secure your deposit or just keeping your living room fresh, remember that the most effective tool is the one that actually touches the hidden grime. I challenge you to find one ‘hidden’ gasket in your home today and give it the deep clean it deserves.
My Toughest Realizations About Keeping My Gear Safe
Over the years, I have learned that a clean-looking bottle is often a deceptive one. The hardest lesson I had to swallow was that if I can smell the bacteria, I am already several days too late. By the time that ‘earthy’ scent appears, the biofilm has already matured into a protective shield that resists simple rinsing. I also realized that color is a huge red flag; if those clear silicone gaskets start to take on a pinkish or orange hue, you are likely dealing with Serratia marcescens, a hardy bacteria that thrives on moisture and fatty substances. This is why I have simplified my gear over time. I now choose bottle designs with fewer moving parts because even the most effective house cleaning secrets from cleaning experts cannot save a lid with unreachable internal chambers. Finally, I’ve learned that dwell time is more important than elbow grease. If your sanitizer doesn’t sit for the full recommended time, the bacteria will simply bounce back by tomorrow morning.
The Tools I Actually Reach For Every Week
You do not need a closet full of chemicals, but you do need precision. My first essential tool is a dedicated set of micro-brushes. I use these not just for straws, but for the tiny air-vent holes in flip-top lids that are notorious for harboring black mold. Second, I highly recommend checking the NSF International database; it is my go-to source for verifying which cleaning agents truly meet the rigorous effective sanitizing methods for a germ-free home. Third, I never go without a dedicated drying tree. Propping bottles up at an angle allows for maximum airflow to the bottom, which is a cornerstone of a daily house cleaning routine to maintain perfection. Lastly, a small 10x magnifying glass has become my secret weapon for inspecting seals. It sounds extreme, but seeing the hidden grime up close will change how you clean forever.
#IMAGE_PLACEHOLDER_E#
Building a Healthier Home One Sip at a Time
Taking care of your reusable water bottle might seem like a minor task in the grand scheme of maintaining a household, but it is a vital step toward total wellness. When you master the art of dismantling and disinfecting your daily gear, you are building the same habits required for sanitizing secrets for a safer house in 2025. You deserve to know that every sip you take is as fresh as the water you poured in. Don’t let the invisible world of bacteria dictate your health; take control of your environment, one gasket at a time. Have you ever found a surprise mold colony in a place you thought was clean? Let me know your ‘oops’ moment in the comments below!