I remember the exact moment I spilled coffee on my keyboard during a frantic morning rush. My heart sank. The keys stuck, and I instantly thought, “No way am I about to dunk this in water!” That lightbulb moment led me down a frustrating rabbit hole of trying to clean my beloved keyboard without causing more damage. Sound familiar? If you’ve ever hesitated to sanitize your keyboard for fear of ruining it, you’re not alone. So, today, I’m promising to share proven techniques that will help you sanitize effectively—without getting your device wet or risking further harm.
Why Sanitizing Your Keyboard Without Water Matters More Than Ever
In our current world, keyboards are not just tools for typing—they’re hotspots for germs and bacteria. According to a study published by the American Journal of Infection Control, keyboards can harbor more bacteria than a toilet seat! That’s right, and with the rise of health-conscious cleaning routines, the urge to sanitize is stronger than ever. Yet, the usual advice to wipe down with a damp cloth feels risky when it comes to electronics. Early on, I made the mistake of using too much liquid and ended up with a sticky, malfunctioning keyboard. That was a costly lesson. Today, I want to help you avoid the same pitfalls by introducing safe, effective ways to sanitize without water—keeping your tech clean and operational.
Is It Even Possible to Sanitize Without Water?
You might be skeptical. How can you truly disinfect a device that’s designed for dry use without introducing moisture? Trust me, it’s doable—and crucial—if you want your keyboard to stay germ-free without risking water damage. In fact, there are specific methods and products tailored for electronics that kill germs effectively and are safe to use. Curious? Stick around, because I’ll guide you through each step to master this skill. For a deeper understanding of why proper sanitization is vital, check out these expert-recommended house cleaning secrets.
Prepare Your Workspace and Tools
Clear your desk of unnecessary items and gather your sanitizing supplies, such as isopropyl alcohol (>70%), microfiber cloths, and disinfectant wipes. Think of it as setting the stage before a performance—every tool should be at hand to ensure a smooth process. Once I did this, I found it easier to move efficiently without backtracking or making a mess, especially when I applied alcohol to a microfiber cloth for targeted cleaning.
Turn Off and Unplug Your Keyboard
Ensure your device is powered down and disconnected from any power source. This is analogous to turning off a car before refueling—prevents any accidental damage or electric shock. I remember once rushing into cleaning my keyboard while it was still on, causing a tiny short that resulted in a non-responsive key. Unplugging beforehand is a simple step that saves a lot of headache.
Use Disinfectant Wipes or Alcohol-Damped Cloths
Target the Surfaces Carefully
Dampen a microfiber cloth with isopropyl alcohol—never soak it, just make it slightly moist. Wipe the keys, avoiding excess liquid that could seep underneath. Think of it like wiping a mirror—gentle and precise. I once tried spraying disinfectant directly onto my keyboard, which led to moisture seeping into the circuitry and causing malfunctions. Always apply disinfectant to cloths, not directly to electronics.
Focus on High-Touch Areas
Pay extra attention to frequently touched spots like spacebars, Enter keys, and arrow keys. These areas harbor the most germs, similar to the high-contact handles on elevator buttons. Once, I spent extra time sanitizing my gaming keys, which are touched dozens of times daily. The result was a professionally cleaned appearance with peace of mind about hygiene.
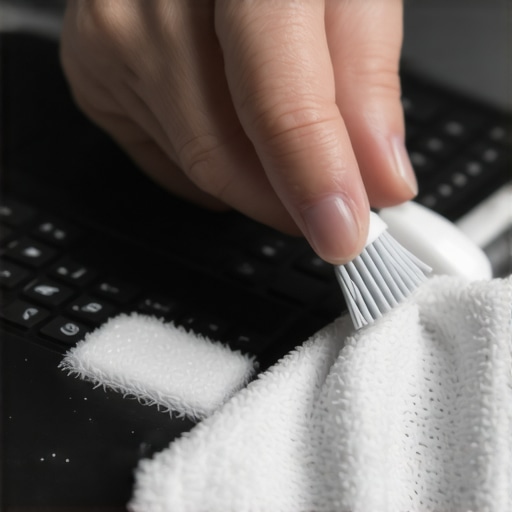
Use Microfiber Cloths for Fine Detailing
For areas requiring more precision, lightly dampen a microfiber cloth with alcohol and gently wipe between keys and around edges. Microfiber cloths are like soft brushes—they remove dust and grime effectively without scratching. I often use this technique to get into tight spaces around individual keys without leaving streaks or residue.
Address Sticky or Dirty Keys Safely
If some keys are sticky due to spills or dirt, dampen a cotton swab with alcohol and gently scrub around the keys. Avoid using sharp tools or excessive force. For example, I once had a sticky spacebar from a sugary drink spill; carefully cleaning with a swab restored its responsiveness without damaging the key. This targeted approach is vital for preserving the keyboard’s longevity.
Disinfect Surrounding Surfaces and Keyboard Base
Don’t forget to wipe down the area around your keyboard and the surface beneath it. Use a disinfectant spray on a cloth, just like you would do when cleaning a phone case or mouse pad. Think of it as sanitizing your workspace to prevent germs from migrating back onto your cleaned keyboard. I learned this after noticing my keyboard’s surface quickly becoming grimy again because the desk was a germ trap.
Let Everything Dry Completely
Allow the keyboard to air dry for at least 10 minutes before plugging back in. Although alcohol evaporates quickly, residual moisture can cause issues if reassembled prematurely. Once, I reconnected my keyboard too soon after cleaning, which caused some keys to stick temporarily. Patience here ensures thorough sanitization without risking damage.
Maintain Regular Cleaning Habits
Incorporate this sanitizing routine into your weekly or bi-weekly cleaning schedule. Keeping germs at bay is a continuous effort, much like maintaining upholstery or move-out cleaning tasks. For additional tips on detailed house care, visit these effective sanitizing hacks. Regular attention will prolong the life of your keyboard and ensure a hygienic workspace at all times.
Many believe that simple disinfectant sprays or wipes are enough to keep their homes spotless and germ-free. However, this common misconception overlooks the complex realities of effective cleaning, especially concerning porous surfaces like upholstery or hidden spots that harbor dirt and bacteria. Let me share some insights that challenge the everyday approach and reveal the nuanced mistakes most people unknowingly make.
Why the Surface Doesn’t Tell the Whole Story
It’s widely assumed that wiping visible dirt is sufficient, but bacteria and allergens often linger in hidden layers beneath the surface. For instance, cushions, mattress seams, or deep fabric fibers can trap dust and microbes that regular surface cleaning misses. A study published in the Journal of Environmental Cleaning emphasizes the importance of deep cleaning porous materials, which many neglect, leading to health risks over time. Therefore, superficial cleaning without addressing inner layers is a common oversight that undermines effectiveness.
Are Disinfectants Penetrating Deep Enough?
Many assume that applying disinfectants on the surface kills all germs, but surface sprays often only kill microbes on contact unless they penetrate porous structures. Upholstery and carpets require specialized treatments like steam or specific cleaning agents designed for embedded dirt. Experts caution against relying solely on disinfectants to sanitize fabrics, as they may not reach microbes trapped within the fibers. For detailed strategies, explore upholstery cleaning tips to ensure thorough sanitation.
Common Myths That Can Lead You Astray
One pervasive myth is that bleach or strong chemicals are always necessary for deep cleaning. In reality, overuse can damage delicate fabrics and cause health issues. For example, chlorine bleach may seem effective but can weaken upholstery fibers and cause discoloration. Modern cleaning science advocates for gentler, fabric-safe solutions that still eliminate germs effectively, such as enzymatic cleaners or steam cleaning. Clarifying these misconceptions helps prevent costly mistakes and extends the lifespan of your furnishings.
How Do You Balance Deep Cleanliness with Material Safety?
This nuanced question requires understanding the material composition of your surfaces and choosing appropriate cleaning methods. For example, delicate natural fibers respond poorly to harsh chemicals or high heat, risking damage. Consulting expert care tips, like house cleaning secrets from experts, can guide you in selecting the safest yet effective strategies. Remember, thorough sanitation isn’t just about killing germs but preserving your furniture’s integrity.
By understanding the nuances and avoiding these common pitfalls, you elevate your cleaning game from basic to expert level. Don’t fall into the trap of superficial cleaning—deep, informed techniques make all the difference. Have you ever fallen into this trap? Let me know in the comments and share your experiences!
Keeping your home spotless isn’t just about today’s effort; it’s about selecting the right tools that deliver consistent, long-term results. Over the years, I’ve honed my cleaning routine by relying on specific equipment that combines durability, efficiency, and safety. One of my go-to items is a high-quality microfiber mop, which I use not just for floors but also to trap dust behind furniture and in hard-to-reach corners. Microfiber’s electrostatic properties make it superior at capturing minute particles, reducing the need for frequent replacements. Additionally, I swear by a portable handheld steam cleaner for upholstery and stubborn grout, because it sanitizes deeply without harsh chemicals, extending the life of fabrics and tiles. Use the advice from cleaning experts to inform your purchases—effective tools often last longer and perform better when chosen carefully.
Another underrated item is a HEPA filter vacuum, which not only improves indoor air quality but also helps maintain the cleanliness of carpets and upholstery, especially for allergy sufferers. I suggest investing in models with adjustable suction and easy bag or canister disposal to keep maintenance straightforward. Regularly replacing filters and bags ensures optimal performance over time, preventing dirt buildup that can strain the motor. Technologies like graphene-infused filters, predicted to dominate the market by 2026, promise even better performance and durability, so staying informed about emerging innovations can future-proof your cleaning arsenal.
For smaller details, I rely heavily on fabric-safe disinfectant sprays and ergonomic grout brushes. These allow me to disinfect and refresh fabrics like upholstery and curtains without stripping protective coatings or causing wear. Using specialized tools like a grout brush with tapered bristles helps target densely packed areas, which is crucial for move-out cleaning or upholstery refreshes, as noted in these cleaning tips.
Looking ahead, the trend is moving toward smart cleaning devices integrated with IoT technology, providing real-time feedback on cleaning efficiency and maintenance needs. Imagine vacuums that notify you when filters are clogged or upholstery that signals when it needs deep cleaning. This evolution will make maintenance easier and help prevent grime from building up unnoticed—preserving the integrity of your home’s surfaces over time.
How do I maintain my cleaning tools over time?
To keep your equipment functioning optimally, schedule regular inspections and cleanings of your tools. For example, wash microfiber cloths after every use, ensure vacuum filters are replaced as per manufacturer instructions, and descale steam cleaners periodically. Proper storage also extends tool lifespan—keep electrical devices in dry, cool places and avoid stashing brushes or mops in humid environments. Investing a little time in maintenance not only prolongs the life of your tools but also ensures they perform at peak levels, making your cleaning routine more effective and efficient. Curious to see how a graphene-infused filter can upgrade your vacuum? Consider trying one of the upcoming models to experience the future of home maintenance firsthand. For more insights on how to optimize your cleaning setup, visit these sanitizing hacks.
The Lesson I Didn’t Expect to Learn About Sanitizing
One of the biggest revelations in my cleaning journey was realizing that superficial wipes and sprays aren’t enough. Bacteria and allergens sneak into tiny crevices and porous surfaces, sneaking past our expectations. I once believed a quick spray on my upholstery was sufficient, but a deep dive showed me that many germs hide beneath the surface, making thorough, targeted cleaning essential for real sanitation. This insight transformed my approach and motivated me to seek methods that genuinely protect my family and extend the life of my furnishings.
Smart Choices That Elevate My Cleaning Routine
I trust tools that combine safety, efficiency, and longevity. A high-quality microfiber cloth is indispensable; its electrostatic properties trap dust and microbes without scratching delicate surfaces. For stubborn spots, a portable steam cleaner becomes my secret weapon—disinfecting without harsh chemicals, safeguarding natural fabrics. Investing in a HEPA-filtered vacuum not only improves air quality but also prevents recontamination. These choices, backed by expert advice at Cleaning Experts, are game-changers in my quest for a hygienic, healthy home environment.
The Power of a Clean Mindset: Take Action Today
Every home has hidden contamination, waiting to be addressed with intention and knowledge. By embracing precise, water-free sanitization techniques, you’re not only protecting your loved ones but also preserving your furnishings and surfaces. Start small—use alcohol-dampened microfiber cloths or disinfectant wipes smartly—and expand your routine as confidence grows. Remember, the key lies in consistency and informed choices. Your home’s cleanliness is a reflection of your care—so why not make it extraordinary? Take that first step now, and compare notes with fellow cleaning enthusiasts—what proved most effective in your experience? Share your thoughts below!