
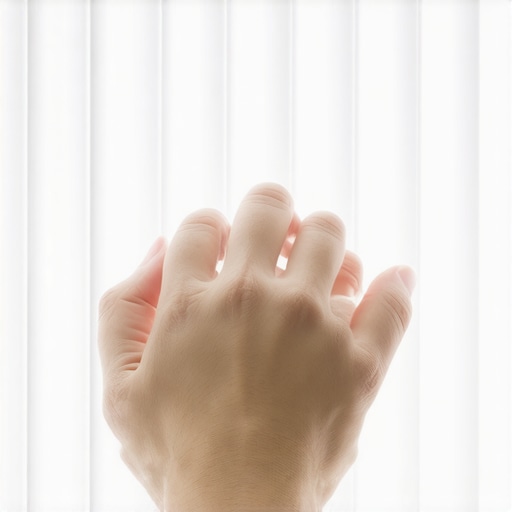
I was standing in the middle of my empty living room, the late afternoon sun hitting those vertical slats at just the right angle to reveal every single layer of grey fuzz and pet dander. I was knee-deep in a move-out clean, and my fancy microfiber duster had snapped in half ten minutes prior. I felt that familiar surge of panic—the kind where you’re certain you’re going to lose your security deposit over a few dusty strips of plastic. I actually considered hand-wiping every single slat with a paper towel. Spoiler alert: that was a terrible idea. It was slow, frustrating, and left behind more lint than it removed. I needed a solution that worked with what I already had in my cupboards.
Ditch the Gadgets for a Better Way
We’ve all been there, lured into the cleaning aisle by those three-pronged “blind cleaners” that look like futuristic pasta tongs. But here’s the truth I learned the hard way: you don’t need them. In fact, most of those gadgets just move the dust around rather than lifting it. I used to think I needed a professional-grade kit to get a sparkling home today, but I was wrong. I once made the mistake of spraying a heavy degreaser directly onto the fabric slats, which left permanent yellow streaks. It was a total disaster that forced me to replace the entire set. Building a daily house cleaning routine is great, but window treatments always seem to fall through the cracks until they are a visible nightmare.
Do You Really Need That $20 Specialized Duster?
The short answer is no. According to the Environmental Protection Agency (EPA), indoor air can be two to five times more polluted than outdoor air, largely due to the accumulation of dust and allergens on surfaces like blinds. But cleaning them shouldn’t require a specialized inventory or a trip to the hardware store. My “lightbulb moment” happened when I realized I already had the perfect tool in my laundry basket. It’s about being resourceful, especially when you are trying to ensure your deposit refund. Have you ever felt like you’re failing at adulting because you can’t keep your window treatments clean? Drop a comment and tell me your worst cleaning “fail”—I promise mine is worse. I eventually discovered the trick for cleaning blinds with a pair of old socks, and it changed everything. It’s faster, more effective, and costs exactly zero dollars. If you are preparing for a transition, adding this to your move-out cleaning strategies will save your sanity and your wallet.
Assemble Your Zero-Dollar Cleaning Kit
Forget the aisles of plastic junk and those overpriced three-pronged gadgets. To start, you only need to raid your laundry basket for a pair of old, clean tube socks—preferably those with a bit of texture or ‘loop’ in the fabric. This texture acts like a magnet for allergens, which is crucial for effective sanitizing methods for a germ-free home. I keep a dedicated bin of these ‘cleaning socks’ now, but during my first frantic move-out clean, I was just grabbing whatever was dry. You’ll also want a spray bottle with a very mild solution. If you are cautious about the finishes on your window treatments, the truth about castile soap and its cleaning power is that it provides a gentle lift without the harsh residues that attract more dust later.
Master the Pinch and Slide Technique
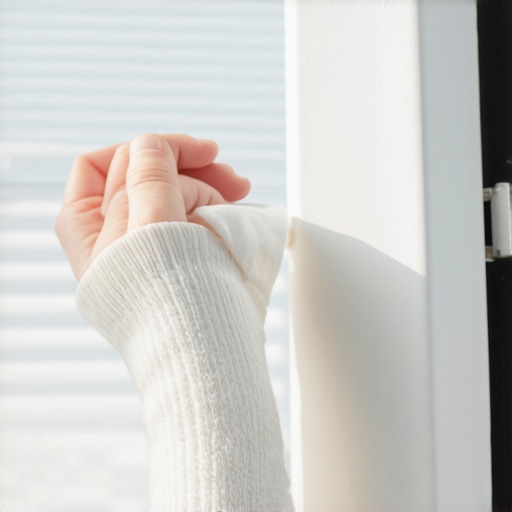
Slip the sock over your dominant hand like a puppet. Lightly mist the fabric of the sock—never soak it. I once made the mistake of using a dripping wet sponge on wooden slats, and they warped so badly they looked like wavy potato chips within forty-eight hours. Now, I use just enough moisture to grab the dust without leaving a trail of water. Pinch the individual slat between your thumb and fingers, then slide your hand from one end to the other. You are essentially cleaning both sides of the slat at once, which cuts your work time in half. It is a similar logic to how you might handle upholstery cleaning tips for a fresh home revival: focus on the friction and the right tool rather than flooding the surface with liquid.
Step Up Your Sanitizing Game
Dust isn’t just an aesthetic problem; it’s a biological record of everything that’s been floating in your air. When you’re looking for sanitizing secrets for a safer house in 2025, you have to think about these forgotten vertical surfaces. If your blinds are in the kitchen, they likely have a sticky layer of aerosolized cooking fat that bonds the dust to the plastic. In these cases, you might need to apply how to get grease off kitchen cabinets without removing the finish techniques—specifically using a tiny drop of degreasing dish soap in your spray mix to break that chemical bond. This ensures you aren’t just moving the grime around but actually removing it from the environment.
Clean the Tracks to Finish the Job
There is absolutely no point in having pristine slats if the window tracks look like a graveyard for dead flies and outdoor grit. This is often the first place a property manager looks during a final walk-through. You can use the same sock-covered finger to get into the narrow grooves, or if the grime is really baked in, you can follow specific advice on how to scrub window tracks so they look brand new again. I remember a particular apartment where I spent three hours polishing the glass but completely ignored the tracks; the property manager ran his finger through the black silt and just sighed. It was an embarrassing lesson in attention to detail. Now, making sure those tracks are spotless is a core part of how to get your full security deposit back with this move-out list. It proves you’ve maintained a daily house cleaning routine to maintain perfection throughout your entire tenancy.
I used to believe that the more a product cost, the better it would perform. I’d buy the premium sprays promised to ‘dissolve’ grime instantly. But here is the contrarian truth that most big-box brands won’t tell you: heavy-duty chemicals often do more harm than good by leaving behind a sticky surfactant residue. This residue acts like a magnet for new dirt, meaning your ‘clean’ surfaces actually get dirty faster than if you had used nothing at all. This is a crucial nuance often missed in a standard move-out clean checklist to simplify your transition. If you leave a film on the walls or baseboards, the next person’s dust will stick to it within hours, making your hard work look like a failure during the final walkthrough.
The Trap of Over-Saturation
The biggest ‘oops’ I see—and one I’ve been guilty of myself—is the urge to soak a stain. Whether it is a spill on the rug or a smudge on the sofa, our instinct is to flood the area with cleaner. When it comes to upholstery cleaning tips for a fresh home revival, moisture is often the enemy. If you are dealing with ‘S’ coded fabrics, using water-based cleaners can cause permanent rings or even shrink the fabric. I’ve seen beautiful linen chairs ruined because someone tried to ‘spot clean’ with a damp cloth. This is why learning how to treat s-coded upholstery fabric without ruining it is vital for anyone who values their furniture’s longevity.
Is Your Steam Cleaner Actually Making Your Home Dirtier?
It sounds like a paradox, doesn’t it? We assume heat and steam equal pure sanitization. However, according to the Institute of Inspection Cleaning and Restoration Certification (IICRC), if a surface remains damp for more than 24 to 48 hours, you are essentially creating a greenhouse for mold and bacteria. Many home-grade steam cleaners don’t have the suction power to pull that moisture back out. If you’re looking for sanitizing secrets for a safer house in 2025, you have to prioritize dry times just as much as the cleaning agent itself. Have you ever cleaned a rug only to have it smell like a wet dog two days later? Have you ever fallen into this trap? Let me know in the comments.

Why Your Fabric Protector is Probably Failing
Most people spray a fabric protector once and assume they are shielded for life. The hidden nuance is that friction from sitting, vacuuming, and walking wears these coatings down in mere months. If you’re following the ultimate upholstery care guide for lasting freshness, you know that re-application is key, but only after a deep clean. Applying protector over a dirty surface just seals the dirt into the fibers. It is much like house cleaning strategies for a sparkling home today; you can’t build a beautiful finish on a shaky, dusty foundation. If you want to ensure your deposit refund, focus on removing the old layers of product rather than just adding new ones. This level of detail is what separates a DIY attempt from a professional-grade result.
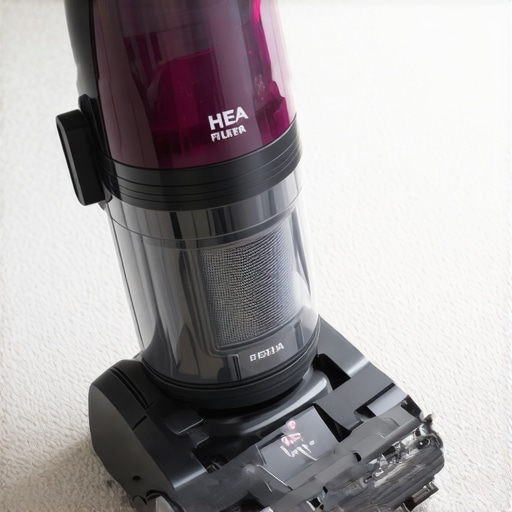
I eventually realized that my $80 big-box vacuum was essentially a “dust cannon.” It sucked up the big crumbs but blasted the fine skin cells and dander out the exhaust, right back into my breathing zone. This is precisely why your vacuum cleaner is actually making your house dustier. I finally bit the bullet and upgraded to a machine with a certified sealed HEPA system. If the air isn’t passing through a medical-grade filter before it exits the machine, you aren’t cleaning; you’re just rearranging the molecules. I always look for the Carpet and Rug Institute (CRI) Seal of Approval. According to the CRI’s technical specifications, a vacuum must pass rigorous tests for soil removal and dust emission to earn their gold star. It is a tool that actually supports a daily house cleaning routine to maintain perfection rather than undermining it.
The Best Brush for Your Upholstery
When I’m tackling furniture, I’ve swapped my plastic scrubbers for a natural horsehair brush. The reason is simple: synthetic bristles are often too abrasive and can fray the delicate fibers of your sofa, especially if you are trying to follow the ultimate upholstery care guide for lasting freshness. Horsehair is stiff enough to agitate the dirt out of the weave but soft enough to prevent “pilling.” This is a pro-level secret that keeps your investment looking new for years instead of months. It’s the difference between a surface that looks cleaned and one that actually feels restored.
The Biological Future of Your Kitchen Counters
Looking ahead, I predict we are going to see a massive shift toward “bio-remediation” in our homes. Instead of reaching for the bleach to kill everything, we’ll be using live enzyme cleaners that continue to eat organic matter long after we’ve stopped scrubbing. We are already seeing these effective sanitizing methods for a germ-free home becoming the standard in high-end medical facilities. These sanitizing secrets for a safer house in 2025 are all about working with nature rather than against it. It is a cleaner, more sustainable way to live that doesn’t involve wearing a gas mask every time you scrub the bathroom.
How do I keep things this clean long-term?
The key isn’t doing more work; it’s doing “micro-tasks” that prevent the “mega-clean” from ever being necessary. I live by the “one-touch” rule: if you touch an item, put it where it actually belongs, not just on the nearest flat surface. This habit alone preserves the house cleaning strategies for a sparkling home today that we all strive for. If you can master this, you’ll find that your move-out cleaning strategies to secure your deposit become almost effortless because the deep grime never has a chance to bond to the surfaces. My advanced tip for you today? Try the “dry brush” technique. Before you use any liquid on your upholstery, use a dry horsehair brush to loosen the dry soil first and vacuum it up. You will be shocked at how much comes out without using a single chemical.
The Mistakes That Cost Me My Security Deposit
The most painful lesson I ever learned was that ‘clean’ doesn’t always mean ‘maintained.’ I once scrubbed a carpet so hard with a stiff plastic brush that I permanently frayed the fibers, making it look worn out rather than fresh. This is why I always suggest looking at effective house cleaning secrets from cleaning experts before diving in with elbow grease alone. Another lightbulb moment? Realizing that moisture is often more dangerous than the dirt itself. If you leave a surface damp, you aren’t cleaning; you’re just inviting mold to the party. Lastly, never underestimate the power of a dry run. Using a vacuum or brush to remove loose soil first prevents that mud-like sludge from forming once you add a liquid cleaner. It is a simple shift that makes a world of difference when you need to secure your deposit.
Four Tools That Actually Matter
You don’t need a closet full of chemicals. I personally swear by a certified HEPA vacuum to stop the cycle of blowing dust back into the air. If your current machine smells, you should investigate why your vacuum cleaner is making the house smell worse before your next session. Secondly, a high-quality horsehair brush is essential for delicate fabrics. Third, keep a bottle of Castile soap for a gentle, residue-free lift. Finally, never ignore your microfiber—it is the MVP for grabbing allergens without spreading them. These are the core elements of any daily house cleaning routine to maintain perfection.
#IMAGE_PLACEHOLDER_E#
Reclaim Your Space and Your Peace of Mind
Cleaning isn’t just about passing an inspection; it is about creating a sanctuary where you can actually breathe. Whether you are prepping for a move or just trying to refresh your current living room, focus on the small wins. Each slat you wipe and each cushion you vacuum brings you closer to a healthier environment. When you apply these house cleaning strategies for a sparkling home today, you aren’t just doing chores—you’re investing in your own well-being. Don’t be afraid to start small; even five minutes of focused effort can break the cycle of clutter and dust. Which part of your home feels the most overwhelming to clean right now? Share your story in the comments below!