It was the kind of morning where I reached into my laundry room expecting a quick wash cycle, only to be greeted by that unmistakable musty smell coming from my washing machine. I peered inside, and there, nestled in the folds of the rubber gasket, was a grimy, slimy film I hadn’t noticed before. It hit me—I’ve been overlooking this stubborn zone for ages, and now, I was paying the price with a smelly, inefficient machine. Have you ever experienced that sudden realization that your appliance is hiding a mess right where you can’t see, but everyone notices? Well, you’re not alone.
Why Cleaning Your Washing Machine Gasket Is a Must for Every Homeowner
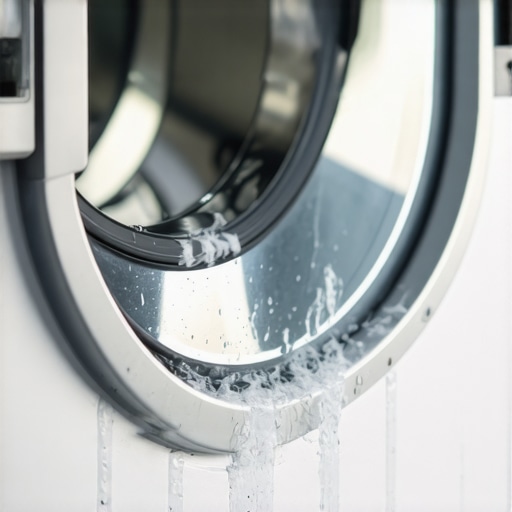
The rubber gasket around your washing machine’s door is a prime hiding spot for mold, soap scum, and dirt. Left unchecked, it can lead to foul odors, reduced machine efficiency, and even health issues from mold exposure. I’ve learned the hard way that neglecting this part can turn laundry day into a breeding ground for bacteria, which is especially concerning during cold and flu season. According to experts at the Environmental Protection Agency, mold spores can negatively impact indoor air quality and pose health risks, especially to sensitive individuals.
Early on, I made the mistake of ignoring the gasket, thinking a quick wipe here and there was enough. Spoiler alert: It wasn’t. That only allowed gunk to build up over time, making the problem worse and more challenging to resolve later. Now, I make it a point to give my gasket a thorough cleaning every month, and the difference is night and day. So, if you’ve faced similar issues—be it persistent smells, visible grime, or just that nagging feeling that your washer isn’t cleaning properly—this post is for you.
Let’s dive into the steps that will help you eliminate that unwanted gunk and restore your washing machine’s freshness. Trust me, once you get into the routine, it’s surprisingly easy, and your laundry will thank you.
Gather Your Supplies for a Thorough Cleaning
Before diving in, assemble essential cleaning tools: a microfiber cloth, soft-bristled brush, white vinegar, baking soda, and a spray bottle. Think of this as preparing your toolbox for a mini home repair—having everything at hand makes the process smoother and more effective. I remember the first time I tried cleaning without proper supplies, ending up with a bigger mess and a lingering smell, so preparation saves time and frustration.
Remove and Inspect the Gasket
Open your washing machine door and carefully peel back the rubber gasket. Use a flashlight if needed to see hidden grime. Look for visible mold, soap scum, and debris. This step is like peeling open a hidden trap in upholstery or furniture—once exposed, you can address the buildup directly. During one cleanup, I discovered a pocket of fashion fabric lint and soap residue, which was causing persistent odors. Removing and inspecting gives a clear starting point.
Apply Cleaning Solutions Effectively
Mix equal parts white vinegar and water in the spray bottle. Spray generously beneath the gasket folds, targeting moldy spots and soap scum, like applying a primer before painting. Let it sit for at least 10 minutes. Vinegar acts as a natural disinfectant and mold fighter. During my first attempt, I was impatient and skipped this waiting period—resulting in less effective cleaning and the need to repeat the process. Patience ensures the vinegar penetrates the grime.
Scrub Away Deep Grime
Using a soft-bristled brush or an old toothbrush, gently scrub the gasket, paying close attention to folds and creases. Use the brush in circular motions, akin to upholstery detailing. If stains persist, sprinkle baking soda directly onto the gasket and scrub again. Baking soda’s abrasive quality helps lift stubborn residues without damaging rubber. I once tackled a particularly stained gasket that smelt musty; applying baking soda eliminated the odor and deep grime effectively.
Wipe and Rinse for a Fresh Finish
Dampen the microfiber cloth with clean water and wipe away loosened dirt and soap residue. Make sure to remove all traces of baking soda and vinegar. For an extra sanitize, spray the gasket with a vinegar-water mixture and wipe again. Think of it as giving your upholstery a final polish—clean, fresh, and odor-free. After rinsing thoroughly, there was a noticeable difference in smell and appearance, restoring my machine’s efficiency.
Prevent Future Buildup
Keep the gasket dry by leaving the door slightly open after washes. Regularly inspect and clean the gasket monthly, especially if you notice odors or visible grime. Just like maintaining upholstery with routine care, consistency prevents stubborn grime from forming. In my case, adopting this quick weekly check has kept my washing machine smelling fresh and running efficiently.
Many homeowners believe they fully understand how to clean and sanitize their upholstery and homes, but beneath these assumptions lie nuanced pitfalls that can undermine your efforts. Let’s clarify some prevalent misconceptions and reveal advanced secrets that can elevate your cleaning game. Contrary to popular belief, using harsh chemical cleaners isn’t always the best route; in fact, natural solutions like vinegar and baking soda, when used correctly, can be equally or more effective without damaging delicate fabrics. A common myth is that high-temperature steam always sanitizes surfaces — but experts say that without proper exposure time, steam can fall short of killing bacteria, especially on porous materials. Make sure to verify if your equipment reaches the right temperature for effective disinfection, as explained in detailed guides on effective house cleaning secrets from professionals. One trap many fall into involves rushing through upholstery cleaning, believing that a quick vacuum or spray will suffice. However, neglecting to properly extract embedded dirt and microorganisms can lead to lingering odors and microbes, which might cause health issues. Explore our upholstery cleaning tips for a fresh home revival to learn how proper extraction techniques make a significant difference. For move-out cleaning, the biggest oversight is focusing solely on visible grime, ignoring hidden spots like behind furniture or in ventilation grills, which can be deal-breakers in inspections. Check out our move-out cleaning strategies to avoid losing your deposit due to overlooked grime. Advanced cleaners ask: How can I ensure my disinfecting methods are truly effective on natural fabrics? The answer lies in understanding fabric coatings and using non-stripping sanitizers that preserve texture while eliminating germs, as discussed in effective house cleaning secrets from cleaning experts. Remember, misusing disinfectants or over-misting can create a chemical build-up that dulls fabric texture or causes rapid re-soiling. Being aware of these nuanced issues can prevent costly mistakes and achieve truly sanitized, fresh results. Have you ever fallen into this trap? Let me know in the comments and share your experiences!Maintaining your home’s cleanliness and upholstery isn’t just about quick fixes; it requires the right tools and a consistent upkeep routine. Over the years, I’ve refined my approach with specific equipment that guarantees long-lasting results. A centerpiece of this arsenal is a high-quality steam cleaner like the Dupray One Plus, which I swear by for its consistency and eco-friendly operation. I personally prefer this model because it heats quickly, offers adjustable pressure controls, and eliminates 99.9% of germs without the need for harsh chemicals, making it perfect for sanitizing delicate fabrics and hard surfaces alike. Using such a device ensures that high-traffic upholstery or kitchen surfaces stay hygienic, and it simplifies regular maintenance, saving time and effort in the long run.
How do I maintain my upholstery cleaning tools over time?
Regularly cleaning and descaling your steam cleaner, for example, prolongs its lifespan and keeps it operating efficiently. I recommend emptying the water tank after each use, descaling biannually with vinegar solutions, and inspecting hoses for signs of wear. These simple steps prevent buildup and technical failures, ensuring your investment stays effective for years.
In addition to steam cleaners, I rely heavily on microfiber cloths, especially those made from tightly woven fibers like the Norwex EnviroCloth. They are incredibly durable, washable up to 500 times, and effectively trap dust, bacteria, and pet hair without spreading particles around. I prefer these over cheap alternatives because they retain their electrostatic charge longer and require less cleaning solution, which aligns with my eco-conscious efforts.
For deep cleaning carpets and rugs, I turn to professional-grade vacuum attachments like the Dyson TurboHead. Its design allows me to reach tricky corners and lift embedded dirt without damaging delicate fibers. Investing in the right attachments makes a noticeable difference during routine home refreshes, especially after moving out or hosting gatherings.
Looking ahead, I anticipate the integration of AI-powered cleaning devices that learn your home’s unique dirt patterns and optimize their routes accordingly. This trend toward smarter home maintenance tools will likely revolutionize long-term upkeep, making cleaning less intrusive and more efficient.
To optimize your cleaning routine, I challenge you to try the latest microfiber cloths I mentioned and see how much easier maintaining your upholstery becomes. Remember, regular inspection and timely maintenance of your tools ensure their longevity and your home’s cleanliness. For a detailed guide on effective maintenance practices, check out our comprehensive [Effective House Cleaning Secrets](https://spotlesscarpetz.com/effective-house-cleaning-secrets-from-cleaning-experts). Maintaining your tools isn’t just about ensuring top performance; it’s an investment in the health and hygiene of your living space, so get started today and experience the difference!
Discovering the Gaps in My Cleaning Routine
One of the biggest lessons I learned about upholstery and sanitizing is that even small overlooked spots can cause big problems, like persistent odors or bacterial buildup. I once thought quick fixes were enough until I realized that neglecting hidden areas, such as behind furniture or in ventilation ducts, can undermine my entire cleaning effort. That lightbulb moment made me appreciate attention to detail and consistency in maintaining a truly clean home.
Another insight was that natural solutions like vinegar and baking soda, when used correctly, are incredibly effective, saving me from exposing my family to harsh chemicals. I used to rely solely on commercial cleaners, but discovering their limitations and the power of simple ingredients transformed my approach. It’s a reminder that sometimes, less is more, especially when it comes to upholstery and home sanitizing.
Finally, I realized that integrating routine maintenance of my cleaning tools—like descaling my steam cleaner or washing microfiber cloths—extends their lifespan and keeps my home healthier. This proactive approach prevents equipment failures and ensures every cleaning session is as effective as the first. The overall lesson? Small, proactive steps make a big difference over time.
Tools That Changed My Cleaning Approach
My go-to gadget now is a high-quality steam cleaner, such as the Dupray One Plus. It’s eco-friendly, effective at sanitizing fabrics without chemicals, and easy to maintain, thanks to its quick heat-up. I trust it because it consistently delivers deep-clean results and long-term hygiene, making routine upholstery cleaning effortless. For detailed tips on maintaining such equipment, check out our guide on effective house cleaning secrets from cleaning experts.
Microfiber cloths, like the Norwex EnviroCloth, are another game-changer. Their durability and ability to trap bacteria mean I use fewer cleaning solutions while achieving better results. Proper storage and care, like regular washing and descaling, keep these tools performing optimally. Upgrading my toolkit improved my cleaning efficiency more than I anticipated.
For deep carpet and rug cleaning, professional-grade vacuum attachments like the Dyson TurboHead have revolutionized my move-out routines. They reach tricky spots and lift embedded dirt, helping me restore my home’s vibrancy efficiently. I believe that investing in the right tools is key to maintaining a fresh, hygienic space with less stress.
Looking ahead, I’m excited about AI-powered cleaning devices that will learn my home’s unique patterns and optimize routines. Embracing technology can make home care less intrusive and more effective, ensuring ongoing cleanliness and health.
Embrace the Journey: Start Today
The path to a healthier, fresher home begins with small, consistent actions—like regularly inspecting your upholstery, using natural sanitizers, and maintaining your tools properly. Remember, every effort compounds, creating a space that not only looks clean but feels genuinely fresh and safe. Don’t wait for stubborn grime or odors to remind you; proactive care keeps problems at bay and makes cleaning less daunting.
What’s one area in your home you’ve been overlooking that could benefit from a little extra attention? Share your thoughts below and let’s inspire each other to master the art of home upkeep!