
How to Fix Loose Edges on Luxury Vinyl Plank Flooring Without Replacing the Whole Room
There is a specific kind of frustration that comes with looking down at a beautiful, newly installed floor and seeing a single edge poking up like a sore thumb. You spent time and money choosing the perfect aesthetic for your home, only to have “peaking” or “lifting” seams disrupt the smooth surface. As a flooring specialist based in Kansas City, I’ve seen this happen in everything from high-end suburban remodels to historic downtown lofts. While my team at Spotless Carpetz is frequently sought out for hardwood floor refinishing in Kansas City, our expertise extends deep into the world of modern resilient flooring, specifically Luxury Vinyl Plank (LVP).
LVP is often marketed as a “bulletproof” DIY-friendly solution, but even the best materials can fail if the physics of the installation aren’t respected. When an edge lifts, it’s rarely a defect in the plank itself. More often, it’s a symptom of an underlying issue – usually involving the subfloor or the environment. My name is Justin Kelley, and I’ve spent years diagnosing why floors fail and how to save them. In this guide, I’m going to walk you through how to identify the root cause of your lifting LVP edges and, more importantly, how to fix them without the massive expense of hiring luxury vinyl plank installers to tear out the entire room.
Why Do LVP Edges Start Lifting? (The Root Causes)
Before you reach for the glue, you have to understand why the plank moved in the first place. If you fix the symptom without addressing the cause, the edge will simply pop back up in a few weeks. In my experience, LVP issues usually boil down to three main culprits.
The Missing Expansion Gap
Luxury Vinyl Plank is a “floating floor,” meaning it isn’t nailed or glued to the subfloor. It expands and contracts with temperature changes. The industry standard – and a rule we live by – is the 1/4-inch expansion gap. This gap must exist around the entire perimeter of the room, including against walls, cabinets, and door frames. If the floor was installed tight against a wall, it has nowhere to go when it expands. The pressure builds up until the weakest point – the locking joint – buckles upward. This is known as “peaking.”
The “Pinched” Floor Effect
Sometimes you have an expansion gap, but the floor is still trapped. This happens when heavy items “pinch” the floor to the subfloor. I’ve seen refinishing hardwood floor contractors transition into LVP work only to realize that heavy kitchen islands or floor-to-ceiling bookshelves shouldn’t be installed on top of LVP. If one side of the floor is pinned down by a 500-pound cabinet and the other side expands, the planks in the middle will lift at the seams.
Uneven Subfloors: The #1 Enemy
If your subfloor isn’t flat, your LVP will fail. The technical specification for most LVP products is that the subfloor must be flat within 3/16″ over a 10-foot radius. If there is a dip or a hump in the plywood or concrete beneath the vinyl, every time you walk over that spot, the plank flexes. Over thousands of footsteps, that vertical movement fatigues the thin PVC locking tabs until they snap or disengage. This is a common issue we see when homeowners replace carpet with hardwood or LVP without properly leveling the subfloor first.
Kansas City Humidity and Subfloor Moisture
Living in Kansas City, we deal with extreme humidity swings. While LVP itself is waterproof, the subfloor is not. High moisture levels in a concrete slab or a damp crawlspace can cause the subfloor to swell or create hydrostatic pressure that pushes against the bottom of the planks. If you’ve noticed your floors acting up during a particularly humid KC summer, moisture is likely the culprit. This is the same reason why most Kansas City hardwood refinishing quotes miss the hidden water damage – the problem is often lurking beneath the surface.
Essential Tools for LVP Edge Repair
To fix a lifting edge professionally, you need more than just a hammer. Using the wrong tools can chip the wear layer of the vinyl, turning a minor repair into a permanent eyesore. Here is what I keep in my repair kit:
- Non-marring tapping block: Never hit the plank directly with a hammer. A tapping block distributes the force.
- Flooring pull bar: Essential for reaching planks near the walls where a tapping block won’t fit.
- Rubber mallet: Provides the necessary force without the destructive impact of a metal hammer.
- Vacuum with crevice tool: You must remove every grain of dust from the locking joint before re-seating it.
- LVP-compatible pressure-sensitive adhesive: For stubborn edges that won’t stay locked.
- Cyanoacrylate (Super Glue) with Activator: For very small, localized seam repairs.
- Heavy weights: Toolboxes, stacks of books, or Five-gallon buckets of water work well to hold the repair in place while it cures.
Step-by-Step Guide: Fixing Loose or Lifting Edges
If you have a plank that is “popping” up, follow these steps to reset it properly. This process works for most click-lock systems, whether they are SPC (Stone Plastic Composite) or WPC (Wood Plastic Composite).
Step 1: Clean the Joint Thoroughly
The most common reason a plank won’t stay clicked down is debris. A tiny grain of sand or a piece of drywall dust inside the “groove” will prevent the “tongue” from seating fully. Use the crevice tool on your vacuum to suck out any grit. If the joint has been open for a while, use a thin plastic toothpick to gently scrape the groove. Do not use a metal screwdriver, as you might snap the locking tab.
Step 2: Check the Perimeter (The “Pinched” Check)
Before you try to force the plank down, you need to see if the floor has room to move. Remove the baseboard or quarter-round molding nearest to the lifting plank. If you see the vinyl plank is pressed tight against the drywall, you’ve found your problem. Use a multi-tool or a sharp utility knife to trim 1/4 inch off the edge of the plank. Once the pressure is released, the “peak” in the middle of the room will often lay flat on its own.
Step 3: The Adhesive Method
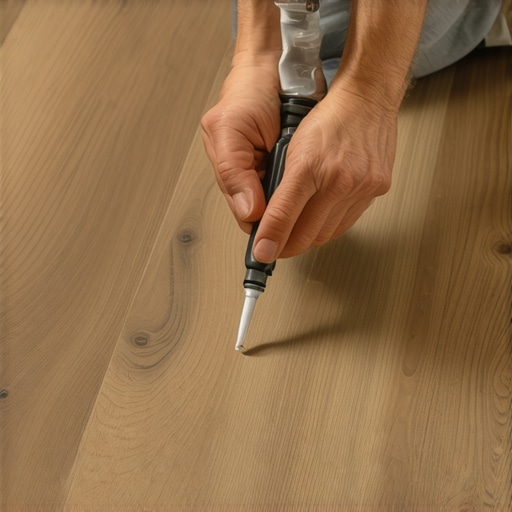
If the locking tabs are slightly worn but not broken, you can use a bit of chemical assistance. Apply a very thin bead of LVP-specific adhesive or a high-quality super glue into the groove of the plank. Be careful not to over-apply; you don’t want the glue “squeezing out” onto the surface of the floor. If you’ve ever wondered why your hardwood floors always look smudgy after mopping, it’s often due to residue – the same applies here. Keep your work area clean.
Step 4: The Tapping Technique
Position your tapping block against the edge of the plank that needs to move. Using your rubber mallet, give it firm, horizontal taps. You are trying to drive the tongue into the groove. If you are working near a wall, use your flooring pull bar. Hook one end over the edge of the plank and tap the other end of the bar with your mallet. You should hear a distinct “click” when the joint engages.
Step 5: Weight and Cure
Once the plank is flat, place heavy weights directly over the seam. This is crucial if you used adhesive. Leave the weights in place for at least 24 hours. Avoid walking on that specific area during this time to ensure the bond sets without being disturbed by the vertical flex of the subfloor.
How to Close Gaps Between Planks
While lifting edges are one problem, “gapping” – where the planks slide apart to reveal the subfloor – is another common issue. This usually happens on the “short ends” of the planks. Unlike lifting edges, which are caused by pressure, gaps are caused by shrinkage or lack of friction with the subfloor.
To fix a gap in the middle of the room without taking the floor apart, you can use the “double-sided tape trick.” Take a scrap piece of wood (a 2×4 works well) and apply high-strength double-sided carpet tape to one side. Stick the wood block onto the plank you want to move. Use a mallet to strike the side of the wood block, driving the plank toward the gap. The friction of the tape allows you to move the plank without needing an exposed edge to tap against. Once the gap is closed, remove the block and use a little WD-40 or citrus cleaner to remove any tape residue.
For gaps near the walls, the pull bar is your best friend. Simply hook the bar on the end of the plank row and tap it until the gaps close up. If you find the gaps keep returning, it’s a sign that the luxury vinyl tile installation lacked a proper perimeter transition or that the subfloor is too slippery, allowing the “floating” floor to drift.
Beyond Edges: Fixing Scratches and Scuffs
Once your floor is laying flat, you might notice the battle scars of the repair process or general wear and tear. LVP is durable, but it isn’t invincible. I often tell my clients that while sanding and refinishing hardwood floors is the ultimate “reset button” for wood, LVP requires a more surgical approach.
- For Light Scuffs: Use a melamine sponge (like a Magic Eraser) and a little water. Gently rub the scuff in a circular motion. This is incredibly effective for rubber sole marks or furniture drags.
- For Light Scratches: Use a color-matched vinyl fill pencil or a wax stick. Rub the wax into the scratch until it is filled, then buff away the excess with a soft cloth. This won’t make the scratch disappear under a microscope, but it will hide it from a standing height.
- For Deep Gouges: If a heavy object has torn the wear layer, a hardwood floor patch won’t work. You’ll need a specialized floor repair paste that hardens into a plastic-like finish.
If you’re dealing with older floors, you might find that the surface looks dull. Before you assume the finish is gone, check out my guide on how to safely lift decades of wax from floorboards without sanding. While written for wood, the principles of removing buildup apply to many flooring types.
When DIY Isn’t Enough: Calling a Kansas City Professional
There comes a point where a DIY fix is just a Band-Aid on a bullet wound. If you have followed the steps above and the plank continues to pop up, the locking mechanism is likely broken. A broken “click” tab cannot be truly repaired; the plank must be replaced. This involves “surgical” plank replacement – cutting out the damaged plank with a circular saw and gluing in a new one with the tongues removed.
Furthermore, if your floor is lifting because the subfloor is severely unlevel, no amount of glue or tapping will fix it. You are looking at a structural failure. In these cases, it’s time to call in professional luxury vinyl plank installers. We can pull up the affected area, apply a self-leveling underlayment to the subfloor, and reinstall the planks correctly.
At Spotless Carpetz, we specialize in the tough cases. Whether it’s hardwood floor water damage repair or a botched LVP install, we have the tools to diagnose the “why” before we implement the “how.” We also provide comprehensive wood floor refinishing kansas city services for those who realize that their “old” floors just needed a little professional love rather than a replacement.
Conclusion
Fixing loose edges on your luxury vinyl plank flooring doesn’t always require a full renovation. By understanding the 1/4-inch expansion rule, ensuring your subfloor is clear of debris, and using the right tapping techniques, you can restore your floor’s seamless look in an afternoon. Remember, the key to a long-lasting floor isn’t just the material you buy; it’s how that material is allowed to interact with the Kansas City environment.
If you’re feeling overwhelmed by gaps, peaks, or scratches, or if you’re ready to transition from LVP to hardwood flooring kansas city, give us a call. From old hardwood floor restoration to modern luxury vinyl tile installation, Justin Kelley and the team at Spotless Carpetz are here to ensure your home stands on a solid, beautiful foundation. Don’t let a lifting edge ruin your room – fix the cause, and enjoy your floors for years to come.