
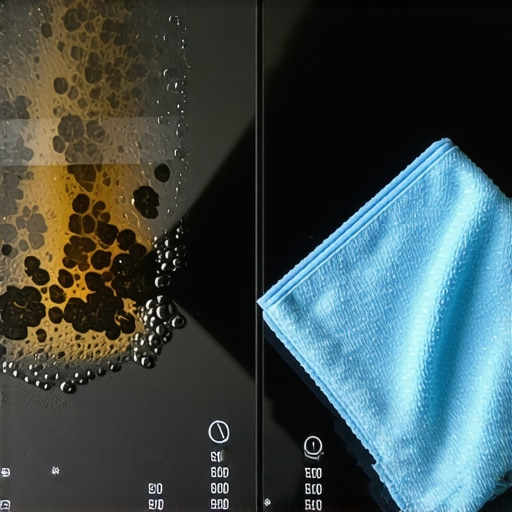
I was searing a steak last Tuesday. The smoke alarm didn’t go off, but the milk I was heating for a latte boiled over in a flash. Within seconds, that pristine glass surface was a charred, black wasteland of carbonized dairy. I felt that familiar pit in my stomach. You know the one. It’s the ‘I’ve ruined this kitchen’ feeling. I tried scrubbing it with a sponge while it was still warm—huge mistake. I just ended up melting a bit of the sponge and making the mess even stickier. It looked like a permanent scar on my otherwise beautiful kitchen. Believe me, I’ve had my share of cleaning disasters, from ruining rugs to wondering why your carpet is still dirty after you shampooed it. But that burnt ring on the stove? That felt personal. [image_placeholder]
Stop Scouring and Start Cleaning Smarter
We’ve all been there, standing over the stove with a bottle of blue spray and a look of pure desperation. Maybe you were trying out a new recipe for a dinner party, or perhaps, like me, you just got distracted for thirty seconds. The result is always the same: a crusty, stubborn ring that seems fused to the glass for eternity. In my early days, I used to reach for steel wool. Please, never do that. I scratched my first induction cooktop so badly it looked like a skating rink after a hockey game. Just like knowing why vinegar is not always the best choice for granite countertops, you have to realize that glass requires a specific touch. Today, I’m going to show you the method that actually works in under ten minutes. No more overnight soaking or sore shoulders from scrubbing. We are going to treat your kitchen with the same care you’d give your furniture, much like following an ultimate upholstery care guide for lasting freshness. We’re aiming for that ‘just moved in’ sparkle without the ‘just moved out’ level of effort. According to a study by the International Association of Certified Home Inspectors (InterNACHI), glass cooktops are among the most easily damaged kitchen surfaces if cleaned with abrasive materials. This is why the ‘wait and soak’ method isn’t just about laziness—it’s about preservation. If you’ve been searching for effective house cleaning secrets from cleaning experts, you know that the right tool beats brute force every time.
Will these methods actually scratch my expensive glass?
That’s the number one fear, right? You spend thousands on a sleek kitchen only to take a scraper or a heavy chemical to it. I was terrified too. I thought for sure I’d leave a permanent mark. But here’s the truth: if you use the right tools at the right angle, the glass is much tougher than you think. It’s a bit like how sanitizing secrets for a safer house in 2025 often involve less elbow grease and more chemistry. We aren’t fighting the food; we’re breaking the bond it has with the surface. Have you ever looked at your stove and just sighed, thinking you’d never get that shine back? Tell me, have you ever accidentally ‘cooked’ a cleaning cloth onto a hot burner like I did? Before we dive into the step-by-step, remember that a clean kitchen is a safer kitchen. If you can master the stove, you might even want to tackle the best way to clean a grimy oven door window while you’re at it. Let’s get that kitchen back to looking like a showroom.
Create a Reaction That Does the Heavy Lifting
You don’t need a lab coat, but a little chemistry goes a long way. Start by mixing baking soda with just enough water to create a thick paste. If it’s too runny, it’s going to slide right off the ‘problem zones.’ I once made the mistake of making it too watery, and the mixture ended up dripping down the sides, which forced me to learn how to clean the space between the stove and countertop much sooner than I planned. Smear that paste over the carbonized dairy or burnt sugar. Now, spritz it with a little vinegar. This isn’t just a fun science experiment; the fizzing helps lift the debris from the glass. This simple mix is one of the most effective sanitizing methods for a germ-free home without using harsh fumes that linger in your kitchen. Let it sit for at least 15 minutes. This is where patience pays off.
Soften the Blow with the Steam Trap
While the soda and vinegar are doing their thing, grab an old towel and soak it in the hottest water your tap can provide. Wring it out slightly—you want it damp and steaming, not dripping. Lay the towel directly over the paste on the stovetop. This creates a localized ‘steam room’ for the grime. The heat re-hydrates the burnt-on bits, making them much easier to wipe away later. I once tried to skip the towel step because I was in a rush for a conference call, and I ended up having to double my cleaning time because the debris was still too brittle. Don’t be like me. This kind of ‘wait-and-work’ strategy is common in many house cleaning strategies for a sparkling home today. After 20 minutes, use the towel to wipe away the bulk of the paste. If you’ve ever dealt with the only way to clean sticky residue from new appliances, you know that moisture and heat are your best friends.
The Secret Is in the 45-Degree Angle
If the paste didn’t get it all, it’s time for the big guns: a glass-safe razor scraper. This is the part that makes everyone nervous. I remember the first time I held a blade to my expensive cooktop; my hands were literally shaking. But here is the trick: keep the glass wet. Never, ever scrape dry glass. Apply the blade at a 45-degree angle—never straight down—and watch as the burnt food peels off like a ribbon of chocolate. This technique is a lifesaver when you are trying to master move-out cleaning strategies to secure your deposit. It’s about being precise, not powerful. The blade should glide, not snag. If you feel resistance, stop immediately and re-apply more liquid. This is similar to sanitizing secrets for a safer house in 2025 where the technique is always more important than the physical force used. 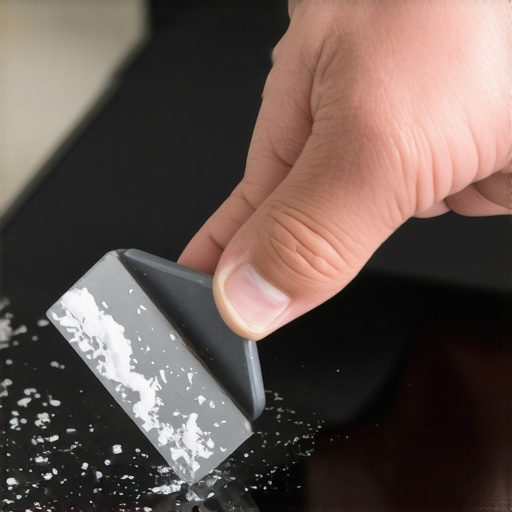
Finish with a Streak-Free Polish
Once the surface is level and the crust is gone, you’ll likely see a cloudy residue. This is often just leftover minerals or cleaner. Grab a clean microfiber cloth. If you notice it’s not working, it might be because of why your microfiber cloths are leaving lint everywhere—usually from being dried with high heat. A fresh, cool cloth and a dedicated glass cleaner or a 50/50 water-vinegar mix will bring back that factory shine. This final step is what converts a standard scrub into part of a daily house cleaning routine to maintain perfection. You aren’t just cleaning; you’re restoring a major investment. This level of detail is exactly what’s required for a move-out clean checklist to simplify your transition, ensuring the next tenant or owner finds a kitchen that sparkles like a showroom.
Stop Drowning Your Surfaces in Chemicals
Most people think that the more product they spray, the cleaner the house becomes. In reality, I’ve found that the ‘more is better’ approach is a recipe for disaster. When you over-apply cleaners, you’re actually creating a sticky film of residue that acts as a magnet for dust and hair. This is especially true for delicate areas; you should learn why you should never spray cleaning products directly on surfaces. Instead of a clean home, you end up with a surface that looks dull and feels tacky within hours. If you’re following a daily house cleaning routine to maintain perfection, the goal is to use the least amount of product necessary to achieve the result. Professionals don’t soak; they mist.
Is your sanitizer actually killing anything?
This is the question that separates the amateurs from the pros. We often spray a surface and wipe it dry immediately, thinking the job is done. However, according to the Environmental Protection Agency (EPA), most household disinfectants require a specific ‘dwell time’—often between three and ten minutes—to actually neutralize bacteria and viruses. If you wipe it off instantly, you’ve essentially just moved the dirt around without killing the germs. For those moving into a new space, mastering sanitizing hacks for safe house transitions is vital for peace of mind. Using effective sanitizing methods for a germ-free home means reading the fine print on the bottle and letting the chemistry work its magic while you step away. 
The Hidden Trap of Over-Wetting Your Sofa
I learned this the hard way after trying to get a coffee stain out of my favorite armchair. I thought if I used enough water and soap, the stain would simply vanish. Instead, I created a watermark that looked worse than the original mess. One of the most overlooked upholstery cleaning tips for a fresh home revival is that moisture is often the enemy of fabric. If you soak the padding beneath the fabric, you risk mold growth and ‘wicking,’ where the stain travels deeper only to reappear as it dries. This is why following an ultimate upholstery care guide for lasting freshness emphasizes dampness over drenching. When you’re handling move-out cleaning strategies to secure your deposit, a ruined piece of furniture can be a costly mistake. Have you ever fallen into this trap and made a stain worse by trying too hard? Let me know in the comments. By focusing on dwell time and proper moisture levels, you’ll move from just ‘wiping things down’ to truly mastering sanitizing secrets for a safer house in 2025.
Stop Fighting with Old Equipment
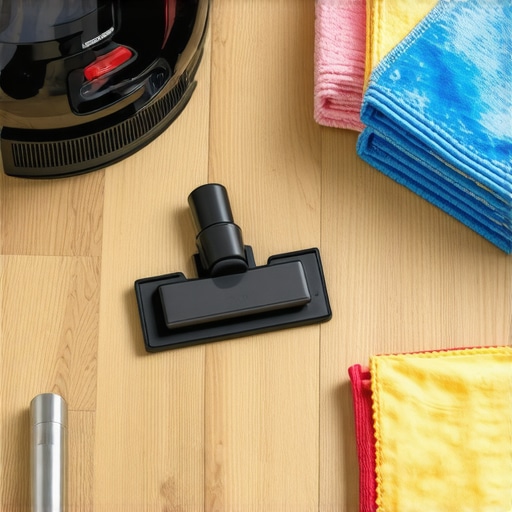
If you’re still using the same plastic-bristled broom and a vacuum you bought in 2012, you’re essentially working twice as hard for half the result. When I finally upgraded to a vacuum with a certified HEPA filter and an adjustable brush roll, my allergy symptoms vanished within a week. Most people don’t realize that why your vacuum isn’t picking up dirt like it used to often has less to do with suction and more to do with a clogged internal filter or a worn-down brush. In my personal toolkit, I also keep a high-quality glass scraper with replaceable carbon steel blades. It sounds aggressive, but it’s the only way to achieve a professional finish on stovetops and windows. This level of precision is exactly what I recommend when following effective house cleaning secrets from cleaning experts. Using the right tool doesn’t just save your back; it protects the integrity of your surfaces.
How do I keep my home in showroom condition over time?
The secret isn’t a massive deep clean every six months; it’s the ‘five-minute reset.’ Maintenance is about catching the mess before it bonds to the surface. For instance, I keep a small spray bottle of 70% isopropyl alcohol and a clean microfiber cloth in my bathroom cabinet. Every night after brushing my teeth, I give the faucet a quick mist and wipe. This prevents the mineral buildup that eventually requires those harsh, acidic cleaners we all hate. This habit is the cornerstone of a daily house cleaning routine to maintain perfection. If you are preparing for a transition, these small wins make the move-out clean checklist to simplify your transition feel like a breeze rather than a marathon. Consistency is the only way to avoid the ‘scrub-till-it-hurts’ weekend sessions.
The Future of Your Cleaning Cabinet
I predict that in the next five years, we are going to see a massive shift away from ‘all-purpose’ chemicals toward bio-enzymatic cleaners and smart surfactants. We are moving toward a world where the cleaner does 90% of the work by eating away organic proteins before we even touch the surface. This is already a staple in high-end upholstery cleaning tips for a fresh home revival. The Institute of Inspection Cleaning and Restoration Certification (IICRC) S300 Standard for Professional Upholstery Cleaning notes that the most significant advancements in the industry come from managing the ‘dwell time’ of these specialized solutions rather than increasing physical agitation. This aligns perfectly with the evolving sanitizing secrets for a safer house in 2025, where we prioritize chemical efficiency over brute force. If you want to stay ahead of the curve, start looking for cleaners that list ‘enzymes’ or ‘probiotics’ on the label—they are game-changers for pet odors and high-traffic areas.
Your Next Move for a Cleaner Home
Before you dive back into your chores, I want you to try one advanced tip: Check the pH of your cleaner before you use it on stone or fabric. Most people treat every stain with vinegar, but as we’ve discussed, acid can be a death sentence for certain materials. If you’re ever in doubt, especially during a high-stakes move-out cleaning strategies to secure your deposit, test a hidden spot first. My best advice for long-term results? Invest in a set of high-GSM (grams per square meter) microfiber cloths and stop using paper towels. You’ll save money, reduce lint, and get a better shine. If you’re feeling overwhelmed by the technical side of things, check out house cleaning strategies for a sparkling home today to simplify your workflow. Go grab a scraper or an enzyme cleaner this weekend and see the difference a pro-level tool makes.
What I Finally Learned After Years of Over-Scrubbing
I used to believe that if I couldn’t smell bleach, it wasn’t clean. In reality, the best effective house cleaning secrets from cleaning experts often involve gentle pH-neutral cleaners and time rather than aggressive scents.
I also learned that heat can be a tool; for example, knowing how to remove water rings from wood furniture using a hairdryer taught me that temperature often solves what scrubbing cannot. The same logic applies to the ‘steam trap’ method for your stove.
Finally, I realized that a daily house cleaning routine to maintain perfection is much more about the ‘five-minute reset’ than it is about a six-hour weekend marathon. Force is the enemy of finish; if you find yourself sweating, you’re likely using the wrong technique or the wrong tool.
The Toolkit That Actually Keeps My Home Spotless
My cleaning cabinet has shrunk over the years as I’ve found tools that actually work. I swear by a 10-pack of high-GSM microfiber cloths, but you must be careful not to ruin them—otherwise, you’ll be asking why your microfiber cloths are leaving lint everywhere. High-quality fibers should never be dried on high heat.
I also keep a carbon steel razor scraper for the stove and a bottle of 70% isopropyl alcohol for mirrors and faucets. This combination handles almost any flat surface in the kitchen. If you’re ever unsure about a specific stain or a delicate material, don’t hesitate to contact us for advice before you risk damaging a surface permanently.
#IMAGE_PLACEHOLDER_E#
Give Yourself Permission to Clean Differently Today
Cleaning doesn’t have to be a battle against your own home. When you use the right tools and let chemistry do the heavy lifting, you reclaim your time and your sanity. These methods aren’t just for daily life; they are essential move-out cleaning strategies to secure your deposit when the stakes are high. Take it one surface at a time, and you’ll soon see your home in a whole new light. Have you ever tried the razor scraper method on your stove, or does the idea still make you a little nervous? Let me know in the comments below!