
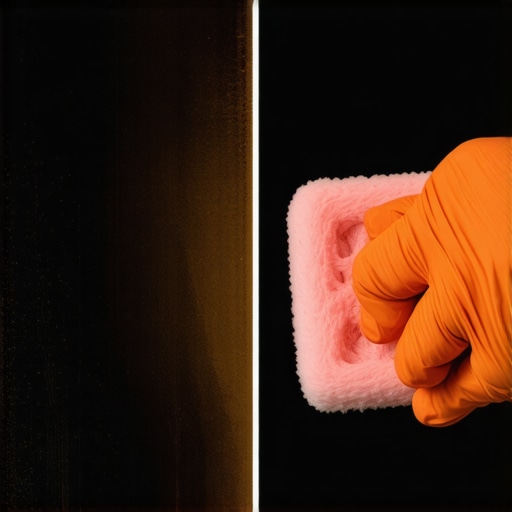
I was standing in my kitchen last Sunday, holding a heavy tray of lasagna, and I realized I had absolutely no idea if the cheese was bubbling or burning. Why? Because my oven door window looked like it had been seasoned with three years of bacon grease and stubborn carbon. It wasn’t just dirty; it was a literal wall of brown mystery. I remember trying to peek through a tiny clear spot near the corner, feeling like I’d totally failed at basic home maintenance. I had tried every ‘miracle’ spray, and all I got was a chemical headache and a window that was still opaque. [image1]
The Day I Stopped Avoiding My Oven Glass
If you’re anything like me, you’ve probably ignored that grimy buildup for months. You tell yourself it’s ‘patina,’ but deep down, you know it’s just baked-on frustration. My biggest mistake early on? I grabbed a heavy-duty wire brush. I thought, ‘Hey, if it works for the grill, it’ll work here.’ That was a disaster. I ended up with microscopic scratches that just made the grease stick even harder the next time I roasted a chicken. It’s a similar lesson to why you should never use a wire brush on your grill grates. Today, I’m going to show you how to melt that grime away without a single scratch or a lungful of toxic fumes. We’re talking about a method that actually respects the tempered glass while obliterating the grease.
Will This Method Actually Save My Weekend?
You might be skeptical. I get it. We’ve all seen those ‘5-minute hacks’ that actually take three hours of grueling elbow grease. But according to experts at Good Housekeeping, the key isn’t raw force; it’s chemistry—specifically, giving the cleaner time to break down the carbonized fats. Whether you are doing a routine daily house cleaning routine or a deep move-out cleaning, getting this window clear is a game changer for your kitchen’s vibe. It’s about working smarter, not harder.
Stop Falling for the Commercial Cleaner Trap
I used to think the harshest smell meant the best clean. I’d spray those foaming aerosols, run out of the kitchen coughing, and hope for the best. The problem is that many of those chemicals are overkill for glass and can even damage the delicate seals around your door. If you’ve ever dealt with greasy range hood filters, you know that grease requires a specific approach, not just raw power. I’ve found that a simple, homemade paste does a better job than the stuff that requires a hazmat suit. Have you ever spent an entire afternoon scrubbing only to find the same brown streaks once the glass dried? It’s soul-crushing. Let’s make sure that never happens again by using the house cleaning secrets I’ve picked up over years of trial and error to get that ‘brand new’ shine back.
Lay Down a Towel Before You Regret It
Before you even touch a sponge, you need to protect your kitchen floor. I learned this the hard way during a stressful move-out cleaning session. I thought I could be precise and avoid any drips, but as the grease began to liquefy, it created a black, oily river that ran straight into my white tile grout. It turned a twenty-minute task into a two-hour ordeal. Now, I always lay a thick, old beach towel directly under the oven door. This isn’t just about tidiness; it’s about avoiding the need for extra house cleaning strategies later on. Trust me, the grease that comes off that glass is surprisingly staining and hard to lift once it hits porous surfaces.
The Two-Ingredient Mix That Beats Toxic Chemicals
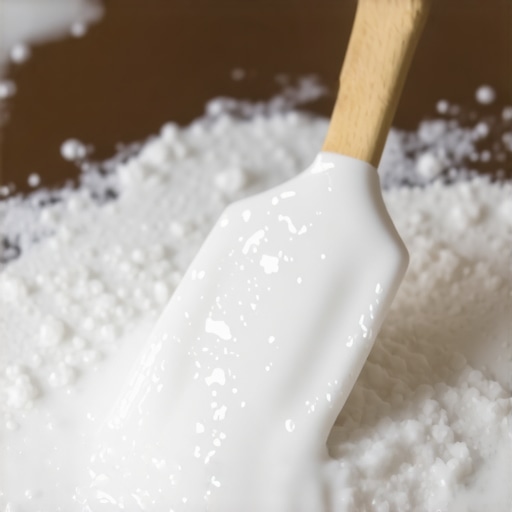
Forget the store-bought foams that smell like a chemistry lab explosion. The absolute best tool in your arsenal is a simple paste made of baking soda and water. You want the consistency of thick Greek yogurt or toothpaste—runny enough to spread but thick enough to hang onto the vertical surface of the door without sliding off immediately. This is very similar to the trick to cleaning toaster ovens without harsh chemicals. Start with about a half-cup of baking soda and add water one tablespoon at a time. If it’s too watery, it won’t stay on the stains; if it’s too dry, it won’t penetrate the carbonized layers effectively.
How to Apply the Sludge Correctly
Open your oven door all the way so it is flat. Use a silicone spatula or even a gloved hand to smear the paste across the glass. Don’t worry about the clear spots; focus on the dark brown or black ‘islands’ of grease. You want a layer about an eighth of an inch thick. Remember, the rule of why you should never spray cleaning products directly on surfaces applies here too; the goal is controlled application, not a messy mist that gets into the oven vents or between the delicate glass panes where you can’t reach it.
Patience Is Your Secret Weapon
This is the part where most people fail. They want the glass clean right now. But cleaning carbonized grease is like trying to dissolve a lollipop; it takes time for the solution to work its way through the layers. Think of this paste like a deep-cleansing facial mask for your oven. It needs to sit for at least thirty minutes, but if your glass is as bad as mine was, let it sit for two hours. I’ve even left it overnight for truly neglected ovens. While you wait, the alkalinity of the baking soda is slowly breaking down the acidic bonds of the cooked-on fats, doing the hard work for you.
The Final Fizz and Wipe
Once the time is up, the paste will likely have turned a disgusting shade of brown. This is good news—it means it’s working. To remove it, use a damp microfiber cloth to gently scoop up the bulk of the paste. For the stubborn bits, spray a little white vinegar onto the remaining residue. You’ll get a satisfying chemical reaction, much like the vinegar and baking soda trick for clogged drains. The fizzing helps lift the last of the grit from the glass surface. Use a plastic scraper—never metal—to gently nudge off any remaining spots. They should slide off like butter on a hot pan without leaving a single mark on the tempered glass.
Why Your Favorite Natural Cleaner Might Be Failing You
Cleaning a window is one thing, but maintaining a whole home requires a shift in mindset from visible dirt to molecular grime. I often hear people say that if it smells like vinegar, it is clean. While I love my baking soda paste for the oven, I’ve realized that vinegar is often treated as a magic potion it simply isn’t. For example, knowing why vinegar is not always the best choice for granite countertops is a vital lesson; that same acidity that cuts grease can actually etch and ruin expensive stone over time. Expertise means knowing the PH of your cleaner and the vulnerability of your surface. Using a high-acid cleaner on a porous surface is a recipe for a very expensive repair bill.
The Dangerous Myth of the Self-Cleaning Cycle
One of the biggest expert traps I see people fall into is the oven’s self-cleaning button. It sounds like a dream—push a button and the mess vanishes. However, most appliance repair technicians will tell you it’s a massive gamble. The extreme heat required to incinerate that grease can easily blow a thermal fuse or melt the delicate control board. I prefer the manual method I’ve shared because it’s infinitely safer for the longevity of your kitchen appliances. True house cleaning secrets usually involve a bit of time and chemistry rather than a scorched-earth approach that risks your hardware.
How Do Professional Cleaners Get That Invisible Film Off?
The secret isn’t just a stronger chemical; it is understanding surfactants and dwell time. Many of us spray a surface and wipe it immediately, but if you look at effective sanitizing methods for a germ-free home, you will see that contact time is king. According to the Environmental Protection Agency (EPA), most disinfectants need to stay wet on a surface for 4 to 10 minutes to actually kill pathogens. If you’re wiping it dry after ten seconds, you are just moving bacteria around. When I am refining my house cleaning strategies for a sparkling home today, I always factor in these wait times. This is especially critical when you’re executing a move-out cleaning and need to ensure the space is truly hygienic and film-free for the next tenant.
#IMAGE_PLACE_HOLDER_C#
Don’t Make This Mistake With Your Upholstery
When it comes to fabrics, the biggest mistake is over-saturation. If you have consulted the ultimate upholstery care guide for lasting freshness, you know that soap residue is a magnet for new dirt. If you don’t rinse or blot properly, the soap stays in the fibers and attracts every bit of dust that floats by. Within a week, the fabric looks worse than before you started. Also, remember the golden rule of why you should never spray cleaning products directly on surfaces—especially electronics, light switches, or delicate finishes. The liquid can seep into cracks and cause permanent electronic failure or ghosting on wood. Have you ever fallen into this trap? Maybe you used a harsh chemical on a surface that wasn’t ready for it? Let me know in the comments!
Tools That Actually Make Life Easier
Once you’ve finally cleared that oven glass or revived a stained sofa, the real challenge begins: keeping it that way. I used to think cleaning was a ‘once-and-done’ event, but it’s really about the systems you have in place. For me, that meant upgrading my toolkit. I stopped buying those cheap, flimsy microfiber cloths that leave lint everywhere. Instead, I invested in 300GSM (grams per square meter) cloths. The density matters because it actually traps the grease rather than just smearing it across your surfaces. If you’ve noticed your tools aren’t performing, it might be why your vacuum isn’t picking up dirt like it used to—clogged filters and worn brushes are the enemies of a clean home.
#IMAGE_PLACE_HOLDER_D#
How do I keep my home looking professional for months?
The secret is consistency and the right equipment. If you are preparing for a move-out clean checklist to simplify your transition, you know that the right tools are half the battle. Keeping a daily house cleaning routine to maintain perfection prevents that soul-crushing buildup from returning. I’ve found that using a HEPA-certified vacuum on every surface—including the baseboards and the tops of cabinets—makes a world of difference. According to technical documentation from Dyson’s microbiology lab, dust mites and allergens can accumulate in soft surfaces within just weeks of neglect, making filtration systems vital. This is why the ultimate upholstery care guide for lasting freshness highlights that regular vacuuming is more important than the occasional deep scrub.
Why Your Vacuum Maintenance Is Non-Negotiable
I see so many people struggle with house cleaning secrets only to realize their vacuum has been essentially dead for months. If you aren’t cutting the hair off the brush roll and washing the foam filters every few uses, you’re just blowing fine dust back into the air. This becomes even more critical when you’re looking for sanitizing secrets for a safer house in 2025. A clogged machine can’t effectively remove the particles that bacteria cling to. Take five minutes to inspect your gear; it’s the difference between a house that looks clean and a house that is clean.
The Next Big Thing in Home Care
I predict that in the next few years, we are going to see a massive shift toward AI-integrated cleaning systems that don’t just ‘vacuum’ but actually analyze the PH of the spills they find. We are already seeing the beginning of this with sensors that adjust suction based on debris density. However, no matter how smart the tech gets, the basics of chemistry—like my baking soda paste—will always have a place. My challenge for you: Clean your vacuum filter tonight. Most people forget it exists, but it’s the single easiest way to boost your cleaning power by 50% instantly. It’s an advanced move that separates the amateurs from the experts who handle complex tasks like move-out cleaning strategies to secure your deposit.
Three Myths About Grease That Kept My Kitchen Grimy
Over the years, I’ve realized that most of our cleaning struggles come from bad advice we’ve heard on repeat. First, don’t assume that ‘more muscle’ equals a better result; in the world of house cleaning secrets, time and chemistry do 90% of the work. Second, never ignore the small gaps—while your oven glass is now clear, don’t forget how to clean the space between the stove and countertop to truly eliminate those hidden odors. Finally, remember that sanitization and cleaning are two different jobs; you can have a sparkling window that is still covered in invisible bacteria if you don’t follow sanitizing secrets for a safer house in 2025.
#IMAGE_PLACE_HOLDER_E#
The Only Tools You Actually Need for a Professional Finish
You don’t need a closet full of gadgets to maintain a home. I’ve narrowed my ‘power kit’ down to three essentials that never let me down. A plastic dough scraper is my secret weapon for lifting carbonized bits without scratching the glass. I also swear by 300GSM microfiber cloths because they actually trap oils rather than spreading them. Lastly, keep a physical kitchen timer handy. If you’re performing a move-out clean checklist to simplify your transition, the timer ensures you give every surface the ‘dwell time’ it needs to break down grime without you having to scrub like a maniac.
Take Back Your Kitchen One Sparkle at a Time
Cleaning shouldn’t feel like a punishment; it should feel like you’re reclaiming your space. Seeing through that oven window for the first time in years is a small victory that makes cooking feel like a joy again rather than a chore. Whether you are using house cleaning strategies for a sparkling home today or just tackling one small appliance, the key is to start small and be consistent. You deserve a home that feels as fresh as it looks. Have you ever tried the baking soda trick on your oven glass, or did you find another secret that works even better? Let me know in the comments below!