
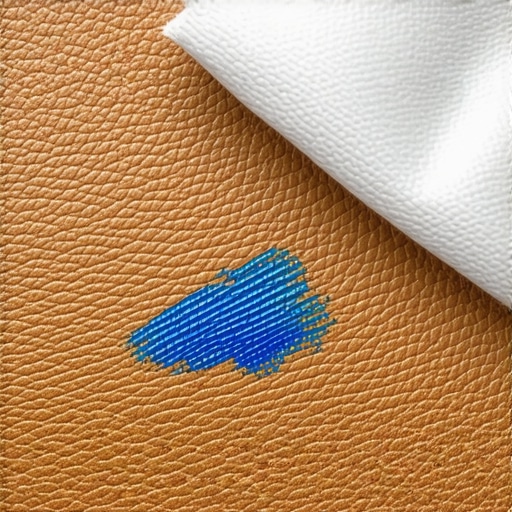
It happened on a Tuesday afternoon. My toddler, bless his creative heart, decided our cream-colored Italian leather sofa was the perfect canvas for a blue-ink masterpiece. I panicked. In a moment of pure adrenaline, I grabbed a bottle of high-percentage rubbing alcohol and scrubbed like my life depended on it. Big mistake. I didn’t just remove the ink; I stripped the top layer of the leather’s finish, leaving a dull, gray patch that mocked me for years. If you have ever stared at a fresh pen mark on your furniture and felt that sinking pit in your stomach, take a deep breath. Today, I am going to share the hard-won secrets I have learned about saving your upholstery without the ‘oops’ moment I had to live with. We are going to tackle that stain safely and effectively, keeping your leather looking as supple as the day you bought it.
Stop Before You Reach for the Harsh Chemicals
I’ve spent years perfecting my ultimate upholstery care guide for lasting freshness, and if there is one thing I’ve learned, it is that leather is a living material. It has pores. It has a specific pH balance. According to the Leather Research Laboratory, the pH of most finished leather is between 4.5 and 5.0, which means using high-alkaline household cleaners can cause the fibers to break down and the color to migrate. When you see an ink stain, your first instinct is to blast it, but that is exactly how you end up with a permanent discolored ring. Whether you are doing a routine spruce-up or a frantic move-out clean, the goal is always gentle lifting, not aggressive scrubbing.
Is that viral hairspray hack actually safe for your sofa?
A lot of people swear by the old-school hairspray trick, but I’m here to tell you to be extremely cautious. Most modern hairsprays have changed their formulas to include less alcohol and more oils and conditioners, which can actually set the stain or leave an oily residue that attracts more dirt later. If you want to try lifting ink stains from a leather sofa using household items, you need a strategy that respects the delicate finish of the hide. Have you ever tried a ‘quick fix’ only to find it made the problem twice as visible? Tell me about your most stressful cleaning disaster in the comments—I promise I’ve probably done worse!
Why Ink and Leather Are Such a Toxic Pairing
The reason ink is so terrifying is that it’s designed to be permanent. On a porous surface like leather, the pigments want to dive deep into the grain. If you are following effective house cleaning secrets from cleaning experts, you know that timing is everything. Fresh ink is a surface problem; old, dried ink is a structural problem. By understanding how the ink interacts with the protective coating on your furniture, you can choose the right tool for the job without stripping away the very thing that makes leather look and feel luxurious. Let’s get into the step-by-step process of identifying your leather type and choosing the safest solvent possible.
Identify Your Leather Type Before You Begin
Before you touch that stain, you have to perform what I call the Water Drop Test. It is the simplest way to determine if your sofa is protected or if you are dealing with an absorbent, unfinished hide. Simply place a single drop of water on a hidden area, like the back of a cushion. If the water beads up and stays on the surface, you are working with finished leather, which means we can proceed with caution. If that water sinks in and darkens the leather instantly, stop immediately. Attempting a DIY fix on unfinished leather—like suede or aniline—usually leads to permanent water marking. I once tried to ‘wing it’ on a vintage tan ottoman without testing first, and I ended up with a dark, distorted ring that looked far worse than the original pen mark. When you are following upholstery cleaning tips for a fresh home revival, knowing your material is 90% of the battle.
The Blot and Lift Method for Fresh Stains
Think of an ink stain like a puddle of wet paint on a glass table. If you swipe at it with a cloth, you are just spreading the pigment across a wider surface area. Instead, you need to lift the ink vertically. Use a high-quality microfiber cloth or even a cotton swab for precision. Moisten the tip with a mild soap solution—never soak it. Touch the center of the ink mark and let the cloth draw the ink into its fibers. This precision-based approach is one of those effective house cleaning secrets from cleaning experts that prevents a minor accident from becoming a living room catastrophe. #IMAGE_PLACE_HOLDER_B#
Choosing the Right Solvent for Stubborn Marks
If soap and water do not do the trick, you might be tempted to go back to the rubbing alcohol. If you must use it, you have to dilute it. Pure isopropyl alcohol is an aggressive solvent that can dissolve the protective top coat of your furniture. Mix one part alcohol with two parts water. This is especially important if you are performing a move-out clean and need to ensure the furniture looks pristine for an inspection. Dip a Q-tip into your diluted mixture and dab only the ink lines. If you see any of the leather’s actual color coming off onto the swab, stop. That means the finish is failing, and it is time to call in a professional. I have found that house cleaning strategies for a sparkling home today often rely on this ‘less is more’ philosophy to avoid accidental damage.
Why You Must Condition the Leather After Cleaning
Cleaning agents, even mild ones, strip away the natural oils that keep leather flexible. If you skip the conditioning phase, the spot where you removed the ink will eventually become brittle and crack. Imagine washing your hands ten times a day without ever using lotion; eventually, your skin will get raw and uncomfortable. Leather is exactly the same. Once the area is dry, apply a tiny amount of pH-balanced leather conditioner to a soft cloth and buff it into the spot in a circular motion. This restores the luster and ensures that your lifting ink stains from a leather sofa using household items process leaves no lasting footprint on the material’s integrity.Beyond the ink stain, there is a broader mistake I see constantly: the confusion between cleaning and sanitizing. Most people assume that if the visible dirt is gone, the germs are too. However, according to the American Cleaning Institute, true sanitizing requires a specific ‘dwell time’—usually between 30 seconds and 10 minutes—where the surface remains visibly wet with the product. If you just spray and immediately wipe, you are merely moving bacteria around. This is one of the most overlooked sanitizing secrets for a safer house in 2025. If you are rushing through a move-out cleaning, this lack of patience can actually leave behind a biofilm that traps odors rather than eliminating them. #IMAGE_PLACE_HOLDER_C#
Why is your furniture attracting dirt faster after you clean it?
This is the ‘Oops’ factor that breaks my heart. Many homeowners use far too much soap, believing that more bubbles lead to a deeper clean. In reality, unless you rinse that upholstery perfectly, the soap residue acts like a high-strength magnet for dust, skin cells, and pet hair. This is why professional-grade upholstery cleaning tips for a fresh home revival always emphasize using the absolute minimum amount of surfactant. I have seen high-end sofas become ‘grime magnets’ within weeks because the owner unknowingly left a sticky layer of ‘cleaner’ behind that never dried correctly.
The Hidden Danger of the Natural Cleaning Myth
We also need to address the common belief that ‘natural’ always means ‘safe.’ It simply doesn’t. While vinegar is a fantastic tool for many areas, its high acidity can aggressively eat through the protective sealants on various household surfaces. Just as you should understand why vinegar is not always the best choice for stone, you must realize it can be equally devastating to the top-coat of finished leather or specialty synthetic blends. Using the wrong pH-level solution on a luxury piece of furniture is a one-way ticket to a permanent finish failure. When you apply effective house cleaning secrets from cleaning experts, the first rule is matching the chemical’s pH to the material’s tolerance, not just grabbing what is in the pantry. Have you ever fallen into this trap and ended up with a sticky or dull surface? Let me know in the comments below!
Stop using kitchen rags on your leather
If you are serious about protecting your investment, stop using paper towels or generic kitchen sponges on your furniture. These materials are surprisingly abrasive and can leave microscopic scratches on the finish that eventually turn into dull spots. I have seen countless sofas ruined because someone used the ‘scrubby’ side of a dish sponge to remove a mark. Instead, I swear by a genuine horsehair brush. Why? The bristles are soft enough to reach into the grain without damaging the top coat, yet firm enough to agitate dirt out of the depths of the hide. If you integrate this into your daily house cleaning routine to maintain perfection, you will prevent the oil buildup that makes leather look ‘shiny’ and cheap over time. Professional documentation, specifically the IICRC S300 Standard for Professional Upholstery Cleaning, emphasizes that proper soil suspension is critical; this means you need the right tool to let the cleaner dwell on the surface rather than forcing it deep into the padding.
The specific gear that actually saves your furniture
One of the biggest mistakes I see during a move-out cleaning strategies to secure your deposit session is using an old vacuum with a clogged filter. You think you are cleaning, but you are actually blasting dust back into the porous leather. Understanding why your vacuum filter might be making your allergies worse is a game-changer for upholstery care. I always use a HEPA-certified vacuum with a soft brush attachment before I even think about applying a liquid cleaner. This prevents ‘muddying’ the stain. As we look toward the future, I predict we will see a massive shift toward probiotic cleaners. These use live bacteria to ‘eat’ organic stains and odors for days after the initial application, which is one of the most exciting sanitizing secrets for a safer house in 2025. It represents a move away from harsh chemistry toward biological maintenance. #IMAGE_PLACE_HOLDER_D#
How do I keep my upholstery looking new for the long haul?
Maintenance is not a one-time event; it is about consistency and the right pH-balanced environment. My personal rule of thumb is a ‘wipe-down’ every two weeks and a deep condition every six months. This prevents the hide from drying out and cracking, which is a structural failure that no amount of cleaning can fix. When you follow the ultimate upholstery care guide for lasting freshness, you are essentially acting as a conservator for your home. I want to challenge you to try one thing today: swap your standard cleaning cloth for a high-gsm microfiber towel and see how much more dirt you lift with just water. You will be shocked at the difference a professional-grade tool makes.
The Hardest Lesson I Learned While Saving My Italian Leather
Looking back at my leather sofa disaster, the biggest takeaway wasn’t just about the ink; it was about the psychology of cleaning. When we see a stain, our brain goes into ‘attack mode,’ but leather requires ‘nurture mode.’ Here are a few lightbulb moments from my years in the trenches. First, the 30-second rule is real. If you do not have the right tools within thirty seconds, walk away. Rushing with a paper towel and dish soap often does more damage than the ink itself. Second, texture trumps color. You can always recolor a faded spot, but once you dissolve the texture of the hide with harsh chemicals, that smooth ‘plastic-y’ scar is permanent. Finally, remember you are cleaning the finish, not just the fiber. Respecting that seal is what separates a novice from a pro. If you keep these shifts in mindset, your upholstery cleaning tips for a fresh home revival will be much more effective because you will stop fighting the material and start working with its natural properties.
The Essential Toolkit for Any Upholstery Emergency
I do not believe in a cupboard full of mystery sprays. To maintain a truly high-end look, I rely on a very specific set of tools that I recommend in my ultimate upholstery care guide for lasting freshness. First, a HEPA-certified vacuum is non-negotiable. You would be surprised at why your vacuum filter might be making your allergies worse and dulling your furniture at the same time by blasting dust back into the pores. Second, keep a stash of high-gsm microfiber towels; they lift pigment rather than scraping it. Finally, always have a pH-balanced conditioner on hand to restore the lipids you remove during cleaning. Whether you are doing a routine spruce-up or a frantic move-out clean checklist to simplify your transition, these three items will save you more money in furniture replacement than any chemical shortcut ever could.
Your Path to a Revived and Worry Free Living Room
Stains happen—it is part of a life well-lived. Do not let the fear of a pen mark or a spill stop you from enjoying your home. By mastering how to lift ink stains from a leather sofa using household items safely, you take back control from the accidents. Remember that the goal of a daily house cleaning routine to maintain perfection is not to live in a museum, but to ensure your sanctuary stays comfortable and beautiful for years to come. You have the knowledge now; go ahead and give your favorite chair the TLC it deserves. #IMAGE_PLACE_HOLDER_E# Have you ever tried the water drop test on your sofa and been surprised by how absorbent it actually was? Let me know your experience in the comments below!