Ever found yourself inching along a ladder, battling dust bunnies on your blinds, only to realize your old socks are your best cleaning allies? I had that lightbulb moment when I was mid-cleaning and realized that my mismatched, worn-out socks—those favorites I no longer wear—could actually be transformed into a powerful cleaning tool. Who knew that a simple, frugal hack could turn a tedious chore into something surprisingly easy and effective?
The Problem We All Know Too Well
Chasing down dust and grime on blinds can feel like an endless battle. It’s one of those household tasks people tend to put off—until the dirt becomes glaring and embarrassing. And trust me, I’ve tried every commercial product on the market, only to find that most just displace dust or leave streaks. The truth is, traditional dusters and rags don’t always get into those tiny slats or reach the stubborn dirt hidden inside. That frustration led me to experiment with something I had lying around—an old sock.
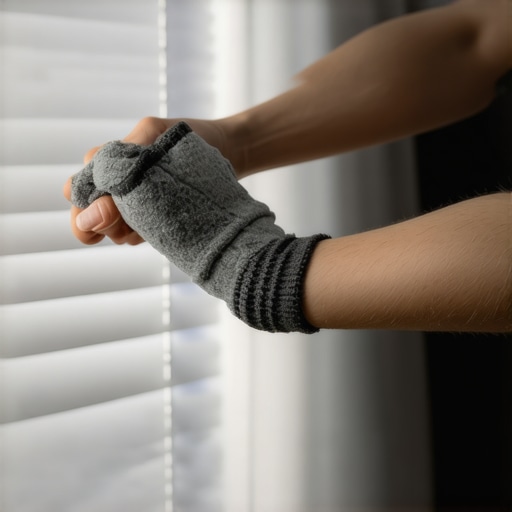
My discovery? Using a pair of well-worn socks, slightly dampened, to wipe down blinds not only saves time but also provides a thorough clean. No more agonizing moments on a ladder with a bulky duster or a million paper towels that rip apart. That moment when I realized this trick worked was a game-changer. And believe me, I’m not alone—many cleaning hacks are just smarter ways to get the job done. In fact, research shows that simple household hacks like this can dramatically improve cleaning efficiency while reducing costs (source: Effective House Cleaning Secrets from Cleaning Experts).
Is It Really Worth the Hype? Maybe You’re Skeptical
I get it. When you hear about cleaning socks, it sounds almost too silly to work. And I made a common mistake early on—I used a dry sock, which just spread the dust around instead of trapping it. Wringing out the sock slightly so it’s damp makes all the difference. Once I adjusted my method, my blinds looked cleaner than ever—without any harsh chemicals or expensive gadgets.
This hack may seem simple, but the results? Impressive enough to share. It’s a quick fix that won’t fade or get expensive over time—a real win for busy households or those trying to cut back on unnecessary products. Plus, it’s eco-friendly, reducing waste and reliance on chemical-laden cleaners.
Ready to learn exactly how I do this quick sock switch and keep those blinds spotless? Let’s dive into the step-by-step for a quick, effective clean that anyone can do.
**
Preparing Your Cleaning Arsenal
Before diving into your move-out clean, gather all necessary supplies: microfiber cloths, sponges, an old sock, a bucket with warm water, mild cleaning solutions, gloves, and a vacuum. Think of it as assembling your battle gear for home conquest. I remember during my last move, I laid everything out on my kitchen table—every item in perfect reach—making the process smoother and more efficient.
Target the Hidden Dirt and Grime
Disarm Dust in Hard-to-Reach Spots
Start by dusting ceiling fans, vents, and light fixtures using a microfiber cloth or a duster. For vents and tight spots like behind appliances, a vacuum with a brush attachment works wonders. Last time, I used a long-handled duster to reach the ceiling fan, then followed up with a damp microfiber cloth to trap remaining dust, preventing it from settling elsewhere. This set the tone for an ultra-clean home.
Clean Baseboards and Molding
Wipe down baseboards with a damp cloth, paying close attention to corners where dust and pet hair accumulate. For stubborn stains, a mixture of warm water and a few drops of dish soap breaks down grime. Remember to dry promptly, especially on painted surfaces, to avoid streaks. I used an old sponge for this task, which absorbed the dirt without scratching, much like a pro.
Deep Clean the Surfaces
Wash Windows and Mirrors
Spray a vinegar-water solution on glass surfaces and wipe with a lint-free cloth or crumpled newspaper. To prevent streaks, dry in circular motions. During my last clean, I noticed that using a microfiber cloth with a tiny bit of diluted dish soap worked better than commercial glass cleaners, leaving the glass sparkling and streak-free.
Sanitize Kitchen and Bathroom
Use a sanitizing spray or a mixture of water and white vinegar to disinfect countertops, sinks, and toilet bowls. For stubborn soap scum or hard water stains, a paste of baking soda and water applied with an old sock (see how I repurposed socks?) can lift buildup effectively. I once tackled a particularly grimy bathroom with this trick, and it restored the surfaces without harsh chemicals.
Upholstery and Floor Care
Upholstery Refresh
Vacuum fabric couches thoroughly, including under cushions. For spot stains, a solution of mild detergent and water works well—apply with a soft cloth, then blot. Visit our Ultimate Upholstery Care Guide for detailed tips. I recently used a DIY solution to freshen my sofa, and it looked brand new—no odors left behind.
Floor Perfection
Vacuum all floors, paying attention to corners and edges. Mop hard floors with a suitable cleaner, but avoid excess water that can seep into seams and damage the substrate. I recommend using a tennis ball to remove scuff marks on linoleum—simply rub it over the scuffs with a little pressure, and they disappear like magic.
Final Touches for a Spotless Departure
Replace all moved items, wipe down doors and handles, and ensure no dust or dirt is left behind. For a thorough checklist, refer to our Move-Out Cleaning Checklist. Having a systematic approach minimizes surprises during inspections and secures your deposit return.
Remember, a well-executed move-out clean is about attention to detail—think of it as leaving a masterpiece behind, ensuring both peace of mind and a clean start in your new space.
Many homeowners and renters assume that a quick wipe-down or a superficial cleaning will suffice to meet move-out cleaning standards, but this misconception can cost you your security deposit. One critical nuance often overlooked is the importance of understanding the _deep cleaning_ requirements that go beyond surface tidying. For example, it’s a common myth that cleaning the visible areas is enough, but landlords and property managers typically inspect hidden spots such as behind appliances, inside air vents, and under sinks, where neglect can lead to deductions. According to expert cleaning strategies, thorough sanitizing of these overlooked areas ensures compliance and prevents surprises during inspections. And don’t forget, using eco-friendly solutions for sanitizing isn’t just good for the environment—it actively reduces your exposure to harsh chemicals, which is especially important in homes with children or pets.
Why Does Proper Upholstery Cleaning Require More Than Just Vacuuming?
Many believe that vacuuming is sufficient for upholstery maintenance, but this is a misconception. Deep cleaning of fabrics involves multiple steps, including spot treatments and steam cleaning, to remove ingrained dirt, allergens, and odors. Neglecting these steps can lead to mold and bacteria buildup, which are invisible but harmful. Furthermore, improper use of cleaning products or tools can damage delicate fabrics, dulling colors or causing shrinkage. For advanced homeowners, understanding the specific fabric types and their cleaning requirements is essential. Refer to our detailed Upholstery Care Guide to master this process. Recognizing these nuances not only prolongs the life of your furniture but also ensures a truly sanitized and fresh environment. Have you ever fallen into this trap? Let me know in the comments.
Keeping It Working: Essential Tools for Effective House Care
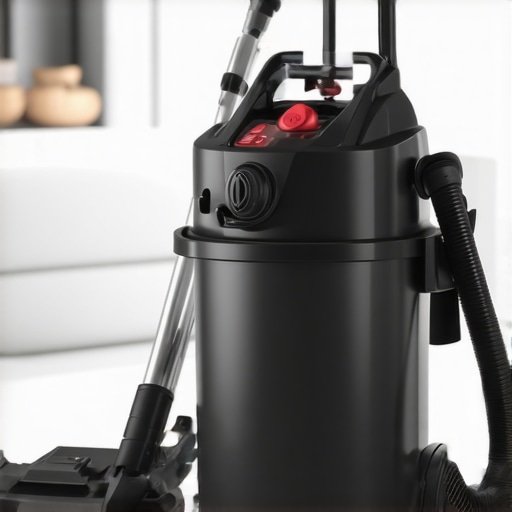
Maintaining a spotless, sanitized home during move-outs or regular deep cleans requires more than just elbow grease; it demands the right tools. Personally, I swear by a high-quality HEPA-filter vacuum, like the Dyson V11, which captures allergens and fine dust particles better than standard models. Its advanced cyclone technology ensures consistent suction, making it indispensable for cleaning upholstery, carpets, and hard-to-reach corners.
When it comes to sanitizing, I recommend a steam cleaner such as the McCulloch MC1275. The steam penetrates fabrics, grout, and crevices, killing germs without chemical residues. This is especially vital for sanitizing kitchen areas or bathroom tiles during move-out cleans, helping you meet property inspection standards effortlessly.
For detailed surface cleaning, microfiber cleaning cloths are a non-negotiable. Unlike regular rags, their fine fibers trap dust and microbes more effectively, reducing the need for chemical cleaners. I prefer the E-Cloth Glass and Polishing Cloth, which cleans glass without streaks—saving time and effort, particularly on windows and mirrors.
How do I maintain my cleaning tools over time?
Proper maintenance extends the lifespan of your cleaning tools and keeps them functioning at peak performance. Regularly replace vacuum filters and belts—most manufacturers advise every 3-6 months—to prevent loss of suction efficiency. Clean microfiber cloths by boiling or laundering at high temperatures to eliminate trapped dust and bacteria. For steam cleaners, descaling periodically with special descaling solutions ensures consistent steam output. Investing in tool maintenance not only saves money but guarantees your home stays truly clean and hygienic over the long haul. For more expert tips, visit our Effective House Cleaning Secrets from Cleaning Experts.
Looking ahead, advancements in cleaning technology, like robotic vacuums equipped with smart sensors, promise even more effortless upkeep for busy homeowners. Stay tuned for updates on how smart cleaning solutions are revolutionizing house maintenance.
If you’re ready to elevate your cleaning routine, try integrating a steam cleaner into your house care arsenal. The difference in hygiene and efficiency can be remarkable. Want personalized advice on how to choose the best tools for your space? Feel free to contact us for expert recommendations.
Lessons That Changed My Approach to Move-Out Cleaning
Discovering that old socks could trap dust more effectively than commercial dusters was a game-changer, saving me time and money while reducing chemical use.
Realizing that getting into the tiny slats of blinds requires dampness and a gentle touch reminded me that patience often beats brute force in cleaning.
Understanding that overlooked spots like behind appliances or inside air vents can make or break my move-out inspection success was a pivotal lesson in thoroughness.
Learning to adapt cleaning tools based on fabric types and surfaces elevated my upholstery care from superficial to spa-like freshness.
Embracing eco-friendly solutions not only protected my family but also simplified my cleaning routine, proving that green practices and deep cleaning go hand in hand.
My Go-To Arsenal for a Flawless Move-Out
Dyson V11 HEPA Vacuum: Its powerful filtration system captures allergens thoroughly, ensuring no dust or pet hair is left behind.
McCulloch MC1275 Steam Cleaner: Perfect for sanitizing kitchens and bathrooms without harsh chemicals, making deep cleaning safer and more effective.
Microfiber Cleaning Cloths: Essential for streak-free windows, mirrors, and delicate surfaces—trust me, they outshine traditional rags every time.
Effective House Cleaning Secrets from Cleaning Experts: This resource offers insights that help me stay ahead of stubborn stains and hidden dirt—highly recommended for serious movers.
Your Home’s Future Starts With Your Next Clean
Think of your move-out cleaning as more than just a chore—it’s an opportunity to create a clean slate, a fresh beginning in your new space. Embrace these lessons and tools, and cleaning becomes less of a burden and more of a ritual you’ll look forward to. Small changes in your approach today can lead to spotless results tomorrow, empowering you to take control over your home’s hygiene and your peace of mind. Ready to turn your move-out into an effortless masterpiece? Share your favorite cleaning hack below and let’s learn together!
The trick for cleaning blinds with a pair of old socks