
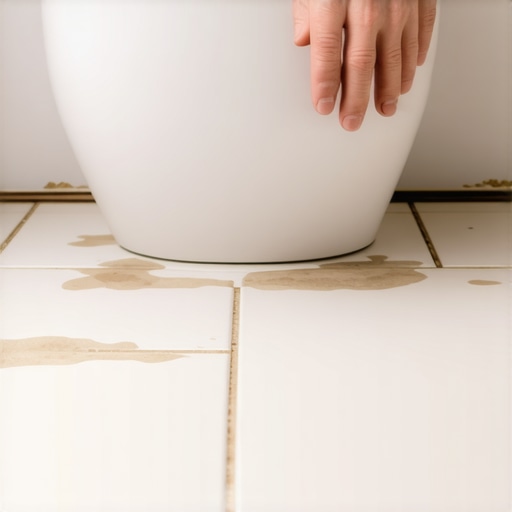
It was one of those mornings where everything seemed to pile up at once — the laundry, the dishes, and that nagging feeling that I was forgetting something important. Then, as I hurried around trying to finish my chores before a last-minute inspection, I caught myself staring at the bathroom door. Specifically, at that tiny gap beneath the toilet. That’s when it hit me — what if that sneaky little spot was the reason the landlord kept inspecting that exact area?
The Real Reason Behind the Focus on Behind the Toilet
I’ve learned over the years that landlords have a keen eye for certain trouble spots, especially behind and beneath the toilet. Why? Well, it’s often where dirt, mold, and even moisture can hide unnoticed. A small leak or accumulated grime in this area can turn into a hefty repair bill or a lost deposit if not addressed properly. And honestly, I was guilty of neglecting this spot myself — until I experienced firsthand how quickly it can turn into a major headache.
The good news? Once I understood what to look for and how to clean it effectively, I managed to keep my bathroom spotless and avoid those unwanted landlord inspections. Today, I’ll share the secrets I wish I’d known earlier, so you can nip potential problems in the bud.
Is This Worth the Extra Effort? Absolutely.
I used to think that focusing on behind and under the toilet wasn’t necessary — a mistake that a lot of folks make. Early on, I believed regular cleaning was enough, but I missed the subtle signs of leaks and hidden grime that can cause long-term damage. For example, failing to catch a slow leak early ended up costing me more than a simple cleaning routine could have.
Did you know that according to the Environmental Protection Agency (EPA), moisture and mold issues in bathrooms are among the top reasons for home inspections failing? Recognizing the importance of small, overlooked spots can save you time, money, and stress.
Now that I’ve shared my initial slip-up, let’s dive into what exactly makes these hidden spots so important and how you can tackle them effectively. Ready to take control of that sneaky little area behind your toilet? Keep reading, because I’ll guide you through every step to keep your home safe, clean, and landlord-friendly.
Target the Area Beneath and Behind the Toilet
Start by turning off the water supply to your toilet and flushing to empty the tank. Use a putty knife or a flathead screwdriver wrapped in a cloth to gently pry off the base of the toilet if possible, or carefully move it aside if your setup allows. This exposes the hidden grime and potential leaks. Wear gloves and a mask to protect against mold and bacteria, especially if you notice a musty smell or black spots.
Scraping and Clearing Debris
Use a plastic scraper or an old toothbrush to dislodge dirt, mineral buildup, or mold from crevices. For stubborn grime, mix a paste of baking soda and water, applying it directly to the affected areas. Scrubbing with this paste acts like a gentle abrasive, breaking down deposits without damaging porcelain or seals. This step is similar to cleaning under kitchen appliances—compact spaces hide more dirt than you realize.
Disinfect and Sanitize Thoroughly
Mix an EPA-approved disinfectant or a bleach solution (1 part bleach to 10 parts water), and apply generously to all surfaces. Use a brush to scrub thoroughly, paying special attention to corners and seams—these are prime hiding spots for bacteria. After scrubbing, let the solution sit for 10 minutes to ensure germs are killed. This process is essential before reassembling or securing the toilet back in place.
Handling Moisture and Mold Risks
Moisture accumulates easily in these hidden areas, fostering mold growth. Once cleaned, use a microfiber cloth to wipe dry all surfaces, ensuring no residual dampness remains. If mold persists, apply a specialized mold remover, following the product instructions carefully. Keeping this area dry not only prevents health issues but also extends the lifespan of your fixtures.
Final Checks for Leaks and Damage
Before restoring everything, visually inspect the base seal for cracks or leaks. Reinstall the toilet carefully, ensuring the bolts are tight but not over-tightened—excessive force can crack the porcelain or distort the seal. Turn the water supply back on and flush multiple times, watching for any signs of leaks or water seeping beneath. If leaks are present, replacing the wax ring or consulting a professional is advisable.
Regular Maintenance Helps Prevent Future Challenges
To keep this area in top shape, incorporate monthly cleaning routines focusing on behind and beneath the toilet. Use a long-handled brush for hard-to-reach spots, and always dry thoroughly afterward. Maintaining a dry environment discourages mold growth and spotty grime build-up, making each cleaning session quicker and more effective. For comprehensive cleaning tips, consider reviewing this move-out cleaning checklist that includes behind-the-toilet chores.
Many homeowners assume that a quick wipe-down or spot cleaning is enough to maintain a spotless home, but this oversimplification often leads to overlooked issues that can escalate over time. One widespread myth is that sanitizing is only necessary during flu season or after illness; however, research from the CDC highlights that regular sanitizing of high-touch surfaces reduces overall germ load year-round, protecting your family continuously. Additionally, people frequently believe that using natural ingredients like vinegar and lemon is always effective for deep cleaning, but these can be insufficient against certain bacteria and mold, as detailed in our effective sanitizing methods guide. It’s a misconception that upholstery cleaning can be done effectively with limited effort, yet neglecting professional-grade techniques may leave hidden dirt and allergens embedded, affecting indoor air quality. Have you ever fallen into this trap? Let me know in the comments.
A critical mistake many make is treating move-out cleaning as a cosmetic touch-up rather than a thorough process. Skimping on detailed tasks like deep cleaning behind appliances or sealing grout lines can jeopardize your security deposit or lead to claims against damage that wasn’t properly addressed. Advanced cleaning requires attention to nuanced areas, such as the hidden grime on the bottom of trash cans or the buildup inside vents, as discussed in our move-out checklist. Furthermore, there’s a tendency to overlook specialized cleaning when dealing with upholstery; many believe that general vacuuming suffices, but deep cleaning fabrics involves specific detergents and techniques that preserve material integrity and prolong lifespan. For in-depth tips, visit expert upholstery care advice.
People often underestimate the importance of maintaining the hidden crevices and corners in the home. For example, neglecting the buildup around baseboards and inside vents can result in accumulated dust and allergens that compromise indoor air quality. An advanced understanding reveals that these hidden spots can harbor bacteria and mold, which are not eliminated through surface cleaning alone. Regular, targeted attention to these areas, coupled with professional cleaning products, builds a healthier environment. Moreover, many are unaware that improper cleaning techniques can cause damage—using abrasive tools on delicate surfaces or overusing harsh disinfectants can lead to discoloration or deterioration. Proper knowledge about cleaning agents, application methods, and timing is vital, as outlined in our house cleaning secrets from experts. Now, think about your routine: are there neglected zones that could be hiding allergens or damaging your fixtures? Addressing this requires a strategic approach that balances efficiency with thoroughness. Have you ever encountered unexpected issues during a cleaning session that caught you off guard? Share your story with me in the comments and let’s learn together.Maintaining your home cleaning tools and equipment is crucial for ensuring long-term effectiveness and preventing costly repairs or replacements. Investing in quality tools, using proper storage solutions, and adopting regular maintenance routines can significantly extend their lifespan. For example, I personally swear by a high-quality steam cleaner with replaceable filters, which not only disinfects surfaces thoroughly but also reduces the need for chemical cleaners, aligning with eco-friendly trends. Regularly inspecting and cleaning your vacuum filters, as suggested by professional cleaning experts in our house cleaning secrets, can prevent dust from recirculating and damaging the motor.
How do I keep my cleaning equipment functional over time? The key lies in establishing a routine that includes cleaning, drying, and proper storage after each use. For instance, always empty and wash your vacuum filters and brush attachments to prevent mold and odor buildup. When it comes to upholstery tools, like those used for deep cleaning fabrics, following manufacturer instructions for routine maintenance ensures optimal performance, as detailed in our upholstery care guide. Using tools with concealed or complex parts warrants occasional lubrication or calibration—think of it like maintaining a car engine.
Looking ahead, trends suggest smarter, IoT-connected cleaning devices will improve maintenance schedules by sending alerts when filters or brushes need attention. Moreover, more professional-grade tools are becoming accessible to homeowners, making deep cleaning more efficient. Don’t wait for a breakdown—start by inspecting your vacuum’s filters today, and replace or clean them based on usage frequency. This small step can prevent decreased suction power and extend your device’s life.
Considering a move-out clean or long-term sanitizing, having well-maintained tools ensures your efforts are more thorough and less time-consuming. Regular upkeep not only improves results but also saves money over time by reducing the need for replacements. Remember, the quality of your cleaning depends heavily on the tools you use—so treat them like investments. Want to dive deeper into maintaining specialized equipment? Check out our sanitizing methods for expert tips.
Start today by picking one cleaning tool, like your vacuum, and schedule its maintenance routine. You’ll be surprised how quickly your equipment performs like new, making your entire cleaning process more effective and satisfying.
Uncovering the Unexpected Challenges in My Cleaning Routine
One of the most eye-opening lessons I received was realizing how overlooked areas, like behind and beneath the toilet, can silently undermine a spotless home. That tiny gap can harbor mold, grime, and leaks, turning a simple cleaning task into a costly repair if ignored. This experience taught me that real cleanliness involves paying attention to those hidden corners most people dismiss, and addressing them proactively.
Some Secrets That Changed My Approach to Maintaining a Fresh Home
I discovered that quick surface cleans won’t cut it when it comes to preventing mold and bacterial buildup. Regular, thorough scrubbing with eco-friendly disinfectants made a noticeable difference, especially in those hard-to-reach spots. Maintaining sealed grout lines, inspecting for leaks early, and drying those areas meticulously have saved me from surprises during inspections and kept my home healthy. Incorporating these practices transformed my cleaning routine from reactive to preventive, which is crucial for long-term home care.
Why Mastering these Hidden Cleaning Tricks Will Empower You
Embracing the art of cleaning behind and under fixtures isn’t just about avoiding landlord inspections; it’s about taking control of your home’s health and longevity. When I started paying closer attention to neglected spots, I also became more efficient and confident. I learned that the right tools, like long-handled brushes and EPA-approved disinfectants, make all the difference. If you’re ready to elevate your cleaning game, exploring resources such as effective sanitizing techniques can set you on the path to mastery.
My Explorations Into Tools and Resources That Make a Difference
Over time, I found that investing in quality tools like steam cleaners with replaceable filters and specialized grout brushes significantly enhances cleaning results. Books like House Cleaning Strategies for a Sparkling Home provided me with structured routines, reducing guesswork. Consulting professional advice and tutorials on proper equipment maintenance, such as upholstery care, keeps my tools in top shape and my cleaning effective.
Embrace the Cleaning Journey with Confidence
Remember, transforming your home and mastering those hidden spaces doesn’t happen overnight. Each small step, inspired by personal insights and curated resources, builds toward a cleaner, healthier environment. If I could start fresh, I’d focus on routine inspections and tool maintenance, which are game-changers. So, why not take that first step today? Your home will thank you for it. How have neglected spots caught you off guard during your cleaning routines? Share your stories below, and let’s learn together.