
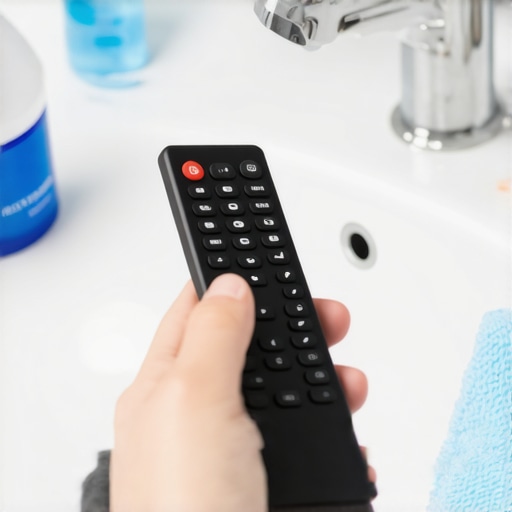
Have you ever grabbed your TV remote, only to hesitate before pressing that button? Maybe you noticed greasy fingerprints, or worse, a tiny crumb stuck in the crevice. It hits you—this little device gets handled countless times daily, yet we often overlook how dirty it truly is. One night, as I was cleaning my living room, I realized how gross my remote must have been after months of neglect. That was my Aha moment—and I knew I had to find a safe, quick way to sanitize it.
Why Sanitizing Your Remote Matters More Than You Think
Our TV remotes aren’t just dirty—they’re a hotbed for germs and bacteria. Studies show that remote controls can harbor more germs than toilet handles! (source: CDC). Considering how much we touch them—sometimes with unwashed hands—it’s clear that regular sanitization isn’t a luxury; it’s a necessity. But here’s the catch—most cleaning methods are either harsh, time-consuming, or risky for the electronics. That’s where the 4-minute trick comes in, transforming a chore into a quick, safe routine you’ll actually stick with.
Is The 4-Minute Trick Actually Worth the Hype?
Early on, I made a mistake—using too much cleaning spray directly on my remote. Not only did I waste time cleaning dried residue, but I also risked damaging the electronics. That moment taught me that safe sanitizing isn’t about brute force; it’s about knowing the right technique. Now, I want to share this simple method with you, so your remote stays spotless without any risk of damage or unhealthy residues. Curious? Let’s dive into how this quick trick can change your cleaning game.
Prepare Your Supplies and Environment
First, gather your materials: a microfiber cloth, 70% isopropyl alcohol, a soft brush or toothbrush, and a small bowl of warm water with a few drops of dish soap. Clear a workspace free of clutter to prevent dropping your remote. I once tried cleaning my remote on a crowded coffee table—ended up knocking over a cup of coffee onto it. Learning from that, I now set up a dedicated cleaning zone to keep everything safe and organized.
Power Down and Remove Batteries
Always turn off your remote and remove the batteries before cleaning. This step prevents accidental presses and electrical issues. During my last cleaning session, I forgot this step—resulting in a brief spark that startled me. Now, I make it a habit to switch off and pop out batteries beforehand.
Surface Cleaning with Alcohol
Dampen a microfiber cloth with 70% isopropyl alcohol. Wring out excess liquid to avoid drips. Gently wipe down the entire surface, paying special attention to buttons and crevices. Think of it as giving your remote a quick, energetic handshake—firm but gentle. I remember wiping mine vigorously, causing some buttons to stick. Now, I apply gentle, circular motions for thorough cleaning without damage.
Reach Hard-to-Clean Areas
Use a soft brush or toothbrush dipped lightly in alcohol or warm soapy water to scrub around buttons and in crevices. This step is crucial because dirt and bacteria hide in the tiniest cracks. One messy Saturday, I used a toothpick to loosen grime in tight spots—made a noticeable difference. Be careful to avoid excessive force that could damage delicate parts.
Sanitize with Isopropyl Alcohol
For an extra germ-killing boost, lightly spray alcohol onto a clean microfiber cloth and wipe the remote again. Avoid spraying directly onto the device to prevent moisture entering electronics. This method ensures any remaining germs are eliminated. I discovered this trick when I noticed a bacterial “film” after cleaning, so I increased my use of alcohol for a safer, hygienic finish.
Dry and Reassemble
Use a dry cloth to wipe off any residual moisture and let the remote air-dry for a few minutes. Once dry, reinsert the batteries and test the device. During my last clean, I rushed to reassemble immediately, causing buttons to stick temporarily. Waiting allowed everything to settle, ensuring proper function and cleanliness. Keep in mind—regular cleaning not only sanitizes but also extends your remote’s lifespan.
Incorporate into Routine Maintenance
Integrate this quick process into your weekly house cleaning routine—perhaps during your daily cleaning schedule. With consistency, your remote stays germ-free and dust-free, reducing overall bacteria spread in your home. I now clean my remote every Sunday afternoon—turning a once-messy chore into a seamless habit. Remember, the key is gentleness and patience—your electronics will thank you for it.
While many believe that a quick spray and wipe suffice for effective upholstery or sanitization, this oversimplifies the complexities involved. In truth, misconceptions abound, often leading to ineffective results or even damage. For instance, some assume that using bleach guarantees sterilization; however, overuse or improper dilution can degrade fabrics and pose health risks, as highlighted in expert cleaning guides. Additionally, many overlook the importance of pre-treatment—focusing solely on surface cleaning neglects deeper dirt and bacteria lodged within fibers. Dive deeper into these nuances through our comprehensive upholstery care guide for lasting freshness. An advanced mistake many make is treating all fabrics equally, not considering the specific material’s needs, which can lead to discoloration or fiber damage. Moreover, a common trap is relying solely on commercial cleaning products without understanding their chemical composition, risking residue buildup that attracts more dirt over time. For example, using strong solvents on delicate silk upholstery can cause irreversible damage. To truly master cleaning, consider the hidden layers of care, such as the order of cleaning steps and compatibility of products—details that significantly impact the longevity of your furnishings. Remember, effective sanitization isn’t just about quick fixes but about understanding the fabric’s nuances and the science behind cleaning agents. Are you falling for any of these myths? Share your experience or questions in the comments! For smarter house cleaning strategies, check out our home cleaning strategies guide to elevate your routine.
Keeping it Working: Essential Tools for Effective Cleaning
To maintain your upholstery, sanitizing, and house cleaning efforts over time, investing in the right equipment is crucial. I personally recommend a high-quality steam cleaner with adjustable settings, like the Wagner PowerFoam, which I use for both upholstery and deep cleaning carpets. Its variable temperature controls allow you to target different surfaces safely, and the detachable brushes make spot cleaning more efficient. Additionally, a handheld upholstery extractor with strong suction and adjustable nozzles helps remove ingrained dirt and pet hair, extending the lifespan of your furniture.
For sanitizing, I rely on isopropyl alcohol-based solutions mixed with distilled water for eco-friendly and quick-drying results. A UL-certified UV sterilizer can also be a game-changer for disinfecting soft furnishings and various household items. Combining these tools ensures your cleaning routine is thorough without risking damage to delicate fabrics or electronics.
The Power of Smart Maintenance Routines
Automation and routine checks are vital for longevity. Scheduling weekly maintenance with targeted tasks—like checking vacuum filters and replacing worn-out upholstery protectors—keeps your home in top shape. For example, regularly inspecting and cleaning vacuum filters with a brush prevents clogging, which can diminish suction power over time. I also suggest setting reminders to reapply fabric protectors after every thorough cleaning; this creates a protective barrier that resists stains and spills, making subsequent cleaning easier.
Expert Predictions: What’s Next for Cleaning and Upholstery Care?
Looking ahead, advancements in nanotechnology promise upholstery fabrics that are inherently resistant to stains and microbial contamination, reducing the need for intensive cleaning. Moreover, IoT-enabled cleaning devices could soon allow remote monitoring and maintenance, optimizing efforts and saving time. Staying updated on these innovations can elevate your home-care routine and ensure your investment lasts longer.
How do I maintain my cleaning tools and extend their lifespan?
Regular maintenance of your tools is often overlooked but essential for sustained performance. For instance, cleaning brushes and nozzles after each use and storing your steam cleaner in a dry, cool place prevents mold and corrosion. Similarly, replacing filters as recommended by manufacturers—usually every 6-12 months—keeps suction power high and prevents bacteria buildup. I learned this the hard way when ignoring filter maintenance led to decreased efficiency and unexpected breakdowns. Implementing a simple maintenance checklist can save you money and time in the long run.
For detailed guidance on extending your tools’ lifespan and avoiding costly repairs, check out our comprehensive house cleaning secrets from experts.
If you’re serious about maintaining your upholstery and cleaning gear, try incorporating an ultrasonic cleaner for small fabric items or parts, which effectively removes deep-seated dirt and germs without harsh chemicals. This small investment can significantly enhance your long-term results and preserve the integrity of delicate fabrics. Remember, consistency is key—regular checks and proper handling of your tools will keep your home fresh and pristine for years to come.
Throughout this journey of mastering remote and upholstery care, I’ve uncovered some invaluable lessons that go beyond simple cleaning techniques. One of the biggest revelations was realizing that consistent, gentle maintenance triumphs over aggressive scrubbing—your devices and furnishings are more delicate than we often give them credit for. Additionally, investing in proper tools and understanding their care has transformed my approach from haphazard to methodical, saving me time and money in the long run. Finally, I discovered that a mindful, informed routine not only enhances cleanliness but also extends the life of your electronics and fabrics, making every cleaning session a step toward a healthier, happier home.