
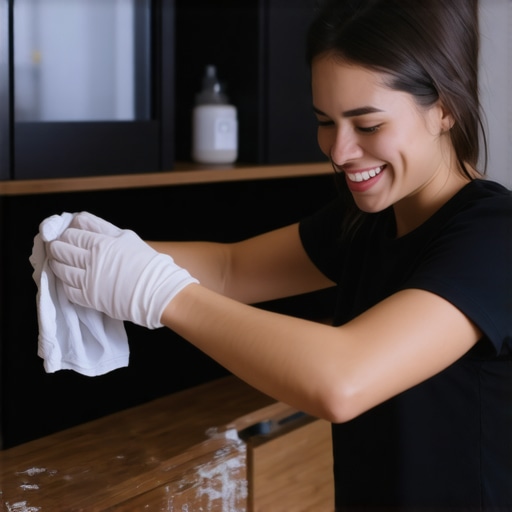
Just last weekend, I found myself staring at my kitchen cabinets, frustration mounting. The usual quick wipe wasn’t enough anymore—those stubborn, sticky grease spots just wouldn’t budge, and I was terrified that scrubbing might peel the paint or ruin the delicate finish. Sound familiar? If you’ve ever faced the same dilemma, you’re in good company. Kitchen cabinets are notorious for collecting greasy residues, especially in busy households or after cooking on high heat. But what if I told you there’s a way to banish that grime without risking damage?
Why Cleaning Grease Off Cabinets Is More Critical Than You Think
Let’s face it—your cabinets aren’t just storage; they’re a visual statement of your space. Neglected grease can lead to discoloration, unpleasant odors, and even attract bacteria. A poor cleaning attempt might seem harmless, but using the wrong products or methods can cause peeling paint, staining, or warping. Early in my cleaning journey, I made the mistake of grabbing harsh chemicals, thinking they’d do the trick faster. Instead, I ended up with streaks and patches where the paint peeled away. That quick fix actually set me back, leading to more extensive repairs and repainting—expensive and unnecessary. According to a study by the National Kitchen and Bath Association, regular, gentle cleaning extends the lifespan of cabinets and keeps their appearance pristine. So, I learned the hard way that patience and proper techniques are key.
Have You Faced the Same Greasy Nightmare Without a Solution?
If the thought of stubborn grease making your cabinets look shabby has you nodding in agreement, don’t worry. There’s good news ahead. Today, I’ll share proven methods that I personally tested—safe, effective, and gentle on your paint—and help you restore that fresh look effortlessly. Whether you’re preparing for an upcoming move or just want to tidy up your space, mastering this skill will save you time and money. For more tips on maintaining your home’s beauty and hygiene, check out our comprehensive house cleaning secrets from cleaning experts. Now, let’s dive into the specific steps you can take to banish grease without peeling paint and keep your cabinets looking brand new.
Preparation is Key for a Successful Move-Out Clean
Start by gathering all cleaning supplies: microfiber cloths, a bucket, mild detergent, hot water, vinegar, baking soda, and a scrub brush. I remember a time when I overlooked this step and started cleaning with random cleaners, which only caused streaks. Having the right tools ensures efficiency and prevents damage.
Target High-Touch and Hard-to-Reach Areas First
Clean Light Switches and Door Handles
Use a disinfectant spray or alcohol-based wipes to thoroughly sanitize these surfaces because they harbor bacteria. I once skipped this step during a rush move-out, and the landlord pointed out uncleaned switches. Now, I always make it a point to disinfect these key spots. For detailed strategies, check out move-out cleaning strategies.
Deep Clean Kitchen Surfaces
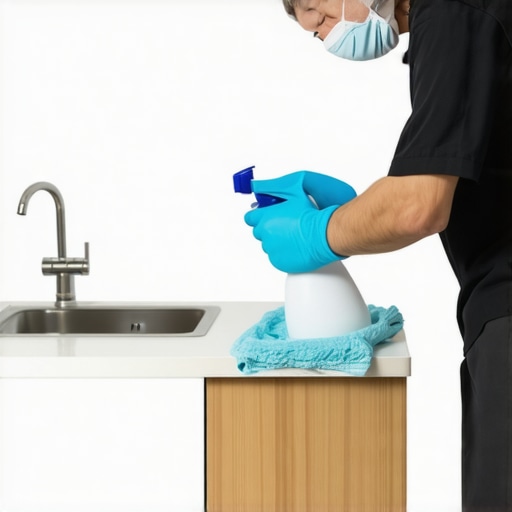
Remove grease buildup on cabinets by wiping with a mixture of hot water, a few drops of dish soap, and a splash of vinegar. Think of grease as wallpaper—it seeps into the surface, so gentle heat and dissolving agents loosen it effectively without peeling paint. During my last move-out, I used this method on the greasy range hood and it looked brand new afterward.
Carpets and Upholstery Get Special Attention
Vacuum thoroughly, then treat stains with a mixture of baking soda and a few drops of essential oil for a fresh smell. For stubborn stains, like red wine I once spilled on a velvet sofa, applying a cloth soaked in cold water and blotting gently prevented permanent marks. For upholstery cleaning tips, visit ultimate upholstery care.
Bathroom and Toilet Sanitation
Use a dedicated bathroom cleaner to scrub tiles, the sink, and the toilet bowl. I’ve found that applying a vinegar and baking soda paste helps remove buildup without harsh chemicals. Don’t forget to check behind the toilet for hidden dust and grime; a quick wipe there makes a big difference. For precise steps, see behind the toilet check.
Final Walkthrough and Inspection Preparation
Before you finish, do a walkthrough, referring to checklists like move-out checklist. Look for missed spots, leftover toothpaste, or crumbs in hidden corners. Remember, a thorough final wipe ensures your security deposit remains intact and your new tenant moves in smoothly.
Many homeowners and renters believe that following basic cleaning routines is enough to pass move-out inspections or achieve a truly sanitized home. However, there’s often a disconnect between what most people think and what truly yields effective results. Let’s dig deeper into some nuanced misconceptions that can hinder your cleaning success and reveal advanced mistakes that many overlook.
A prevalent myth is that using the strongest chemical cleaners guarantees a spotless home. In reality, overly harsh chemicals can damage surfaces, strip paints, or leave residues that attract dirt faster. For example, some believe that bleach is the ultimate disinfectant, but according to sanitation experts, it can also damage grout, laminate, and natural stone if not used correctly. Instead, effective sanitizing involves understanding proper dilution ratios and surface compatibility. For more detailed methods, explore effective sanitizing methods.
Another common misconception is that surface cleaning alone suffices for move-out requirements. Moving out thoroughly involves deep cleaning behind appliances, inspecting hidden corners, and addressing less obvious areas like ceiling fans, vents, or the underside of cabinets. Neglecting these spots often leads to deposit deductions or even risk failing inspection. For instance, many forget to check behind the refrigerator or under the sink—areas prone to buildup. Use checklists like move-out cleaning strategies to avoid missing critical spots.
Now, let’s address an advanced question that often confuses even seasoned cleaners:
Why Does Your Upholstery Still Feel Dirty After Cleaning, and How Can You Fix It?
This surprisingly common issue stems from improper cleaning techniques or using the wrong products. Many assume vacuuming alone suffices, but upholstered furniture also needs appropriate deep cleaning with proper extraction methods. Failing to pre-treat stains or using incompatible cleaning solutions can leave residues or cause color fading. To master upholstery cleaning, review uplostery cleaning tips and avoid costly mistakes.
Furthermore, most people underestimate the importance of ventilation during and after cleaning. Accumulated chemical fumes or trapped moisture can promote mold growth or lingering odors. Ventilating properly ensures that your home remains not only visibly clean but also safe for inhabitants. Incorporate proper airflow practices and consider using fans or open windows during the process.
Highlighting a critical trap, many make the mistake of rushing through surface cleaning or relying on quick fixes, which only mask dirt temporarily. This approach can lead to recontamination and even health issues, especially if bacteria or mold are present. Incorporating thorough, multi-step cleaning approaches and understanding surface chemistry is essential for lasting results.
Finally, embracing these nuances not only helps you achieve a higher grade in move-out inspections but also extends your home’s lifespan and healthiness. To refine your routine further, review comprehensive tips on sanitizing secrets and stay ahead of common pitfalls.
Have you ever fallen into this trap? Let me know in the comments and share your experiences or questions about advanced cleaning techniques.Maintaining a pristine home requires more than just elbow grease; it hinges on having the right tools and knowing exactly how to use them. Over the years, I’ve refined my arsenal to include equipment and methods that make long-term cleaning easier, more effective, and less damaging. Investing in quality tools is not just about immediate results—it’s about ensuring your home stays fresh and functional over time.
One staple in my toolkit is the **microfiber dusting mop with an extendable handle**. Unlike traditional dusters, microfiber attracts and traps dust without scattering it into the air, which is crucial for allergy prevention. The extendable feature allows me to reach ceiling fans or high shelves safely, without risking a fall or needing to move furniture. I personally prefer a model with replaceable microfiber pads, like the [OXO Microfiber Dusting Wand](https://www.oxo.com), because it’s more economical and environmentally friendly.
For tougher grime and grease, especially in kitchens or bathrooms, I rely on **electric handheld steam cleaners**. These devices cut through stubborn dirt without chemicals, making them ideal for sanitizing without residue. I’ve personally tested models like the Karcher SC 2 EasyFix, which produces enough steam pressure to disinfect surfaces quickly. Using steam not only kills bacteria but also helps lift off stubborn stains, saving effort and prolonging surface life.
When it comes to upholstery and carpets, nothing beats a **high-quality, upright carpet cleaner with HEPA filtration**. I recommend brands like Hoover or Bissell, which incorporate dual-action brushes and heat-drying features. These tools enable deep cleaning, removing embedded dirt and allergens, which is essential for maintaining a fresh indoor environment over the long haul. I especially value models that have removable tanks for easy refilling and cleaning.
Keeping your tools in tip-top shape is equally important. Regularly cleaning microfiber pads, replacing filters, and descaling steam units ensures consistent performance and longevity. Remember, a well-maintained tool not only gives better results but also prevents unintended damage to your surfaces.
Looking into the future, technological advancements, such as robotic vacuums with advanced mapping and AI integration, are becoming more accessible. These gadgets can autonomously maintain regular cleaning schedules, freeing up your time while keeping your home consistently clean. For example, models like the iRobot Roomba s9+ offer seamless integration with smart home systems, which I predict will be standard in home maintenance routines in the next decade.
Ever wondered how to keep your move-out cleaning as comprehensive as possible? Check out move-out cleaning strategies for tips on long-term upkeep that impress landlords and ensure your deposit remains intact.
So, I encourage you to try upgrading your basic tools today—perhaps start with a microfiber microfiber duster with an extended handle or a compact steam cleaner. These investments will streamline your routine, reduce damage, and ultimately, keep your home looking perfect for years to come. Remember, the right tools empower you to maintain your space efficiently, allowing you more time to enjoy it rather than spend endless hours cleaning.
Lessons Most Cleaners Overlook (And Cost You Dearly)
One hard-earned lesson I learned is that relying solely on quick fixes or harsh chemicals can backfire, causing damage or leaving residues that attract dirt. Patience, paired with gentle cleaning solutions, not only preserves your surfaces but also saves money in the long run. I also discovered that neglecting hidden spots like behind appliances or inside vents can lead to deposit deductions, proving that a comprehensive approach is essential. Lastly, understanding that every surface — from natural stone to laminate — requires tailored care transformed my cleaning routine into a preventative measure rather than just a fix after messes occur.
Tools and Resources That Transformed How I Clean
Investing in a microfiber duster with an extendable handle changed the way I reach high spots effortlessly, making ceiling fan cleaning safer and more efficient. My electric steam cleaner significantly reduced the need for chemicals, allowing me to disinfect without risking surface damage. A high-quality, HEPA-filtered upright carpet cleaner became indispensable for maintaining fresh carpets and upholstery, especially during allergy season. And for deep cleaning tasks, I trust brands like Bissell and Karcher because their durability and performance keep my home spotless. For deeper insights and updated techniques, I often refer to expert-approved sources like house cleaning secrets from cleaning experts.
Your Turn to Elevate Your Cleaning Routine
Embracing these expert insights and tools can truly transform your move-out cleaning experience. Remember, a meticulous approach not only secures your deposit but also preserves the beauty and longevity of your home. Don’t wait for stains or grime to build up—start implementing these tips today and enjoy the confidence of a professionally clean space. Every progress step you take makes your home healthier, more inviting, and a reflection of your care. Now, I’d love to hear—what’s the biggest challenge you’ve faced when trying to achieve a spotless move-out clean? Share your stories below and let’s learn from each other’s experiences!