
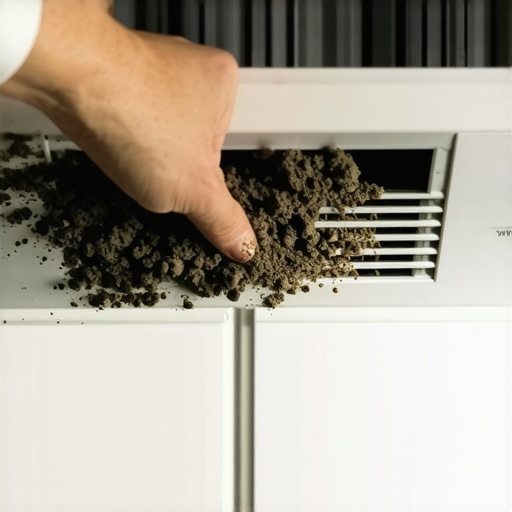
I remember the first time I moved out of an apartment and nervously watched the landlord inspect every nook and cranny. But what caught my eye wasn’t the squeaky hinges or the scuffed walls—it was that dusty, grimy build-up inside the bathroom vent. It looked harmless at first, but deep down, I knew that this little hidden trap could cost me my security deposit. Have you ever faced that gut-wrenching moment when your landlord points out something you missed?
The Battle Against the Bathroom Vent Dust Clump
That realization sparked a bit of a panic in me. I had scrubbed the tiles, cleaned the mirrors, and even disinfected the toilet—yet here was this unassuming dust trap lurking behind my bathroom cover. Turns out, landlords have a keen eye for this spot because it’s a prime area where dust, lint, and even mold can accumulate without us noticing. Not only does this affect the overall cleanliness, but it can also impact indoor air quality and even lead to maintenance issues if ignored over time.
Why should you care? Because overlooking this small detail might mean losing a chunk of your deposit or facing unexpected repair costs. Plus, maintaining a dust-free vent isn’t just for move-outs—it’s essential for healthier air in your entire home. Regularly cleaning this hidden pocket can prevent the buildup of allergens and even prolong the life of your ventilation system. According to the Environmental Protection Agency, indoor air can be up to five times more polluted than outdoor air, largely due to dust and mold particles lingering in unnoticed areas like vents.
Early on, I made the mistake of just wiping around the vent cover without pulling it out. Big mistake. Without actually removing the cover, dust and debris have a perfect place to settle and grow undisturbed. It’s a simple step that most forget, but it makes all the difference. So if you’re wondering, “Is cleaning the bathroom vent really worth my time?”—absolutely. It’s a small effort for a huge payoff.
Have you ever faced this problem and wondered if your cleaning routine actually gets to the hidden corners? Or are you stuck thinking it’s just too complicated to bother with? Don’t worry; I’ll walk you through the simple steps to tackle this sneaky dust zone in my upcoming sections. Trust me, once you master this trick, you’ll never have to sweat about those landlord inspections again.Prepare Your Workspace and Gather Supplies
Start by removing any items from around the vent area to ensure free access. Gather necessary tools such as a screwdriver, microfiber cloths, a vacuum with a brush attachment, a small scrub brush, a bucket of warm water, mild detergent, and optional disinfectant. Wearing gloves can protect your hands from dust and debris, much like prepping for a delicate surgical procedure. This preparation phase ensures efficiency and safety within your cleaning process.
Safely Remove the Vent Cover
Use a screwdriver to unscrew the vent cover carefully. Keep screws in a small container to prevent loss. Once removed, place the cover in a sink filled with warm water and mild detergent. If the cover is heavily soiled, let it soak for 10–15 minutes to loosen grime, similar to a Marinade that softens tough stains before scrub-down. This step facilitates more thorough cleaning later on.
Clean the Vent Cover and Grime Removal
Use a soft-bristled scrub brush to tackle stubborn dirt on the cover, paying special attention to crevices and louvers. Rinse thoroughly with clean water and set aside to dry. During my first deep clean, I found that a toothbrush worked wonders for my vent’s intricate parts, drastically reducing cleaning time. Ensuring the cover is spotless prevents dust from re-settling when reinstalled, akin to polishing a mirror to enhance clarity.
Vacuum Dust and Debris Inside the Duct
Attach the brush or crevice tool to your vacuum and carefully insert it into the duct opening. Vacuum out loose dust, lint, and debris thoroughly, making several passes if needed. Imagine it as using a slim wand to extract hidden gunk—your aim is to reach into every nook, much like cleaning behind furniture for that lost sock. Regular vacuuming prevents buildup that can cause poor airflow or mold growth, key for maintaining air quality.
Deep Clean the Inside Using Microfiber Cloths and Disinfectant
Dampen a microfiber cloth with a mixture of warm water and mild detergent or disinfectant. Wring it well to avoid dripping. Wipe down the interior surfaces of the duct, louvers, and the vent cover. For hard-to-reach spots, use a smaller brush or Q-tip dipped in cleaning solution. I once cleaned my vent using a cloth wrapped around a pencil—a trick that effectively tackled tight corners. This step eliminates bacteria and prevents mold spores from thriving in moist areas.
Reassemble with Precision and Reinforce Air Quality
After all parts are dry, reattach the vent cover securely with screws. Ensure no tools or debris remain inside before sealing. Consider replacing or upgrading filters if your system uses them, and run the fan for 10–15 minutes to circulate clean air. Doing so is like giving your house a breath of fresh life after a deep cleanse, similar to a morning refresh for your lungs. Regular maintenance like this extends the lifespan of your ventilation system and keeps indoor air healthier.
If you’d like to deepen your understanding of house maintenance, check out effective house cleaning secrets from cleaning experts. Remember, consistent attention to these small but vital details can save you money and preserve the comfort of your home. Keep your space dust-free and breathe easy!
Many homeowners and renters approach cleaning with good intentions, but even seasoned declutterers can fall prey to misconceptions that hinder their efforts. One prevalent myth is that using harsh chemicals always guarantees a germ-free environment, but in reality, overusing disinfectants can damage surfaces and lead to chemical resistance. Experts like those at the Environmental Protection Agency emphasize that proper technique and selecting the right cleaners are more effective than brute force alone.
Another misconception is that scrubbing harder or longer removes more dirt. In fact, excessive scrubbing can degrade upholstery fibers or scratch surfaces, which may cause permanent damage. Instead, understanding the nuanced differences between materials and cleaning products saves time and preserves the integrity of your furnishings. For instance, using the right upholstery cleaner from ultimate upholstery care guide can extend your furniture’s lifespan.
When it comes to move-out cleaning, many believe that a thorough all-over scrub is sufficient. But missing areas like behind appliances, inside vent covers, or under sinks can cause landlords to deduct deposits unnecessarily. Advanced move-out strategies involve targeted cleaning of these often-overlooked spots. For example, check out move-out cleaning hacks designed to streamline your process and avoid costly surprises.
What are the risks of relying solely on surface-level cleaning?
Let’s dig deeper. Surface cleaning, while visible, often neglects hidden grime that harbors bacteria, mold spores, and allergens. Studies have shown that bacteria like E. coli can linger on common household surfaces for days if not properly disinfected, which is why sanitizing isn’t just about appearance but essential for health. Proper sanitizing techniques involve understanding the science behind microbial death and selecting the right agents—like EPA-registered disinfectants—rather than relying solely on everyday cleaners. For safe and effective sanitizing tips, visit Sanitizing Secrets for a Safer House in 2025.
Have you ever fallen into this trap? Let me know in the comments. Remember, mastering the nuances of cleaning processes not only ensures a healthier home but also extends the life of your furnishings and saves you money in the long run.
Maintaining a spotless home isn’t just about tackling chores once in a while; it requires the right equipment and techniques to ensure lasting results. Over my years of cleaning, I’ve discovered that investing in quality tools can make all the difference in how effectively and easily you can keep your space clean and healthy. One staple I swear by is a high-powered, cordless vacuum with a HEPA filter, like the Dyson V11. Its lightweight design and advanced filtration system help me remove dust, pet hair, and allergens efficiently, especially from upholstery and hard-to-reach corners, aligning with insights from the effective house cleaning secrets from cleaning experts. Additionally, I never leave home without my microfiber cleaning cloths—these are game-changers for dusting and disinfecting surfaces without scratching finishes, an approach supported by industry standards for surface care. For stubborn grime, I rely on a steam cleaner that heats water to over 200°F, providing chemical-free sanitation that’s perfect for sensitive areas like kitchens and bathrooms. This aligns with future trends emphasizing natural disinfectants, as discussed in Sanitizing Secrets for a Safer House in 2025. I also recommend a handheld, rechargeable scrub brush for deep cleaning upholstery and textured tiles—this tool allows targeted cleaning without the bulk of traditional equipment. The key is being strategic about your tools: choose versatile, durable, and ergonomic options that match your specific cleaning needs. What’s more, integrating smart home devices, like scheduling apps for regular cleaning routines, can help maintain consistency over time. Embracing these tools and methods not only simplifies your chores but also ensures you achieve long-lasting cleanliness. If you’re serious about elevating your cleaning game, try incorporating a steam cleaner into your routine this month—it works wonders on grout and fabric surfaces alike.Throughout my cleaning journey, I discovered that the tiniest overlooked detail—like a dusty bathroom vent—can significantly impact your home’s cleanliness and your peace of mind. The lesson? Never underestimate hidden spots; they hold the key to truly fresh and healthy living spaces. Regularly examining and cleaning these unseen areas prevents allergen buildup, extends your ventilation system’s lifespan, and ensures your home remains a sanctuary rather than a breeding ground for germs. Over time, I learned that consistency beats perfection, and empowering ourselves with simple techniques transforms daunting chores into manageable habits. Remember, mastering small details like the bathroom vent not only secures your deposit but also boosts your confidence in maintaining a spotless, welcoming environment that nurtures your family’s health.