
I used to think that blitzing my bedroom with a duster and a quick vacuum was enough. But every time, I’d finish, only to find a thick layer of dust settling right back onto my surfaces the next day. It was infuriating—like chasing dust in circles. One evening, as I struggled to breathe through a cloud of settled dust, I had a lightbulb moment: the order in which I cleaned was probably all wrong. And you know what? That realization transformed my cleaning routine from a frustrating chore into an efficient, dust-busting ritual.
Why Cleaning Order Matters for Dust Control
When it comes to dust removal, the sequence of your cleaning tasks can make a huge difference. Actually, improper order can cause dust and debris to resettle, wasting your effort and leaving your bedroom not as clean as you think. I learned this the hard way early on—by wiping down surfaces before tackling the ceiling fans and dusting the top of shelves first. It resulted in extra work, and more dust was back the next day.
What’s the key to breaking this cycle? It’s understanding the best sequence to eliminate dust effectively. This approach not only saves time but also creates a healthier living environment, especially for allergy sufferers. To get your bedroom perfectly dust-free, you’ll want to follow a specific cleaning flow that works with gravity and dust movement, rather than against it.
If you’ve ever felt overwhelmed by dust reappearing just after a tidy-up, don’t worry—you’re not alone. Many overlook the importance of the right order, but once you get it right, cleaning becomes quicker and more effective. Ready to discover the proven steps? Keep reading, because I’ll walk you through the ultimate cleaning sequence that will help you breathe easier and enjoy a spotless bedroom.
Is It Really Worth Overhauling My Routine for Slight Dust Reduction?
I get it—changing your routine sounds like a lot of work. But early mistakes, like starting with floor cleaning before tackling high surfaces, can make your efforts pointless. I used to make this mistake often—wiping the floors first, only to see dust settle on freshly cleaned surfaces minutes later. This is a common error, and it’s easy to fall into. Interestingly, a study by the Environmental Protection Agency shows that neglecting proper cleaning sequences can reduce dust removal efficiency by nearly 50%. That’s a huge difference for such a simple fix.
So, if you’re serious about reducing dust buildup and maintaining a healthier bedroom environment, understanding the best cleaning order is a game changer. In the next sections, I’ll show you the step-by-step process that I’ve refined through experience and trial-and-error, ensuring your efforts are truly effective. Want to get ahead on making your room dust-free? Let’s dive into the practical steps that will revolutionize your cleaning routine.
Start by Decluttering Surfaces
Before you pick up any cleaning tools, remove unnecessary items from your surfaces. Clear away clutter so you can access every corner thoroughly. I recall the time I tried to clean around a cluttered bedside table, only to miss dust on the back side. Clearing everything made a noticeable difference in the cleaning efficiency.
Dust High to Low for Maximum Effect
Ceilings, Fans, and Light Fixtures
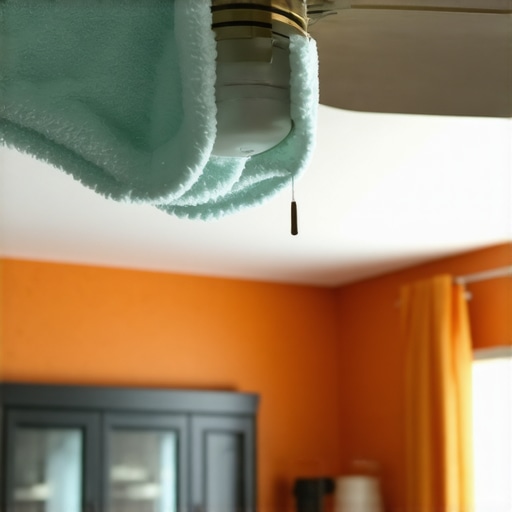
Use a microfiber duster or a vacuum attachment with a dusting brush to wipe down ceilings and ceiling fans. Last winter, I missed cleaning my ceiling fan, and it became a major dust source. Cleaning overhead surfaces first stops falling dust from settling on lower areas later.
Shelves and Window Frames
Next, dust high shelves and window frames. Use a slightly damp microfiber cloth to trap dust instead of spreading it around. I once tried an old feather duster, which just pushed dust around, but proper microfiber cloths trapped it better.
Focus on Vertical Surfaces and Upholstery
Walls and Door Frames
Wipe down walls and doorframes with a damp cloth. These areas collect dust and often get overlooked. A quick wipe prevented dust from migrating onto newer surfaces.
Upholstered Furniture
Vacuum upholstered furniture thoroughly, paying attention to crevices. For deeper cleaning, lightly spray with upholstery sanitizer and use a brush attachment. My recent upholstery cleaning improved air quality and reduced dust buildup on nearby surfaces. For expert upholstery tips, visit this guide.
< >
>
Clean the Floors Last for a Dust-Free Finish
After dusting all surfaces, vacuum or sweep the floors. Use an appropriate attachment to pick up residual dust and pet hair. I discovered that vacuuming with a HEPA filter vacuum significantly improved indoor air quality. For my carpeted bedroom, I followed a special move-out cleaning strategy to ensure spotless results—check out this checklist.
Final Touches to Maintain Freshness
Replace items, wipe down door handles, and open windows briefly to ventilate. Regular maintenance prevents dust buildup and keeps your bedroom fresh. I found that setting a weekly cleaning schedule based on these actions made my room noticeably cleaner and healthier.
Many people believe that household sanitizing is as simple as spraying disinfectant and wiping surfaces, but this oversimplifies a complex process that requires nuance to truly be effective. One widely-held myth is that all disinfectants are equally effective against germs. In reality, some products are only bacteriostatic or require adequate contact time, which many overlook. Experts emphasize the importance of understanding the specific disinfectant’s active ingredients and the recommended dwell time, as outlined in the CDC’s cleaning guidelines. A common mistake many make is assuming that cleaning alone kills all germs; however, cleaning removes dirt and organic matter that can shield bacteria and viruses from disinfectants, rendering sanitizing less effective. Proper sanitation involves both thorough cleaning and appropriate disinfection, applied in the correct sequence. Another subtle point often missed is the importance of cleaning high-touch surfaces frequently, especially during illness seasons or when moving out, to prevent cross-contamination. Many homeowners also neglect to clean and sanitize their upholstery adequately, despite it being a hub for allergens, dust mites, and bacteria. Regular deep cleaning with suitable upholstery cleaning methods and products is crucial for maintaining a healthy living space. Advanced mistakes include using overly harsh chemicals on delicate fabrics or surfaces, which can cause damage or leave residues that attract more dirt over time. For instance, aluminum foil or baking soda are often used in DIY upholstery cleaning, but these can sometimes irritate sensitive skin or damage fibers if not used properly. To avoid these pitfalls, consult expert guides like the ones at [the comprehensive upholstery care resource](https://spotlesscarpetz.com/ultimate-upholstery-care-guide-for-lasting-freshness) and always adhere to manufacturer’s instructions. Recognizing these subtleties and misconceptions can significantly elevate your cleaning routine, especially when preparing for move-outs. You want to ensure your space is truly sanitized to secure your deposit and protect your health. For detailed strategies on effective sanitizing methods, visit [this resource](https://spotlesscarpetz.com/effective-sanitizing-methods-for-a-germ-free-home). Keep in mind that rushing through cleaning tasks often leads to missed spots and incomplete sanitization, which can be a costly mistake during move-outs or health crises. So, next time you tackle household cleaning, remember that understanding the nuances makes all the difference. Have you ever fallen into this trap? Let me know in the comments.
Maintaining Your Cleaning Arsenal
Once you’ve established an effective cleaning routine, the next step is ensuring your tools stay in top shape to deliver consistent results. Personally, I swear by investing in high-quality microfiber cloths and a durable vacuum cleaner with a HEPA filter. These tools withstand frequent use and provide superior dust and allergen removal. For example, microfiber cloths like the E-Cloth brand are excellent because they trap dirt and microbes without the need for chemical cleaners, reducing wear over time. Regularly washing these cloths in hot water preserves their effectiveness and prevents bacteria buildup.
When it comes to vacuuming, replace or clean your HEPA filters every six months, or more often if you have pets. This maintains airflow efficiency and ensures allergens aren’t recirculated into the air. My go-to vacuum is the Dyson V11, which provides powerful suction and smart diagnostics to alert me when maintenance is needed, saving me repeated trouble. Having reliable equipment simplifies ongoing maintenance, meaning you spend less time fixing issues and more time enjoying a spotless space.
Tools I Recommend for the Long Haul
For upholstery and move-out cleaning, a steam cleaner like the Bissell PowerFresh is invaluable. It deep cleans fabrics and surfaces without harsh chemicals, which is particularly good for delicate upholstery. I regularly use it to refresh sofas, drapes, and even mattress covers. Its high-temperature steam kills dust mites and bacteria effectively, and the detachable water tank makes it easy to maintain. You can also find advanced models with accessories for tight corners and upholstery crevices, ensuring no spot is missed.
Another essential is an extendable duster like the Swiffer Dusters (with the extendable handle). They make it effortless to reach ceiling fans, high shelves, and light fixtures, reducing strain and preventing accidents. As I mentioned earlier, cleaning high to low is vital—using tools designed for those heights keeps the process safe and thorough.
Previewing the Future of Cleaning Tools
Looking ahead, I predict smart cleaning gadgets will become standard. Devices like robotic vacuums from brands like Roborock that integrate with smart home systems will increasingly handle routine dusting and vacuuming, freeing you to focus on detailed tasks. Staying updated with these advancements can ensure your cleaning routine remains efficient and eco-friendly.
How do I maintain my cleaning tools over time?
The key is consistent upkeep and mindful storage. Regularly washing cloths, changing filters, and cleaning attachments prolong their lifespan and guarantee optimal performance. It’s worth setting a monthly maintenance schedule—think of it as an investment in your home’s long-term hygiene. For detailed maintenance tips, see this guide which emphasizes pre-emptive care for cleaning equipment.
Remember, your tools are only as good as the care they receive. So, commit to routine checks and proper cleaning, and you’ll enjoy consistently pristine results without unexpected equipment failures. For a comprehensive checklist on maintaining your cleaning arsenal, visit this move-out cleaning checklist.
What I Wish I Knew Before My First Deep Clean
One major lesson was realizing that cleaning order isn’t just about convenience—it’s about optimizing effectiveness. I once scrubbed the floors first and wondered why dust kept settling on my freshly wiped surfaces; turning the sequence around changed everything.
Another revelation was the importance of quality tools. Investing in microfiber cloths and a HEPA-filter vacuum saved me from repetitive cleaning cycles, making the process more efficient and less frustrating.
Finally, understanding the science behind dust movement—gravity and airflow—helped me develop a routine that targets the most critical areas first, preventing dust from resettling and ensuring a truly cleaner bedroom.
Gear Up: Tools That Elevate Your Cleaning Game
My go-to toolkit now includes microfiber cloths like the E-Cloth brand—they trap dust better and last longer. For air quality, the Dyson V11 vacuum with HEPA filters keeps allergens at bay, especially important for allergy sufferers.
A steam cleaner like the Bissell PowerFresh has transformed upholstery cleaning, removing dust mites and bacteria without harsh chemicals. For reaching high spots, extendable dusters such as Swiffer Dusters make overhead tasks safe and effortless.
Looking ahead, smart robotic vacuums from brands like Roborock are beginning to handle routine dusting, freeing you for those detailed cleaning tasks that truly make a difference.
Embrace the Journey: Your Bedroom Deserves It
Cleaning isn’t just chores—it’s a chance to create a healthier, more inviting sanctuary. Every time you refine your routine, you step closer to a home where dust and allergens are minimized, and comfort takes center stage.
So, why not start today? Implement these insights, choose your tools wisely, and watch your space transform. Remember, a dust-free bedroom isn’t a distant dream—it’s within your reach. Have you ever experienced a breakthrough moment in your cleaning routine? Share below and let’s discuss how you made your home healthier and happier.