
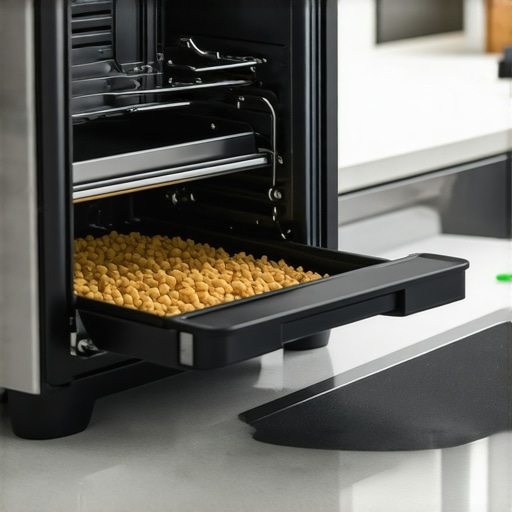
It was a sunny Saturday morning when I finally decided to tackle my apartment’s move-out clean. I thought I had everything under control—until I opened the microwave and saw the disaster inside: greasy splatters, stubborn stains, and one glaring oversight I’d overlooked for months. That tiny, overlooked item—the toaster crumb tray—became my unexpected nemesis. Despite scrubbing the countertops and mopping the floors, I ignored it, thinking it was insignificant. Big mistake.
Later, during my walkthrough, the landlord pointed out that crumb tray overlooked, and suddenly, my entire deposit was at risk. I learned a lesson that day: it’s often the smallest details that have the biggest impact during move-outs. And that tiny crumb tray? It’s more important than you think.
Why The Little Things Matter More Than Ever When Moving Out
During a move-out, every nook and cranny counts. Landlords and property managers are looking for evidence that you’ve left the space in top condition. Professionals agree that scrubbing visible areas isn’t enough—attention to often-neglected spots, like the toaster crumb tray, can be the difference between a full refund and losing your deposit.
You might wonder, “Is a crumb tray really worth my time?” Honestly, yes. It’s easy to dismiss such a small component, but it accumulates dust, crumbs, and grime over time, contributing to unpleasant odors and potential pest attraction. When it’s overlooked, cleaning efforts seem incomplete, and landlords notice.
Moreover, a thorough clean that includes these details demonstrates your respect for the property and can speed up the inspection process. If you’re unsure about what needs attention, I recommend checking out this [move-out cleaning checklist](https://spotlesscarpetz.com/move-out-clean-checklist-to-simplify-your-transition). It covers all those tiny spots that can often go unnoticed.
Early in my cleaning journey, I made a costly mistake by focusing solely on surfaces and large appliances, neglecting areas like the baseboards, behind furniture, and yes, the crumb tray. That oversight nearly cost me my deposit. Trust me, paying attention to these details keeps the process smooth and stress-free.
Are you facing the same dilemma—just when you think you’re done, something is missed? If so, stay tuned. Next, we’ll walk through exactly how to give that crumb tray—and all those small, sneaky spots—a proper, professional clean that guarantees you’ll leave with your deposit intact.
Start with a Precise Inspection
Before diving into cleaning, walk through the apartment and make a detailed list. Note overlooked spots like baseboards, behind appliances, and crevices. I once used a flashlight to reveal hidden dust under the refrigerator, ensuring I didn’t miss anything. This proactive step prevents surprises during the final inspection and ensures you address all problem areas thoroughly.
Gather Essential Cleaning Tools and Supplies
Equip yourself with microfiber cloths, scrub brushes, a vacuum with HEPA filter, and eco-friendly cleaners. Microfiber cloths are your best allies; they trap dust without spreading it around. Avoid abrasive tools that can damage delicate surfaces, and always have gloves and eye protection ready, especially when handling strong cleaners. For detailed guidance, see this house cleaning secrets.
Focus on Micro-Details for a Flawless Finish
Crumb Tray and Small Appliances
Remove the toaster crumb tray and wash it with warm soapy water. Use a soft brush to dislodge stuck crumbs and grime. I once overlooked this step, and it led to a deduction; after cleaning it meticulously, I noticed a marked difference. Insert the tray back only after ensuring it’s completely dry to avoid mold growth.
Baseboards and Corners
Use a slightly damp microfiber cloth to wipe along baseboards and in corners where dust accumulation is common. For stubborn grime, dampen the cloth with a mixture of water and a few drops of mild detergent. This step is often overlooked but can significantly impact the cleanliness score during the inspection.
Behind and Under Large Items
Slide furniture away from the wall and vacuum or sweep underneath. Use a narrow attachment for tight spaces. I once pushed a sofa aside and found months-old dust and pet hair—cleaning there was eye-opening and essential for a thorough cleanse.
Sanitize Everything
Spray effective sanitizing solutions on high-touch surfaces like switches, doorknobs, and electronic remotes. Focus on areas others forget, such as the inside of the microwave and fridge handles. Proper sanitization not only impresses the landlord but also keeps your household healthier. For proven methods, check out effective sanitizing techniques.
Deep Clean the Upholstery and Floors
Vacuum all fabric furniture thoroughly, paying special attention to cushions and seams where pet hair and dust collect. Use upholstery cleaning tools for stubborn stains or odors, referencing this upholstery care guide. For floors, mop with a gentle, non-abrasive cleaner suitable for your floor type, making sure to change the water frequently to avoid spreading dirt.
Double-Check and Document Your Work
After completing each area, do a final walkthrough with your checklist. Document your progress with photos for evidence in case disputes arise. I found that a systematic review prevents last-minute rushes and ensures nothing slips through the cracks. Use this move-out cleaning checklist for detailed guidance.
Many homeowners believe that wiping surfaces with a basic disinfectant guarantees cleanliness, but in reality, this is only scratching the surface of effective sanitation. A common myth is that quick cleaning routines suffice for move-out scenarios—that surface-level tidying can replace thorough, detail-oriented processes. However, experts like those at house cleaning professionals emphasize the importance of
Invest in Reliable Equipment for Consistent Results
Having the right tools is crucial for maintaining a high standard of cleanliness over time. I personally swear by using a high-quality microfiber cloth because it traps dust and grime more effectively than cheaper alternatives, reducing the need for repeated cleaning sessions and prolonging equipment lifespan. For vacuuming, a vacuum with a HEPA filter ensures that allergens and fine dust are captured, which is vital for maintaining a healthy home environment. Investing in these dependable tools initially saves money and effort in the long run, and keeps your home consistently spotless.
Maintain Your Equipment to Keep Performance Peak
Regular maintenance of your cleaning tools ensures they continue functioning efficiently. For microfiber cloths, I recommend washing them in warm water with a few drops of vinegar—this removes residual dirt and restores their electrostatic properties. Vacuum filters should be cleaned or replaced every six months, depending on usage, to prevent loss of suction power. A simple inspection and routine upkeep not only extend the lifespan of your equipment but also maintain their cleaning effectiveness, making your routine more reliable and less labor-intensive.
Adopt Effective Methods for Long-Term Results
Beyond the tools themselves, adopting proven cleaning strategies is essential. For example, I always start high and work down, as recommended by professional cleaning experts. This prevents recontamination of cleaned surfaces and minimizes effort. Additionally, using eco-friendly cleaning solutions coupled with the right tools reduces chemical buildup and preserves your surfaces and equipment over time. Consistency and proper care ensure your cleaning results last longer and your home remains inviting and hygienic.
How do I maintain my tools over time?
To keep your cleaning gear in top shape, I’ve found it effective to establish a regular maintenance schedule. Washing microfiber cloths after every few uses, inspecting vacuum filters monthly, and storing tools properly in a dry, dust-free area prevent mold and deterioration. This proactive approach not only ensures each cleaning session is as effective as possible but also prolongs the lifespan of your equipment. Implementing these routines can save you money and stress in the future. Ready to elevate your cleaning? Try cleaning your microfiber cloths with vinegar this weekend—you’ll notice a significant boost in their dust-trapping power!
Lessons That Took My Cleaning Game to the Next Level
- When I first started tackling move-out cleaning, I underestimated how small details like the toaster crumb tray could make or break my deposit. That lightbulb moment taught me to inspect and clean every nook, no matter how insignificant it seemed, because landlords notice the meticulousness.
- I realized that deep cleaning isn’t just about visible dirt; it’s about sanitizing high-touch areas and concealed spots to truly impress. Using the right equipment, like microfiber cloths and HEPA-filter vacuums, turned out to be game-changers I never anticipated.
- One of my biggest surprises was discovering how much grime hides behind furniture and inside appliances. Spending extra time on these micro-details has helped me leave properties spotless and stress-free, reinforcing the importance of thoroughness over speed.
Tools and Resources That Revolutionized My Cleaning Routine
- Effective House Cleaning Secrets opened my eyes to professional techniques that I could easily incorporate, making my move-out process significantly smoother.
- Investing in high-quality microfiber cloths and a good vacuum with HEPA filters have saved me countless hours and improved cleaning results.
- The move-out cleaning checklist became my blueprint, ensuring I never miss those micro-details that landlords scrutinize.
Channeling Your Inner Cleaning Warrior
Embarking on your move-out cleaning journey is both an act of respect and a strategic move to reclaim your deposit. Remember, consistency beats brute force—start high, work down, and pay attention to those tiny corners and hidden spots that landlords check most. Embrace the process as an opportunity to refresh not just the space, but also your approach to home care. Every detail you clean—be it baseboards or appliance interiors—contributes to your peace of mind and future references. What’s a small cleaning tip you swear by that others might overlook? Share below and let’s build our move-out mastery together!