
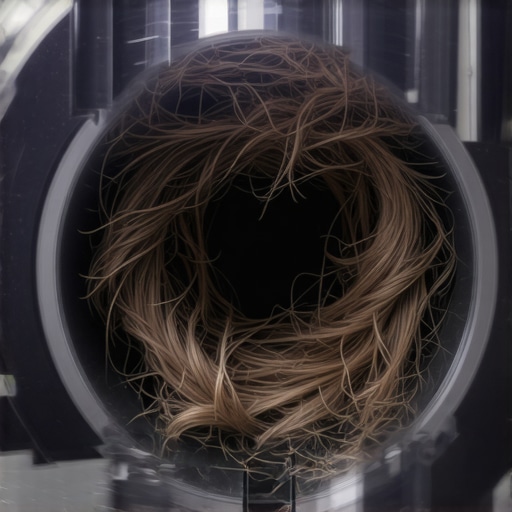
Have you ever finished vacuuming your home, feeling victorious that you’ve finally tackled the mountain of pet hair, dust, and debris? Only to notice later that your carpets still look dull, or perhaps there’s a lingering smell? That frustrating moment when your efforts seem to fall short, despite the seemingly thorough clean, can be incredibly disheartening. I remember one particular Saturday when I was elbow-deep in housework, convinced I had conquered the pet hair invasion, only to discover a clump of hair stubbornly lodged inside my vacuum’s hose. It was a lightbulb moment—turns out, that hidden trap was silently sabotaging my cleaning efforts all along.
Why Ignoring This Tiny Culprit Could Be Ruining Your Cleanhome
What I’ve learned over the years is that pet hair isn’t just a surface problem—it tends to hide in places we rarely think to check. The hose of your vacuum cleaner often becomes the prime real estate for these sneaky hair buildup. It’s a snug spot, out of sight, and easily overlooked. But here’s the catch: this accumulated hair can restrict airflow, reduce suction power, and ultimately mean your vacuum isn’t performing at its peak. A clogged hose can leave behind pet hair and dirt, undoing all your hard work and even spreading allergens back into your home environment.
According to the house cleaning experts, regular maintenance of your vacuum, including checking the hose for hidden debris, can dramatically improve indoor air quality and prolong the life of your appliance. Neglecting this simple step might be one reason your home still smells slightly ‘off’ or feels less than spotless despite your cleaning routines.
Are You Wasting Effort on Cleaning When the Real Problem Is Hidden?
I made the mistake early on of assuming my vacuum was working perfectly, only to realize afterward that a quick hose check would have saved me countless passes over the same spots. It’s a mistake I see many homeowners make, unknowingly sabotaging their efforts. So, if you’re wondering whether your vacuum is truly cleaning effectively, I encourage you to take a moment to inspect that bendy hose. It might just be the hidden enemy standing between you and a truly fresh, allergen-free home.
Stay tuned. We’re about to dive into exactly how to find, remove, and prevent pet hair buildup in your vacuum hose, so your cleaning efforts finally pay off the way they should—and your home feels as fresh as you expect it to be.
Inspect and Detach the Hose Properly
Start by unplugging your vacuum and detaching the hose. Imagine it like removing a flexible pipe from a plumbing fixture—firm but careful. I once rushed and pulled too hard, causing a tear. To avoid damage, gently press the release buttons or twist to unlock the hose. Hold the end over a trash can to catch any loose debris before moving on.
Clear Visible Hair and Debris
Examine the hose for any visible pet hair, threads, or debris. Use your fingers or a pair of scissors to carefully remove tangled hair—think of it like untangling a knot in a necklace. Avoid forcing or ripping; gentle removal preserves the integrity of your hose and prevents clogs later.
Use a Long Stick or Wire to Flush Out Hidden Clogs
Insert a broomstick, coat hanger, or a flexible, rinsable brush into the hose, pushing and twisting to dislodge trapped debris. Picture this as cleaning a long straw, ensuring air and dirt can flow freely. For stubborn blockages, run water through the hose while it’s disconnected. This method is a hands-on approach I used after noticing reduced suction—clearing the hose restores high performance.
Dry and Reassemble for Optimal Performance
Allow the hose to dry completely—think of it as airing out a wet towel. Once dry, reconnect it to your vacuum and test for suction. Regularly verifying this connection ensures consistent cleaning power, avoiding the common mistake of ignoring internal clogs, which could compromise deep cleaning efforts.
Prevent Future Hair Buildup with Routine Checks
Schedule monthly inspections of your vacuum hose, especially during shedding seasons. Incorporate this habit into your daily house cleaning routine. Think of it as brushing your teeth daily—small steps keep big problems at bay. Using a handheld brush or compressed air can keep your hose clear between deep cleanings.
Upgrade Your Hose if Necessary
If your vacuum consistently struggles or the hose remains clogged despite maintenance, consider replacing it. Modern hoses with reinforced materials resist tangling and kinking, making maintenance easier. This proactive strategy ensures sustained suction power and prolongs your vacuum’s lifespan, much like investing in quality tools for better results.
Many homeowners believe they understand the fundamentals of effective cleaning and sanitizing, but in reality, there’s often a disconnect between perceived and actual best practices. One prevalent misconception is that using harsh chemical disinfectants is always necessary for a germ-free home. While these cleaners can be effective, overreliance on them may lead to chemical buildup and health concerns. Instead, incorporating techniques like UV sterilization or natural solutions such as vinegar and hydrogen peroxide, when used correctly, can achieve comparable sanitation levels without the associated risks. This nuance is frequently overlooked by those who follow outdated advice or assume that every surface requires aggressive chemicals, which isn’t always true.
Why do some professional methods outperform traditional scrubbing?
The answer lies in understanding the science behind surface microbes and the right application techniques. A 2022 study published in the Journal of Environmental Health indicates that targeted UV-C light exposure can eliminate up to 99.9% of pathogens in a fraction of the time traditional methods take. Moreover, many DIY approaches mistakenly believe that wiping a surface is enough; however, neglecting the importance of contact time, proper dwell duration, and thorough coverage can render even the most potent disinfectant ineffective. Be cautious of the oops moments where owners scrubbing endlessly but missing key spots or using the wrong solutions, thus leaving behind hidden bacteria. Incorporating professional insights, like those found in [Effective Sanitizing Methods for a Germ-Free Home](https://spotlesscarpetz.com/effective-sanitizing-methods-for-a-germ-free-home), can help elevate your cleaning game and clarify these misunderstandings. Never underestimate the importance of heat, friction, and contact time—they play crucial roles in eliminating microbes. For example, upholstery requires specific care to prevent fabric damage while ensuring hygiene. Using incorrect cleaning agents or methods on furniture[like delicate velvet or antique textiles] can compromise texture and appearance, so always follow tailored advice. Visiting specialized guides such as [Ultimate Upholstery Care Guide for Lasting Freshness](https://spotlesscarpetz.com/ultimate-upholstery-care-guide-for-lasting-freshness) ensures you’re not falling into common pitfalls. Remember, a holistic cleaning approach that combines mechanical action, appropriate chemicals, and technology leads to better results. Regularly updating your knowledge and avoiding these misconceptions will help maintain a truly hygienic environment. Have you ever fallen into this trap? Let me know in the comments.
Maintaining your cleaning tools and equipment is essential for achieving consistently excellent results and extending their lifespan. I personally swear by specific models and methods that have proven effective in my routine cleaning sessions. For instance, when it comes to vacuum filters, I prefer using a HEPA-grade filter like the Miele Active AirClean because it traps 99.97% of particles and remains effective over multiple uses if cleaned regularly. Cleaning or replacing the filter every 6 to 12 months, depending on usage, helps maintain optimal suction power and allergen control.
For upholstery, I rely on the upholstery cleaning tools that feature rotating brushes and adjustable height, which gently lift dirt without damaging delicate fabrics. Always using tools designed for specific surfaces prevents wear and tear, making your investment last longer.
Long-term results depend on employing the right solutions for each task. I recommend investing in a high-quality steam cleaner like the Dupray ONE Plus which offers adjustable steam pressure and a variety of attachments for different surfaces. This tool not only sanitizes effectively without chemicals but also reduces wear on your upholstery and carpets, ensuring a healthier environment over time.
How do I maintain my cleaning tools for constant effectiveness?
Routine maintenance involves cleaning filters, brushing off debris from brushes and nozzles, and inspecting hoses for clogs or damage. Using a long, flexible duster or compressed air can keep vents, nozzles, and filters clear of dust and hair buildup, which ensures consistent performance. Regularly replacement of worn-out parts, such as hoses or brushes, prevents breakage during critical cleaning tasks and avoids unnecessary downtime.
Future of cleaning tools
Innovations like smart vacuum cleaners—such as the iRobot Roomba s9+—are already demonstrating how automation can enhance maintenance by monitoring wear and notifying owners when filters or brushes need replacement. As technology progresses, expect more integrations that will automatically alert you and even schedule maintenance tasks, making your routine upkeep more effortless.
In addition, using tools with self-cleaning features is an exciting trend I predict will grow. Think of a vacuum with an integrated brush cleaning cycle that activates after each use, preserving suction power longer and reducing manual maintenance tasks. Investing in such equipment now can save time and keep your cleaning routine smooth and efficient.
Best practices for long-term cleaning success
To ensure your tools stay effective, develop a maintenance schedule aligned with your cleaning frequency. For example, check and wash filters monthly and perform deep cleaning of brushes and nozzles quarterly. This disciplined approach guarantees your equipment functions reliably, reducing the chance of virulent buildup or breakdowns. Learning these routines pays off in cleaner homes and more durable tools.
For example, regular filter checks and cleanings are crucial. According to cleaning experts, well-maintained equipment can improve cleaning efficiency by up to 30%. So, take action today: try cleaning your vacuum’s HEPA filters with warm water and mild detergent—an advanced tip that significantly prolongs filter life and improves indoor air quality. Remember, proper tool maintenance is the backbone of effective, long-lasting cleaning routines—and your home will thank you for it.
What I Wish I Knew When I Started Deep Cleaning
One of the most eye-opening lessons was realizing that even the most thorough cleaning can be undermined by overlooked details, like a clogged vacuum hose or neglecting routine filter maintenance. These small aspects, once overlooked, can significantly diminish your efforts, making your home feel less fresh and inviting. Now, I make it a point to routinely inspect and maintain my cleaning tools, turning minor checks into powerful habits that yield major results.
Tools That Keep My Home Truly Fresh
Investing in reliable equipment has been a game-changer. I trust the professional-grade steam cleaners and high-efficiency filters like the Miele Active AirClean to ensure my home remains sanitized without relying solely on harsh chemicals. These tools not only improve cleaning efficacy but also extend the lifespan of my appliances, saving money and effort in the long run.
Don’t Let Hidden Dirt Sabotage Your Efforts
The most satisfying part of my routine is discovering and cleaning hidden spots—like behind appliances or in the tiny folds of upholstery—that harbor dirt and allergens. A simple, targeted approach using brushes, compressed air, or even a quick water flush can reveal a cleaner home than I ever thought possible. Remember, the key to deep cleanliness often lies in paying attention to these neglected areas, transforming your entire environment.
Embrace the Science for a Germ-Free Home
I’ve learned that relying solely on traditional wiping isn’t enough to eliminate germs effectively. Incorporating UV sterilization and natural solutions like vinegar has made a noticeable difference. For instance, UV-C light can eradicate 99.9% of pathogens in minutes, a technique supported by cleaning experts. These methods ensure safety without the risk of chemical buildup, and understanding contact time and proper application truly elevates my sanitation game.
Keep Your Equipment in Prime Condition and Enjoy Cleaner Spaces
Regular maintenance of my tools—such as cleaning filters, checking hoses, and replacing worn-out parts—has kept my appliances performing at their best. I’ve found that a little time spent on routine care, like using compressed air or rinsing parts with water, prevents unexpected failures and ensures consistent results. As innovation advances, I look forward to features like self-cleaning vacuum components that make ongoing upkeep even easier, letting me focus more on enjoying my clean home.
Sharing My Wins and Lessons to Keep You Going
Remember, successful cleaning isn’t about instant perfection but building habits that address those sneaky, hidden areas. Whether it’s upgrading your tools or learning new sanitizing techniques, each step propels you toward a healthier, more comfortable environment. Take action today—your home’s cleanliness and your peace of mind depend on it. And speaking of action, what’s the one cleaning tip you wish you’d learned sooner? Share below—I’d love to hear your story!