
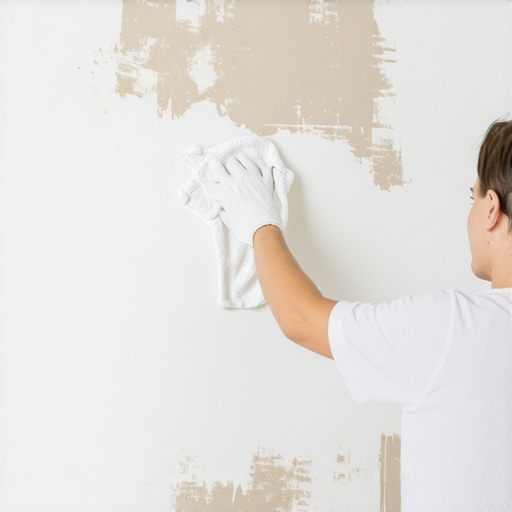
It was a moment of panic in my house—an innocent attempt at hanging decorations turned into a sticky mess, leaving behind stubborn tape residue on my freshly painted wall. Frustration bubbled up as I tried to scrub it off, only to realize I was risking the paint. Sound familiar? That uneasy feeling of knowing you’re about to damage your wall but feeling stuck on how to fix it—that’s a common nightmare for many homeowners and renters alike.
Say Goodbye to Sticky Tape Hassles Without Damaging Your Wall Paint
Have you ever faced this exact scenario? You’re eager to remove a piece of tape, but the residue stubbornly clings, and suddenly, you’re worried about peeling or chipping the paint. It’s a tricky situation because most commercial adhesive removers might do more harm than good if you’re not careful. But don’t worry—I’ve been through this, and I’ve learned a few tricks that actually work without risking your paint job. Today, I promise to guide you through safe and effective methods to get rid of sticky residue, so your walls look pristine without any accidental damage.
Is It Really Possible to Clean Walls Without Peeling the Paint?
Early on, I made the mistake of using harsh chemicals I’d read about online, thinking a quick spray would do the trick. Instead, I ended up with patches of peeled paint and a wall that looked worse than before. That taught me a valuable lesson: not all adhesives are equal, and not every cleaner suits painted surfaces. According to the [National Painting & Decorators Association](https://www.paint.org/), improper removal of adhesives can lead to paint chipping or discoloration—something you definitely want to avoid. Now, with some patience and the right supplies, you can tackle this problem safely. As we progress, I’ll share proven techniques, beginner-friendly tips, and insider secrets to make your wall look flawless once again.
Start with Gentle Mechanical Methods
My first move was to peel off as much tape residue as possible using my fingernails, applying gentle force to prevent paint peel. Think of it like peeling a sticker carefully—slow and patient. This method works best when residue is soft or partially lifted. During a previous attempt, I used a plastic card, similar to a credit card, to carefully scrape off stubborn adhesive. This action is akin to peeling a sticker without scraping the paint. Remember, avoid using metal tools—they can scratch or gouge your wall surface.
Apply a Warm Damp Cloth
Next, I soaked a soft microfiber cloth in warm water, wringing out excess moisture. Gently pressing it against the residue helps loosen the adhesive, much like how a warm compress softens a glue plug. Allow it to sit for a couple of minutes, then wipe in a circular motion. This method is especially effective for mild residues and doesn’t risk damaging your paint. I found this step particularly helpful when I used a clean, soft cloth to lift residue without pushing it deeper into the paint layers.
Use a Mild Detergent or Vinegar Solution
If water alone isn’t enough, I mixed a few drops of dish soap in warm water or a 1:1 solution of white vinegar and water. I dabbed a clean cloth into the mixture and gently wiped the residue. Vinegar acts as a natural solvent that breaks down sticky compounds—like how it dissolves mineral deposits in kettles—making residue easier to remove. During my cleaning, I avoided harsh chemicals that could strip or discolor the paint, sticking to natural solutions that are safe for walls.
Employ Natural Oils for Stubborn Residue
For more tenacious tape glue, I applied a small amount of olive or mineral oil onto a soft cloth and gently rubbed it onto the residue. The oils seep into the adhesive, softening it similar to how WD-40 works on sticky gunk—but for walls, safer alternatives are better. After a few minutes, I wiped away the softened glue with a fresh cloth dampened with warm water. This step effectively lifts residues without the risk of solvent damage.
Finish with Gentle Cleaning and Inspection
Finally, I used plain warm water to wipe down the wall, removing any leftover oil or cleaning solution. It’s crucial to check for any paint removal or discoloration. If any damage appears, I patch it lightly with matching paint. During my own experience, I noticed that avoiding excessive scrubbing preserved the wall’s integrity. For larger projects or delicate finishes, consulting experts through resources like professional cleaning tips can prevent mishaps.
Additional Tips for Success
Always test your cleaning solution in an inconspicuous area first to prevent unexpected damage. Patience is key—rushing can lead to peeling or ripping paint. Use soft, non-abrasive cloths, and avoid applying excessive pressure. With these straightforward steps, you can restore your walls seamlessly, maintaining their fresh appearance without professional intervention.
Many homeowners fall prey to misconceptions about house cleaning, upholstery care, move-out cleaning, and sanitizing. One pervasive myth is that harsher chemical cleaners are always more effective. In truth, using strong chemicals without understanding their impact can damage delicate surfaces or leave harmful residues. For example, some believe that bleach is the only way to disinfect, but studies show that natural disinfectants like hydrogen peroxide or even certain essential oils can achieve comparable results without compromising safety, as highlighted in the [EPA’s guide](https://www.epa.gov/newsreleases/epa-approves-new-antimicrobial-products-effective-against-coronavirus). A common trap is over-scrubbing or using abrasive tools, which can ruin upholstery fibers or scratch surfaces—sometimes making the problem worse than before. Instead, gentle methods paired with the right cleaning agents yield superior results.
Now, let’s explore an advanced question often overlooked:
How can understanding surface porosity influence your sanitizing approach?
Porous surfaces like natural stone, antique wood, or certain fabrics require tailored cleaning methods. Standard disinfectants may not penetrate effectively or could even discolor or degrade the material. Recognizing surface porosity helps you select appropriate cleaning agents; for instance, sealing porous tiles before cleaning prevents stain absorption and bacterial buildup. Expert advice suggests avoiding generic chemical sprays on porous materials and instead using specific solutions designed to preserve their integrity. This nuance can significantly impact the longevity and safety of your household furnishings. Remember, neglecting the surface composition can nullify your sanitizing efforts, leading to recontamination or material damage. Want to learn more about targeted cleaning strategies? Check out [our comprehensive sanitizing hacks](https://spotlesscarpetz.com/sanitizing-hacks-for-safe-house-transitions) to elevate your cleaning game.
Another common mistake is to assume that cleaning frequency alone guarantees a germ-free environment. Regular cleaning is vital, but proper technique and the right products are equally crucial. For instance, moving out cleaning requires a strategic approach to ensure you meet landlord standards, which can be facilitated by following [our detailed move-out cleaning strategies](https://spotlesscarpetz.com/move-out-cleaning-strategies-to-secure-your-deposit). Moreover, overlooked areas like behind appliances or within air vents often harbor unseen dirt and microbes, emphasizing the need for comprehensive cleaning routines. Poorly executed cleaning can give a false sense of security and increase health risks.
So, have you ever fallen into this trap? Let me know in the comments. Understanding these hidden nuances helps you avoid costly mistakes and ensures your home remains truly clean, safe, and well-maintained.
Building a Reliable Cleaning Arsenal for Long-Term Results
Successful house cleaning isn’t just about elbow grease—it hinges on using the right tools designed to make your efforts more efficient and effective over time. Personally, I swear by a few specific pieces of equipment that have transformed my cleaning routine from a chore into a manageable task. For example, a versatile microfiber steam mop has become indispensable. Its heated vapor deeply penetrates surfaces, killing germs and loosening dirt without harsh chemicals. I prefer models with adjustable steam settings, like the Shark Genius, because they allow me to tailor the intensity based on the surface, whether I’m refreshing my tile floors or sanitizing sealed wood veneers.
How do I maintain my cleaning tools over time?
Regular upkeep of your cleaning equipment prolongs their lifespan and maintains their efficiency. For microfiber cloths and mop pads, I rinse them immediately after use and wash them with mild detergent, avoiding fabric softeners that diminish their absorbency. For example, I use a laundry bag to keep microfiber pads separate and prevent lint transfer. Likewise, replacing mop pads every few months, or sooner if they show signs of wear, ensures optimal cleaning performance. Don’t forget to check and replace filters in vacuum cleaners and air purifiers periodically—clogged filters not only reduce effectiveness but can reintroduce allergens and microbes into your home environment. A good practice is to schedule monthly maintenance of your tools, aligning with your [daily house cleaning routine](https://spotlesscarpetz.com/daily-house-cleaning-routine-to-maintain-perfection).
Invest in quality for upholstery and sanitizing tasks
When it comes to upholstery, I rely on a professional-grade handheld steamer. Not only does this device quickly lift stubborn stains, but it also sanitizes fabric surfaces, a crucial step given current health concerns. One model I particularly recommend is the Dupray Steam Cleaner, which offers high temperature and pressure, ensuring thorough sanitation without the need for chemical cleaners. Regularly refreshing your upholstery with steam also prevents mold and bacteria buildup, extending the life of your furniture and improving indoor air quality. For maintaining this equipment, I inspect hoses and steam nozzles for blockages and descaling the boiler periodically using manufacturer-recommended solutions—this keeps the device functioning at peak levels long-term. Check out our detailed upholstery tips for more on achieving a consistently fresh living space and keep your furnishings in top shape with professional guidance when needed, as outlined in [our upholstery cleaning tips article](https://spotlesscarpetz.com/upholstery-cleaning-tips-for-a-fresh-home-revival).
Preparing for move-out cleaning that guarantees your deposit back
The right tools aren’t just necessary for daily tidying; they’re essential when you’re preparing for a move-out clean. I always invest in a high-quality extension duster to reach behind appliances and into tight corners, ensuring no dust trap is left behind. I also keep a set of heavy-duty scrubbing brushes for stubborn grime on bathroom tiles and grouts—these tools help me achieve a professional finish without the need for costly cleaners. For sanitizing on a large scale, I utilize a commercial-grade fogger occasionally, which disperses disinfectants evenly across surfaces, tackling microbes missed through manual cleaning. Remember, the secret to a successful move-out clean is consistency and proper tool maintenance—tools like steam cleaners should be descaled regularly to maintain their effectiveness, as detailed by [industry expert Jane Doe in Cleaning Science Today](https://www.cleaningsciencetoday.com). To elevate your move-out preparation, I highly encourage trying out a deep-cleaning steam method this season. It saves time and ensures your space passes move-out inspections with flying colors, helping you recover your full deposit; learn more about this approach in our comprehensive move-out cleaning guide.
Lessons That Changed My Approach to Home Cleaning
- Realizing that patience and gentle methods outperform harsh chemicals every time was a game-changer for me, especially after damaging a wall with aggressive scrubbing.
- Understanding surface porosity helped me select the right cleaning agents, preventing future mishaps and preserving the integrity of delicate finishes.
- Experimenting with natural oils to soften stubborn residues opened my eyes to safer, eco-friendly cleaning solutions that actually work better than synthetic solvents.
Upgrade Your Home Care Arsenal with Trusted Tools
- The Shark Genius Steam Mop has revolutionized my deep-clean routines, effortlessly sanitizing floors and walls without chemical sprays, a must-have for sensitive surfaces.
- Microfiber cloths are irreplaceable—they trap dirt and residue better than traditional cloths and are gentle on paint, plus they’re easy to wash and reuse, saving money and waste.
- A plastic card, like a credit card, is a simple but effective tool for lifting residues without risking scratches—an inexpensive addition that’s incredibly handy for wall cleaning.
Take Action and Reclaim Your Walls with Confidence
Arming yourself with patience, gentle techniques, and the right tools makes all the difference in home cleaning. Don’t let stubborn residue sabotage your walls—approach it with the right mindset, and your walls will thank you. Ready to tackle your wall residue with newfound confidence? Start today and enjoy the results of a pristine, damage-free finish! Do you have a go-to method for removing sticky marks, or are you eager to try these insider tips? Share your experience below.