
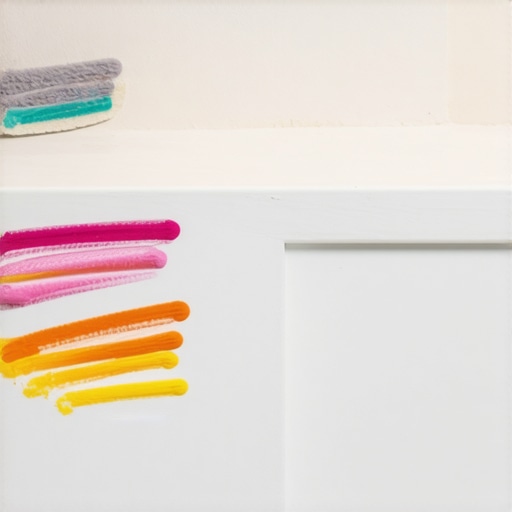
It happened in the middle of packing, surrounded by boxes and half-eaten snacks. I reached down to grab a box, and there it was—an unmistakable trail of crayon scribbles streaked across my pristine baseboards. My heart sank, and suddenly, all my plans for a perfect move-out cleaning vanished in a puff of frustration. Sound familiar? If you’ve ever faced the horror of discovering your little artist’s masterpiece in the most unexpected places, you’re not alone. Those stubborn crayon marks seem to have a life of their own, stubbornly clinging to the surface, taunting you just before move-out day.
Why Crayon Marks Feel Like a Personal Attack
I’ve learned over the years that crayon marks on baseboards aren’t just a minor annoyance—they can threaten your entire security deposit if not handled properly. When I first tackled this problem, I made a crucial mistake: I assumed that regular cleaning products would do the trick. Guess what? They didn’t. Instead, I spent hours scrubbing and still ended up with dull, scratched, or even damaged baseboards. That experience taught me a vital lesson: battling crayons requires more than just a quick wipe.
The good news is, I’ve finally found a simple, effective secret that combines common household items with a little know-how. This method not only removes crayon stains but also restores the baseboard’s original finish. Want to know the secret? Stay tuned, because I’ll walk you through exactly how to reclaim your walls and ensure that nothing stands between you and your full deposit refund.
Is Scrubbing Your Walls the Only Way? The Skeptic’s Dilemma
Many skeptics worry that these tricks are just myths—especially since early in my cleaning journey, I used harsh chemical solutions that ended up damaging the wood. I used to think, “If I just scrub harder, this will come off.” Spoiler alert: it often made things worse. Today, I believe in gentle, natural methods. Did I face setbacks at first? Absolutely. But over time, I discovered that overusing aggressive cleaners not only damages baseboards but can also be hazardous to your health.
For the full scoop on effective strategies—including some you might not expect—you might want to check out [effective house cleaning secrets from cleaning experts](https://spotlesscarpetz.com/effective-house-cleaning-secrets-from-cleaning-experts). It’s packed with tips that can change your cleaning game and save your walls from being sacrificial pawns in your cleaning battles.
Now, ready to get those crayon marks off and restore your baseboards without a fight? Let’s dive into the practical steps that will turn this daunting task into a breeze, leaving your home looking spotless and move-in ready.
Choose Gentle Cleaning Agents to Protect Your Baseboards
Start with a mild, natural option like a mixture of baking soda and water. Mix two tablespoons of baking soda with a few drops of water to create a paste. This acts like a gentle abrasive, much like using a soft scrub brush instead of steel wool. Apply the paste with a soft cloth, gently rubbing the crayon marks. During one move-out, I used this method on my son’s crayon remnants and was amazed at how effortlessly the marks lifted without damaging the finish. It’s perfect for preserving the underlying paint or varnish.
Utilize Rubbing Alcohol for Tougher Stains
If the crayon marks stubbornly stick around, grab some rubbing alcohol from your medicine cabinet. Dampen a microfiber cloth with a small amount of alcohol—don’t soak it, just dampen—and gently wipe over the affected area. Think of it like erasing pencil lines on paper—soft, effective, and precise. I once had a set of baseboards with thick crayon scribbles from a particularly creative toddler. Dabbing with alcohol softened the waxy residue and made removal quick. Remember to test a small, inconspicuous spot first to ensure it doesn’t strip the paint.
Consider Using Gentle Erasers to Lift Residue
In my latest cleaning session, I used a soft rubber eraser, similar to a pencil eraser, to gently lift residual crayon. Lightly pressing and rubbing in a circular motion can pick up crayon without scratching the surface. It’s like giving your baseboards a tender massage—a simple, cost-effective trick that can handle fine details or smaller spots easily. Be cautious to avoid excessive pressure that might wear down the paint or finish.
Finish with a Natural Sealant or Polish
After removing the crayon marks, restore the shine by applying a natural furniture polish or a mixture of olive oil and lemon juice. This method creates a protective barrier, much like a clear coat, enhancing the baseboard’s appearance and making future cleaning easier. During my last move, after cleaning stubborn crayon scribbles, this step left the baseboards looking refreshed and like new.
Prevent Future Markings with Protective Measures
To avoid similar crayon mishaps in the future, consider applying a washable wall sealant or a low-tack adhesive film on baseboards. It’s akin to putting a clear shield in front of your walls. When my cousin moved out, she installed removable wall coverings that protected her baseboards from her young artists, saving her from repeated scrubbing sessions. Those small investments can save time and stress on your next move or freshening up.
Additional Tips for a Spotless Transition
For comprehensive move-out cleaning, check out our move-out cleaning checklist. It ensures you cover every nook, including tricky spots like baseboards, behind appliances, and ceiling fans. Remember, patience and gentle methods are key—abrasive tools can cause irreversible damage. By following these steps, you’ll be well on your way to a spotless home that impresses landlords and guarantees your security deposit back.
Many homeowners and renters often believe they know the essentials of cleaning, upholstery, and move-out procedures, but beneath these basics lie nuanced misconceptions that can lead to costly mistakes. One prevalent myth is that using harsh chemicals always yields better results. In reality, aggressive cleaners can damage delicate fabrics and finishes, making natural and gentle methods far more effective and preserving your investments. The trap here is oversimplifying cleaning to brute force—scrubbing harder does not equate to cleaning smarter, and it may result in fabric tears or discoloration. An advanced mistake many overlook is neglecting to test cleaning solutions on hidden areas first, which can cause unexpected damage or color bleeding, especially with vibrant dyes or sensitive fibers. Always perform a patch test to avoid irreversible harm.
Let’s consider a common misconception about upholstery cleaning: the belief that steam cleaning is universally the best method. While steam can be effective for certain fabrics, it can also lead to mold growth if not properly dried or used on inappropriate materials. Professional experts advise carefully selecting cleaning techniques based on fabric type, which can be overlooked by DIY enthusiasts eager to save time. Moreover, believing that sanitizing equals sterilizing is another misconception. Many think that spraying disinfectants guarantees a germ-free environment; however, studies show that cleaning physically removes microbes more effectively than chemical disinfectants alone. Integrating both physical removal and chemical sanitization ensures a truly safe and hygienic space.
What Should You Avoid When Deep Cleaning Your Home?
The biggest pitfall is mixing incompatible cleaning chemicals, which can produce hazardous fumes or cause surface damage. For example, combining bleach with ammonia creates toxic chloramine vapors, risking respiratory issues. Always read labels thoroughly before combining solutions. An additional mistake is neglecting to follow proper air ventilation during and after cleaning, which can lead to inhaling harmful substances. Ensuring good airflow reduces health risks and helps cleaning agents work more effectively. Being aware of these nuances can save you from hidden dangers, save money, and prolong the life of your furnishings.
Looking to elevate your cleaning routine? Check out our expert-backed cleaning secrets to ensure you’re not falling into these common pitfalls. And when it comes to move-out cleaning, skipping essential steps can jeopardize your security deposit. Use our comprehensive move-out checklist as your guide.
By being aware of these subtle yet impactful misunderstandings, you can avoid costly mishaps and leave your home truly spotless. Have you ever fallen into this trap? Let me know in the comments.
Maintaining Your Cleaning Arsenal for Lasting Results
Investing in the right tools is crucial to keep your home pristine over time. Personally, I rely on a high-quality microfiber upholstery brush, which gently lifts dust and pet hair without damaging delicate fabrics, ensuring longevity of your furniture. Additionally, implementing a steam cleaner with adjustable pressure settings allows me to sanitize surfaces effectively without harsh chemicals, aligning with my goal of a safer, eco-friendly household. The latest advancements in portable steam technology mean that I can tackle everything from mattresses to curtains quickly, preserving fabric integrity.
How do I keep my tools in top shape for ongoing cleaning?
Regular maintenance is vital. For example, I clean my microfiber attachments after every use to prevent bacterial buildup and ensure optimal performance. Using a gentle rinse in warm water suffices, followed by air drying. For my vacuum, I replace filters every three months and check for clogs to maintain suction power. Keeping your tools in excellent condition not only extends their lifespan but also guarantees consistent results, saving you money in the long run. To streamline this, I’ve adopted a routine checklist available in our daily cleaning guide. This habit helps me stay on top of maintenance and ensures that my equipment performs when I need it most.
Planning for Scale and Future Cleanings
As I grow more confident in my routine, I consider tools that support scaling my cleaning tasks. For larger spaces, I prefer a commercial-grade backpack vacuum with adjustable settings—it makes extensive cleaning less tiring and more thorough. For upholstery and delicate surfaces, an extraction wand connected to my steam cleaner allows quick refreshes without over-wetting. Looking ahead, I anticipate the integration of smart cleaning devices, like automated scrubbers and app-controlled vacuums, which will revolutionize home maintenance by providing consistent, hands-free cleaning sessions. These innovations promise to reduce the time invested per cleaning cycle while enhancing results.
What is the best way to maintain cleaning tools over months and years?
Establishing a regular maintenance schedule is key. For instance, deep cleaning your brushes and nozzles quarterly prevents dirt buildup that can reduce effectiveness. Additionally, inspecting electrical cords and connections periodically ensures safety and prevents unexpected failures. Using manufacturer-recommended cleaning agents for your equipment—like specialized crevice tool disinfectants—can extend their lifespan. By making maintenance a routine part of your cleaning, you guarantee that your tools will perform reliably when tackling stubborn stains or high-traffic areas. I recommend reviewing expert house cleaning strategies to align your tool care with best practices. Try incorporating these maintenance tips into your schedule and experience smoother, more effective cleaning sessions for years to come.
The Hidden Lessons Behind Crayon Cleanup
One thing I’ve painfully learned is that rushing into cleaning can lead to unintended damage, especially when dealing with delicate baseboards. Patience and gentle products are your best friends in restoring surfaces. I once used harsh chemicals that stripped the finish and left me regretting the effort. Now, I focus on soft, natural solutions and take my time — that’s the secret to protecting your investment. Additionally, I realized that testing any cleaner on a small, inconspicuous spot saves you from big regrets. Each mistake taught me the importance of careful preparation and knowing your materials.
My Tried-And-True Tools for Baseboard Revival
Over time, I’ve curated an arsenal of trustworthy tools that make restoring baseboards simple and effective. A soft microfiber cloth is invaluable; it cleans without scratching or stripping paint. Natural solutions like baking soda paste and rubbing alcohol are my go-tos for stubborn crayon marks, providing powerful results without risking damage. I also recommend investing in gentle erasers for small spots, which lift residual wax effortlessly. For finishing touches, a light polish with olive oil and lemon juice restores shine and adds a protective layer — making future cleaning easier. These tools and tips have transformed my cleaning routine and can do the same for you.
Your Turn to Make Magic with Gentle Cleaning
Remember, the key to a successful move-out and protecting your security deposit is patience and choosing the right products. By adopting a gentle, strategic approach, you not only remove crayon marks but also preserve the beauty of your home’s surfaces. If you’re eager to hone your cleaning skills and discover more insider tips, explore our effective house cleaning secrets from cleaning experts. Taking these small steps can make a big difference in the results you achieve and the peace of mind you’ll enjoy during your move. Now, tell me — have you ever used an unexpected method to tackle stubborn stains? Share your stories below!