
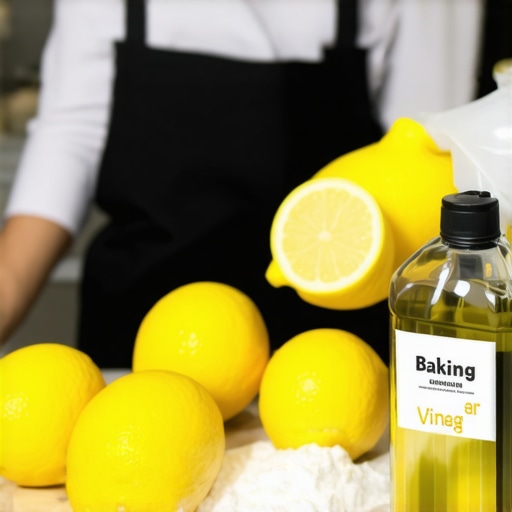
Ever had that dreaded moment when you’re about to showcase your cooking skills, only to open the oven and be hit with a cloud of greasy, grimy despair? I remember one particularly frustrating weekend when I was hosting friends, and as I peeked into my oven, I realized it looked like a scenes from a horror movie — burnt-on residues, stubborn grease spots, and a smell that refused to leave. It was a lightbulb moment for me. Why was I relying on harsh chemicals when I could clean naturally, safely, and effectively?
Why Natural Oven Cleaning Is a Game-Changer
Let me tell you, cleaning your oven with only natural ingredients isn’t just about avoiding chemical fumes — although that’s a big perk. It’s about choosing a method that’s safer for your family, your pets, and the environment. Plus, it’s often more effective than the toxic sprays we tend to grab in a panic. I’ve found that a simple paste of baking soda and vinegar, combined with some elbow grease, can work wonders—without the need for abrasive cleaners or hours of scrubbing. And the best part? It costs next to nothing, and you probably already have everything in your pantry.
In fact, an eco-friendly approach to cleaning is gaining momentum. According to a recent study, households using natural cleaning solutions reported fewer respiratory issues and a more pleasant home environment. Why not give your oven a fresh start without exposing yourself to harmful fumes?
But here’s a trap I fell into early on: I thought I could just spray and wipe. Big mistake. I learned the hard way that skipping the proper preparation and letting the paste sit longer actually makes a huge difference. Trust me, there’s a bit of a process, but it’s worth every minute.
Are you tired of using store-bought oven cleaners that leave a chemical aftertaste or an overpowering smell? Or perhaps you’ve faced the struggle of stubborn baked-on grime that just won’t come off? If so, keep reading. I promise, with a few simple steps, your oven will be spotless—and naturally so.
And if you’re pondering whether this method really works or just another kitchen myth, I totally get it. Early on, I made the mistake of rushing the process, which led to less-than-stellar results. That’s why I’m here to share the tried-and-true techniques I’ve perfected over years. You don’t have to be a cleaning expert to pull this off—just a little patience and the willingness to try something different.
Ready to ditch the toxic sprays and embrace a healthier, more effective way? Let’s dive into the natural ingredients and simple steps that will transform your oven cleaning routine from a dreaded chore to a simple, satisfying task.
Apply Baking Soda Paste for Heavy Grime
Start by mixing 1/2 cup of baking soda with a few tablespoons of water until it forms a thick paste. Spread this generously over the stubborn baked-on residues inside your oven. I once tackled a months-old burnt pizza crust by carefully applying this paste with an old toothbrush, which allowed me to target hard-to-reach spots without damaging the surface. Let it sit for at least 12 hours or overnight to loosen the grime effectively.
Vinegar Spray for Breakthrough Cleaning
After the baking soda has had ample time to work, spray a mixture of equal parts white vinegar and water over the entire oven interior. The vinegar will react with the baking soda, fizzing and loosening remaining residues for easy wiping. During my first attempt, I watched the fizzing action closely—almost like a mini volcanic eruption inside the oven—which is a sign the cleaning agent is doing its job. Use a soft cloth or sponge to wipe away loosened dirt, revealing a much cleaner oven surface.
Scrubbing Stubborn Spots with Natural Tools
For particularly stubborn spots, gently scrub with a non-abrasive scrubber or an old toothbrush dipped in your vinegar solution. I remember battling a greasy area near the oven door hinge, which required some firm but gentle elbow grease. Avoid steel wool or abrasive pads, as they may scratch the surface. For best results, repeat the application of baking soda and vinegar on persistent areas, ensuring every corner is addressed.
Rinse and Wipe for Final Shine
Once the grime is loosened, dampen a microfiber cloth with plain water to wipe down all surfaces thoroughly, removing any remaining residues or cleaning solutions. Finish by drying with a clean, dry cloth to prevent streaks. When I completed my first natural cleanse, the oven gleamed, not just visually but also with a fresh, natural smell—a stark contrast to the overpowering chemical fumes from store-bought cleaners.
Extra Tips to Keep Your Oven Pristine
To maintain cleanliness, consider placing a drip tray or baking sheet in the oven during cooking to catch spills and drips. Regular light cleaning with this natural method can prevent heavy buildup, making each deep clean easier. Additionally, for oven racks or glass surfaces, remove and soak them in a vinegar and baking soda solution separately, then scrub gently with a soft brush. This multi-step approach ensures your entire oven remains hygienic and odor-free, supporting your health and a safer home environment. For more detailed cleaning strategies, visit this resource.Many homeowners and tenants operate under misconceptions that can jeopardize their cleaning efforts and even risk losing security deposits. One prevalent myth is the belief that simply spraying a disinfectant over surfaces is enough to ensure thorough sanitation. In reality, effective sanitizing requires meticulous attention to contact time and proper application methods, as highlighted by cleaning experts. For example, failing to allow disinfectants to sit for the recommended duration diminishes their effectiveness, increasing the chances of lurking germs. An overlooked nuance is the importance of cleaning high-touch areas—like door handles and light switches—before disinfecting them, because dirt and grime can shield pathogens from disinfectants. Skipping this step reduces sanitization quality and is a common mistake that many miss.
Another misconception involves upholstery cleaning. Some assume that vacuuming alone is sufficient to remove embedded allergens and pet hairs. However, deep cleaning upholstery with appropriate tools, such as steam cleaners or fabric-safe extractors, prevents allergen buildup and extends furniture lifespan. Neglecting this advanced step can lead to health issues and damage over time. Additionally, in move-out scenarios, many think that focusing solely on visible dirt guarantees a successful inspection. But inspectors often look for overlooked spots—like behind appliances or inside vents—that can cause deposit deductions. It’s wise to consult comprehensive checklists or professional services to ensure nothing slips through the cracks. For instance, thorough cleaning that includes hidden areas can be the difference between getting your full deposit back or facing penalties.
Ever wondered why your simple cleaning routine isn’t enough to pass a move-out inspection? The hidden layer often lies in understanding biofilm buildup—resistant layers of bacteria and grime that standard cleaning can’t remove. Advanced cleaning techniques, such as using EPA-approved disinfectants combined with proper mechanical action, target these hidden threats effectively. Studies indicate that neglecting proper sanitization techniques can lead to persistent germs, increasing health risks and decreasing overall hygiene. For example, improper sanitation in bathrooms or kitchens often leaves harmful bacteria untouched, despite appearances. To navigate this, prioritize deep cleaning tools and techniques rather than relying on surface-level chores. Want to make sure you’re not falling into these traps? Check out [effective house cleaning secrets from cleaning experts](https://spotlesscarpetz.com/effective-house-cleaning-secrets-from-cleaning-experts) for in-depth strategies.
Remember, understanding these nuanced mistakes and myths isn’t just about superficial cleanliness; it’s about ensuring health, safety, and deposit reimbursement. Have you ever fallen into this trap? Let me know in the comments.
Invest in Reliable Equipment for Consistent Results
To truly keep your home pristine, it’s essential to use tools that deliver consistent, professional-quality results. I rely heavily on a high-end microfiber mop, like the Microfiber Magic Mop, because it traps dust and dirt more effectively than standard cloths and minimizes streaks. For upholstery, I swear by the Bissell SpotClean Proheat, which combines suction and heat to lift stubborn stains without harming delicate fabrics. These tools might seem like a splurge initially, but their durability and efficiency save you time and effort in the long run.
Prioritize Quality Over Cheap Fixes
Cheap cleaning solutions can do more harm than good, especially over time. For instance, I recommend investing in a good steam cleaner with adjustable settings, like the Wagner SteamForce. It’s versatile enough to refresh carpets, sanitize bathroom tiles, and even clean oven interiors naturally. Advanced tools like these ensure deep cleaning, reducing the buildup of grime and bacteria, which can be stubborn if not addressed properly. Remember, a well-maintained machine can last for years, justifying the upfront cost.
Adopt a Scheduled Maintenance Approach
Consistency is key. Creating a regular cleaning schedule—such as weekly upholstery refreshes or bi-monthly oven deep cleans—helps prevent the accumulation of dirt and stains. Using digital tools like the Tody app allows me to set reminders and track cleaning tasks, ensuring I never skip a critical step. This proactive approach extends the lifespan of appliances and furniture, keeping your home healthier and more inviting over time.
How do I maintain my cleaning tools to ensure long-term efficiency?
Proper maintenance of your cleaning equipment is crucial. Rinse microfiber cloths and mops thoroughly after each use to remove trapped dirt and disinfect them periodically. For vacuum filters and attachments, check manufacturer recommendations—many filters need replacing every six months to prevent reduced suction and airborne allergens. Regularly descaling steam cleaners and replacing worn bristles on brushes ensures optimal performance. These simple habits can dramatically improve your cleaning outcomes and prolong the lifespan of your tools.
Looking ahead, I believe smart cleaning devices will become more prevalent. From app-controlled robotic vacuums to AI-powered sanitizers, technology is making home maintenance more effortless. Meanwhile, integrating these reliable tools into your routine provides an immediate boost, making daily upkeep less of a chore. If you want to explore more expert tips on effective cleaning methods, check out this resource.
Don’t wait to upgrade your cleaning arsenal—try introducing a high-quality steam cleaner or microfiber mop into your routine this week. Your home will thank you for it!
Throughout this journey of mastering natural cleaning techniques, I’ve uncovered some invaluable lessons that no quick guide can truly share. First, I realized that patience and consistency outperform quick fixes—dedicating a little time regularly prevents heavy buildup and stress during move-out inspections. Second, I learned that understanding the anatomy of grime—knowing where hidden spots hide stubborn dirt—can save you hours of scrubbing and frustration. Lastly, trusting tried-and-true tools, like quality microfiber cloths and effective natural solutions, elevates your cleaning game without risking damage or exposure to harsh chemicals, as discussed in depth in this expert resource that transformed my approach.