
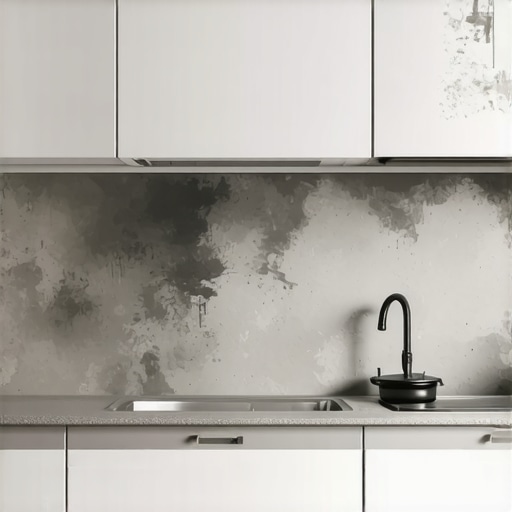
It was a morning like any other, until I glanced up while rummaging through my pantry, and there it was—an ominous, dusty patch of grime defiantly clinging to the top of my kitchen wall cabinets. Initially, I shrugged it off as just another layer of dust, but in that moment, a sudden light bulb flickered in my mind: “How long has that been there?” I realized I’d overlooked this spot for years, despite being diligent with my cleaning routine. That realization hit me hard—and quite frankly, it was a wake-up call.
Why the grime on top of your cabinets deserves your attention
Many homeowners focus on the more visible parts of their kitchen—counters, sink, floors—while leaving the area above cabinets unchallenged. Yet, this overlooked space can accumulate a surprising amount of dirt, grease, and even mold over time. According to experts at the Environmental Protection Agency, areas that are seldom cleaned tend to harbor bacteria and allergens, creating an invisible threat to your home’s air quality and your family’s health. So, ignoring this space isn’t just about aesthetics; it’s about preventing potential health issues.
Thinking back, I made a critical mistake early on. Instead of tackling the top of my cabinets during my quarterly cleaning, I simply dusted the lower surfaces and called it a day. That small oversight eventually led to a buildup so stubborn that it required more than just routine dusting—it demanded a deep clean.
Have you faced this problem too? If so, you’re not alone—and more importantly, you’re in the right place. Today, I promise to show you exactly how to conquer this hidden enemy, transforming your kitchen from a dust trap into a spotless, healthy space.
Is cleaning above the cabinets really worth the effort?
At first glance, it might seem like a minor chore—after all, who really notices this area unless someone is haute. But the truth is, neglecting it can lead to a buildup of grime that’s not only unsightly but potentially dangerous. Think about it: grease splatters, dust, and pet hair swirling in the air—it’s a recipe for respiratory issues and allergy flare-ups.
Of course, I also fell into the trap of assuming that a quick wipe was enough, only to find out that stubborn residues require special attention. Early in my journey, I used generic cleaning sprays that promised quick results but ended up just spreading the grime around. It was a lesson in patience—and the importance of using the right tools and solutions.
If your kitchen has been crying out for a deep clean in those high, hard-to-reach spots, don’t worry. I’ll guide you through proven methods and share tips I learned the hard way. Plus, I’ll recommend some eco-friendly strategies to keep your space pristine without harsh chemicals. Ready to reclaim your kitchen’s top shelf? Let’s get started.
Gather Your Tools and Prepare
Before you start, assemble your cleaning arsenal: a sturdy step ladder, microfiber cloths, a pair of rubber gloves, a bucket of warm water, mild dish soap, an all-purpose cleaner, and a scrubbing brush with soft bristles. Wearing gloves protects your skin from grease and grime while ensuring a firm grip on your tools. Position your ladder securely against the wall, making sure it’s stable. Have a trash bag or bucket nearby to collect dust and debris, preventing messes from spreading.
Clear the Space and Protect Surfaces
Remove any decorative items, kitchen appliances, or dishes that might be on top of your cabinets. Cover nearby countertops with old towels or sheets to catch falling dust or dirt. This simple step prevents unnecessary mess and keeps your work area tidy, much like laying down a protective sheet before painting a wall. It also gives you clear access to every corner, ensuring no spot is overlooked.
Dust Off the Surface
Start by dusting the top of the cabinets with a microfiber cloth or duster extension. Use a gentle sweeping motion to wipe away loose dust and cobwebs. For stubborn debris, lightly dampen your cloth with water or an all-purpose cleaner. Think of this as sweeping away the surface layer — you want to loosen the grime before scrubbing. If your cabinets have intricate corners or moldings, use a soft brush to dislodge dirt from hard-to-reach areas. Remember, multiple gentle passes are more effective than harsh scrubbing, which could damage surfaces.
Deep Clean with a Suitable Solution
Dampening your microfiber cloth with a mixture of warm water and a small amount of dish soap creates a gentle cleaning solution perfect for removing grease and grime. For tougher spots, spray a commercial all-purpose cleaner designed for kitchen surfaces. Apply it generously, then let it sit for a few minutes to loosen embedded dirt—akin to letting marinade soak into meat. Afterward, wipe with a clean, damp cloth to pick up residual grease and residue. Rotate your cloth frequently to avoid spreading dirt around. Use a scrubbing brush on textured or stubborn stains, but ensure the bristles are soft to prevent scratching.
Tackle Built-Up Grease and Mold
If your cabinets have developed mold or heavy grease buildup, switch to a more potent sanitizing solution. Mix equal parts of white vinegar and water for a natural remedy, or opt for a specialized kitchen degreaser. Apply it using a sponge or spray bottle, ensuring full coverage. Let it sit for 10-15 minutes, allowing the solution to break down grime thoroughly. Scrub gently, paying close attention to corners and crevices. For mold, consider using a diluted bleach solution—just ensure proper ventilation and avoid contact with painted surfaces. Once cleaned, wipe down with a damp cloth and dry the area completely to prevent future mold growth.
Address Stubborn Stains and Residues
For persistent stains or greasy patches, a paste made from baking soda and water can act as a mild abrasive. Apply it directly to the stain and let it sit for 15 minutes. Then, gently scrub with a soft cloth or brush. Rinse thoroughly with clean water. After cleaning, always dry the surface with a clean towel to prevent water spots or streaks. Remember, patience is key—sometimes, multiple passes are necessary to fully lift stubborn residues, much like peeling an onion layer by layer without rushing.
Reassemble and Final Inspection
Once everything is spotless and dry, replace decorative items and appliances carefully. Conduct a thorough visual inspection to ensure no dust or residue remains. Use a clean, dry microfiber cloth to give the surfaces a final wipe, enhancing shine and removing any remaining streaks. This last step ensures your effort results in a gleaming, healthy kitchen surface, free from hidden grime leaks that could compromise hygiene or appearance. Regular maintenance post-deep cleaning will make future cleanings faster and easier, turning your kitchen into a showcase of cleanliness and order.When it comes to professional cleaning, many homeowners believe that sticking to the basics—like vacuuming floors and wiping counters—is enough. However, the real mastery lies in understanding the nuances that most miss, which can significantly impact both cleanliness and health. One common misconception is that surface-level cleaning suffices for move-out scenarios. In reality, neglecting deep sanitizing, especially of upholstery and hidden crevices, can lead to lingering germs and stains, possibly jeopardizing your deposit or health. For example, many forget that upholstery fabrics trap dust, pet dander, and bacteria, making specialized cleaning and sanitizing essential. As outlined in our comprehensive guide on [effective house cleaning secrets from cleaning experts](https://spotlesscarpetz.com/effective-house-cleaning-secrets-from-cleaning-experts), mastering these subtle details distinguishes an average clean from an exceptional one.
A crucial trap to avoid is the assumption that standard disinfectants suffice for all surfaces. Some cleaners may kill surface bacteria but fail to penetrate upholstery fibers or sanitize mold-prone areas effectively. A study published in the Journal of Environmental Health emphasizes that porous materials like fabric sofas or mattresses require specific sanitizing techniques, such as steam cleaning or specialized foam treatments, to ensure complete hygiene. Overlooking this can result in a home that looks clean but still harbors harmful microorganisms.
The biggest mistake often made during move-out cleanings is underestimating the importance of detailed attention to high-touch points and hidden spaces. For instance, door frames, window sills, and beneath appliances are frequently overlooked but can contain accumulated grime and allergens. This oversight not only affects the home’s cleanliness but can also cause issues during inspections, leading to potential deposit deductions. That’s why a thorough checklist tailored for move-out cleaning—like ours—should include these unnoticed yet critical areas.
What advanced techniques can ensure comprehensive sanitization without harsh chemicals?
For advanced disinfecting, consider employing methods like steam cleaning that use high-temperature vapor to kill bacteria and mold naturally, aligning with eco-friendly trends and safety standards. Additionally, ultraviolet (UV) sterilization devices are gaining popularity for decontaminating mattresses, upholstery, and even air ducts. These methods are supported by experts in [sanitizing methods](https://spotlesscarpetz.com/effective-sanitizing-methods-for-a-germ-free-home), who advocate for integrating technology into traditional cleaning routines to achieve superior results.
In essence, the key to a truly effective move-out or deep household clean lies in going beyond the surface and understanding the microscopic nuances—such as fabric porosity or inaccessible corners—that contribute to a healthier, more pristine environment. Always remember, meticulous attention to these details can safeguard your health, preserve your deposit, and elevate your cleaning standards.
Have you ever fallen into this trap? Let me know in the comments.Maintaining a pristine and sanitized home requires not only diligent effort but also the right tools that make the process efficient and effective. Over the years, I’ve experimented with various equipment and methods, and now I can confidently recommend specific gear that truly delivers results. One of my most valuable investments is a **steam cleaner** like the Dupray Neat Steam Cleaner. Unlike traditional mops or chemical sprays, steam cleaning allows me to sanitize upholstery, tiles, and hard-to-reach corners without harsh chemicals. It’s particularly effective on upholstery, as detailed in our [upholstery cleaning tips](https://spotlesscarpetz.com/upholstery-cleaning-tips-for-a-fresh-home-revival), ensuring a deep clean that removes allergens and bacteria.
For dusting and reaching high ceilings or cabinet tops, a **microfiber duster with extendable handle** has become indispensable. Microfiber’s electrostatic properties trap dust more effectively than traditional cloths, and the extendable pole makes it easy to clean without a ladder—saving time and reducing risk.
When it comes to scrubbing stubborn stains, I rely on a **precision grout brush** combined with a **natural citrus-based degreaser**. The brush’s angled bristles allow me to target grout lines precisely, while citrus degreasers cut through grease naturally and safely. This combo proves especially useful for move-out cleans, where every surface must meet high standards.
For sanitizing high-touch electronics, I use a **UV light sanitization device**. Scientific studies, such as those outlined in [Effective Sanitizing Methods for a Germ-Free Home](https://spotlesscarpetz.com/effective-sanitizing-methods-for-a-germ-free-home), confirm that UV-C sterilization effectively kills bacteria without liquids or chemicals, making it perfect for remotes, keyboards, and smartphones.
Looking ahead, I see a growing trend in **smart cleaning devices**—robot vacuums with mapping and self-emptying capabilities—that can maintain cleanliness daily with minimal effort. Integrating such technology could revolutionize long-term home maintenance.
## How do I maintain my cleaning arsenal over time?
Regularly evaluating and updating your tools is key. Replace microfiber cloths monthly to prevent bacterial buildup, and descale your steam cleaner annually following manufacturer guidelines. Keep a log of maintenance tasks, especially for mechanical equipment like vacuums and brushes, ensuring they operate at peak performance. Invest in quality tools that last longer; cheap alternatives often break or become less effective quickly. Lastly, staying informed about new methods—like enzyme cleaners for pet stains—can help you adapt your routines for better results.
Thinking of elevating your cleaning game? Start by trying out a **UV sterilizer for electronics**. It’s a game-changer for homes with kids or pets, offering peace of mind knowing surfaces are truly sanitized. For personalized advice or service, don’t hesitate to reach out through our [contact page](https://spotlesscarpetz.com/contact-us-2). Remember, sophisticated tools combined with proven techniques will keep your home not just clean, but genuinely healthier for the long haul.Cleaning above cabinets might seem like a small detail, but my biggest lesson was realizing how overlooked spots can harbor hidden grime that affects both health and the overall impression of your home. I learned that neglecting details like high corners or behind appliances can lead to residual dust and mold that stubbornly resist even routine cleaning, emphasizing that meticulous attention pays off in long-term cleanliness and peace of mind.
The tools we choose, from steam cleaners to microfiber cloths, can dramatically influence our results. Investing in quality gear, like a reliable steam cleaner or a soft-bristled scrub brush, transforms an otherwise daunting job into a manageable task, making the cleaning process more efficient and effective. These tools help me reach tight spots and eliminate residues that regular equipment simply can’t handle, elevating my standards from good to exceptional.
Getting into the habit of seeing cleaning as a form of self-care—rather than a chore—has shifted my mindset. Every time I finish a deep clean, I feel a sense of achievement and pride, knowing my home is healthier and more inviting. This perspective encourages me to stay consistent, turning cleaning into a positive ritual rather than a dreaded task. For those looking to elevate their cleaning routine, I encourage embracing these methods and tools, which can truly make a world of difference.