
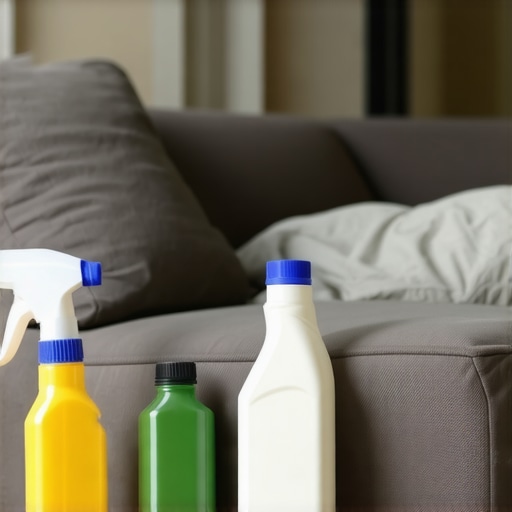
I remember the moment clearly: I had just finished what I thought was a thorough sofa cleaning session. I grabbed my favorite cleaner, sprayed generously, scrubbed a little too enthusiastically, and stepped back to admire my work. But instead of a fresh-smelling couch, I was hit with an overwhelming odor—worse than before. That dreaded moment of realization hit me like a ton of bricks: I had made a mistake that many DIY cleaners fall into. The truth is, cleaning your sofa isn’t always as simple or straightforward as the commercials would have you believe.
Why Your Sofa Might Smell Worse After Cleaning
This frustrating experience taught me a valuable lesson: not all cleaning methods are created equal. Especially with upholstery, your approach can mean the difference between actually removing odors and just masking them temporarily. A common mistake I made early on was using too much harsh chemical cleaner without properly ventilating or testing a small area first. That caused residue buildup and trapped odors rather than eliminated them. According to experts, improper cleaning can often make odors worse because residues trap dirt and moisture inside the fabric, creating a perfect environment for bacteria and mold to grow—a surefire recipe for persistent smells. For reliable advice on maintaining your furniture’s freshness, I recommend checking out our Ultimate Upholstery Care Guide.
Is Scrubbing Harder Always Better?
One of my biggest doubts was whether more vigorous scrubbing leads to better results. Turns out, applying too much pressure or using aggressive chemicals can damage fabric fibers, making them more susceptible to trapping odors. Instead of aggressive cleaning, gentle techniques combined with the right products offer better results. And yes, sometimes less really is more when it comes to upholstery cleaning.
So, if you’ve faced this exact problem—cleaning your sofa only to be greeted by a foul smell—you’re not alone. But don’t worry, in the following sections, I’ll share practical tips and proven strategies to help you clean smarter, not harder, and actually enjoy a fresh-smelling sofa once again. Ready to turn that cleaning disaster into a success story? Let’s get started.
Prep Your Workspace and Gather Supplies
Start by clearing your furniture and surrounding area. Move any nearby items and vacuum loose debris with a handheld vacuum or upholstery attachment. Assemble your cleaning tools: a mild fabric cleaner, microfiber cloths, a soft-bristled brush, and a spray bottle filled with a diluted cleaning solution. This preparation ensures efficiency and prevents cross-contamination. I once spent a Saturday cleaning my sofa, realizing I was missing a microfiber cloth; once I grabbed one, the process became much smoother.
Test Cleaning Products on a Hidden Area
Before applying cleaner broadly, test in an inconspicuous spot like the sofa’s underside or an unnoticeable seam. Use a small amount of the product and wait 10 minutes to check for discoloration or fabric damage. This step is crucial to prevent costly mistakes. A personal lesson came when I used a harsh chemical on my new couch, resulting in fabric discoloration. Always check product compatibility—this saves you from regret later.
Apply the Cleaning Solution Precisely
Lightly spray the tested cleaner onto the fabric. Avoid drenching the surface; aim for a fine mist to prevent moisture seepage into cushioning. Use a microfiber cloth to gently blot and lift dirt. For stubborn stains, dampen your brush slightly and gently agitate the area—think of it as massaging the fabric rather than scrubbing it raw. I remember meticulously working on a red wine stain, dabbing and bloting carefully, which eventually led to its complete removal.
Deep Clean Segments Methodically
Divide your sofa into sections—back, seat cushions, arms—and work one at a time. Use the same gentle approach, ensuring complete coverage and attention to problem areas. Pay special attention to seams, where dirt tends to hide. Following this methodical pattern, I tackled my three-seater sofa in manageable parts, which made an otherwise overwhelming task more approachable and effective.
Allow Proper Drying and Ventilation
After cleaning, open windows and turn on fans to facilitate rapid drying. Moisture trapped inside can cause odors and promote mold growth—something I learned the hard way after rushing the process. Ensure the fabric is thoroughly dry before replacing cushions or using the sofa again. A trick I use is placing a portable fan nearby to circulate air—this speeds up drying and keeps the fabric fresh.
Sanitize to Eradicate Germs
Once the fabric dries, apply a natural sanitizing spray or use a mixture of vinegar and water for an extra level of hygiene—be cautious, however, as vinegar can alter fabric textures. For delicate upholstery like velvet or silk, opt for specialized sanitizers suitable for the material. Regular sanitizing not only eliminates bacteria but also reduces odors, making your sofa inviting once more. For thorough sanitization of your entire space, consider consulting our effective sanitizing methods.
Final Tips: Maintain and Prevent Odors
Keep cushions fluffing and rotate them regularly. Use fabric protectors to repel spills and stains. For ongoing freshness, vacuum weekly and clean spills immediately. A personal tip: after deep cleaning, placing a bowl of baking soda under cushions can absorb residual odors—works wonders for maintaining a fresh environment. These simple steps ensure your sofa remains pristine and odor-free for longer periods, reducing the need for frequent intensive cleans.
Many homeowners and tenants believe they have a clear understanding of effective cleaning strategies, but in reality, some widespread beliefs can lead you astray. Contrary to popular opinion, rushing through a move-out clean or using the harshest chemicals on upholstery doesn’t guarantee spotless results. In fact, these common misconceptions often cause more harm than good. For example, many think that scrubbing harder will remove stubborn stains more effectively, but this can damage fabric fibers and trap odors deeper into the material. Instead, employing gentle techniques and specific cleaning products tailored to your furniture can yield superior results. To avoid costly mistakes, always test cleaning solutions on hidden fabric areas before full application—this simple step can protect your investment and your deposit. Additionally, the myth that bleach or vinegar alone can fully sanitize your home overlooks the importance of proper disinfectants and advanced cleaning methods. Studies from the Institute of Inspection, Cleaning and Restoration Certification (IICRC) suggest that effective sanitization incorporates EPA-recognized disinfectants applied with the right equipment, ensuring comprehensive germ elimination. Have you ever fallen into this trap? Let me know in the comments! Also, for comprehensive move-out strategies that help secure your deposit, check out our move-out cleaning guide. Remember, understanding the nuances and avoiding these common myths can make your cleaning routine more efficient, effective, and less stressful.
Keep It Running: Tools That Make Maintenance Easier
Maintaining a spotless home long-term requires more than just occasional deep cleans; it demands reliable, high-quality tools that stand the test of time. I’ve learned from firsthand experience that investing in the right equipment can save you hours and ensure consistent results. One of my top recommendations is a high-grade steam cleaner like the McCulloch MC1275. This powerhouse uses pressurized steam to sanitize surfaces effectively without chemicals, making it perfect for upholstery, tiles, and even delicate fabrics. Its versatility has reduced my reliance on multiple cleaning devices and streamlined my routine.
Another essential is a cordless handheld vacuum such as the Dyson V7 Trigger. It’s lightweight, powerful, and ideal for quick cleanups of dust, pet hair, and crumbs. I use mine daily, especially around move-out times when every bit of debris counts. Consistent maintenance of your vacuum—like emptying the bin and replacing filters—ensures it operates at peak performance, which is crucial for long-term cleanliness.
How do I maintain my cleaning tools over time?
Regular upkeep extends the lifespan of your cleaning tools. For my steam cleaner, I follow the manufacturer’s instructions for descaling using vinegar or commercial descaling solutions, ensuring no mineral buildup impairs function. The vacuum filters are replaced every 3-6 months, depending on usage, to prevent clogging and maintain suction. Additionally, I always store my equipment in a dry, organized space to prevent damage and make quick access easier. Keeping tools in top shape prevents breakdowns and guarantees that each cleaning session is as effective as the first.
Looking ahead, I predict that smart cleaning devices will become standard, integrating sensors to monitor wear and automatically schedule maintenance. Companies are already developing vacuum cleaners that alert users when filters or brushes need attention, which could revolutionize how we approach home care.
Choosing the Right Products for Upholstery and Long-Term Results
While tools lay the foundation, using the appropriate cleaning solutions ensures enduring freshness. For upholstery, I rely on gentle, fabric-safe cleaners recommended by experts. The Ultimate Upholstery Care Guide highlights the importance of pH-balanced products that preserve fabric integrity while eliminating odors and stains. Combining these with your reliable tools creates a synergy that prolongs your furniture’s lifespan and maintains a healthy environment.
Ready to Elevate Your Cleaning Routine?
Experimenting with tools like a steam cleaner and maintaining them properly can dramatically improve your home’s cleanliness and longevity. Don’t hesitate to try the descaling technique I mentioned—adding a cup of vinegar to your steam cleaner’s water tank every few months can prevent mineral deposits, ensuring optimal performance. Remember, investing in quality tools and caring for them is the most effective way to make your cleaning efforts last longer and yield better results. To get started, check out detailed maintenance tips and product recommendations at our upholstery cleaning tips page, or reach out through our contact form for personalized advice.
Lessons Only Insiders Know About Upholstery Refreshing
- One of the most surprising lessons I learned was the danger of rushing through the final drying phase. I once hurriedly replaced cushions, only to find that lingering moisture caused musty odors within hours. Patience with proper ventilation is key to a truly fresh sofa.
- Disassembling your furniture into manageable sections isn’t just easier—it prevents oversight. I used to overlook the back and underneath areas, which accumulated hidden dirt and contributed to persistent smells. Breaking the job into parts ensures a thorough clean every time.
- The myth that all fabrics respond well to the same cleaning method almost cost me my favorite velvet sofa. After some research, I discovered that delicate fabrics require specialized products and gentle techniques—not aggressive scrubbing or harsh chemicals.
- Testing cleaning solutions in inconspicuous spots might seem tedious, but it saved my sofa from discoloration and fabric damage. A simple patch test beforehand prevents costly regrets after full application.
- Regular maintenance, like vacuuming cushions and treating stains immediately, dramatically extends the lifespan of upholstery. These small habits create a foundation for long-lasting beauty and freshness.
Tools and Resources That Make a Difference
- The McCulloch MC1275 Steam Cleaner became my go-to for chemical-free sanitizing. Its versatility allows me to freshen up everything from upholstery to tiles, ensuring deep cleanliness without residues.
- Investing in a Dyson V7 Trigger cordless vacuum made quick touch-ups effortless, especially when moving furniture or tackling pet hair. Its powerful suction and portability fit perfectly into my routine.
- The Ultimate Upholstery Care Guide offers invaluable insights into fabric-specific cleaning techniques and safe product recommendations, saving me from trial-and-error guesswork.
- For detailed move-out tips, the move-out cleaning strategies checklist delivers step-by-step guidance that helps me secure my deposit while leaving the property spotless.
Take Your Cleaning to the Next Level
Don’t let misconceptions hold you back from achieving a truly fresh and odor-free sofa. Embrace gentle techniques, invest in trusted tools, and always test products first. Remember, each piece of furniture tells a story—and with the right care, yours will be a source of comfort and pride for years. Whether you’re preparing for a move or just want a healthier home, applying these insider insights can make all the difference. Ready to elevate your cleaning routine? Share your experiences below—I’d love to hear how you tackle stubborn odors or delicate fabrics.