
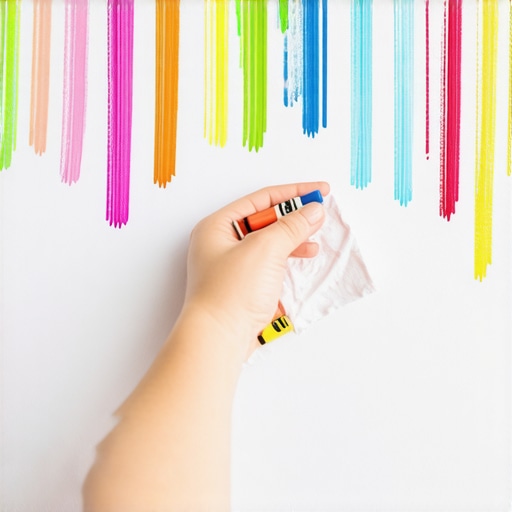
It was late afternoon, and I was frantically trying to finish cleaning before the kids got home. As I stepped into the living room, my eyes landed on the most colorful, most stubborn crayon marks streaked across the freshly painted wall. My heart sank. I had just painted that wall last weekend. No way I was going to start all over again. Sound familiar? I bet many parents or renters have found themselves in this nail-biting situation, feeling helpless and unsure how to remove crayon stains without stripping off the paint.
Why We Usually Make Things Worse with DIY Crayon Removals
Early on, I believed that scrubbing with harsh chemicals or abrasive scrubbers was the only way. Turns out, I was actually making my wall damage worse. I tried everything from toothpaste to baking soda, thinking I was doing a good deed, but my walls ended up with scratches, dull patches, or even paint peeling. I learned the hard way that not all home remedies are safe for painted surfaces. For example, using too much force or the wrong cleaning agents can cause more harm than good, transforming a minor mishap into an expensive repaint job. I also made the mistake of rushing, thinking a quick wipe would do the trick, which only smudged the crayon further or diffused the stain.
What You Can Expect from This Guide
If you’ve faced similar frustrations, you’re in the right place. Today, I’m going to share practical, tested methods for removing crayon marks that respect your walls’ paintwork—no damage, no fuss. We’ll explore simple solutions that use common household items, learn what mistakes to avoid, and discover the secrets that professionals swear by. Whether your wall is freshly painted or vintage, the techniques I’ll cover will help you restore it to its pristine condition. Ready to reclaim your walls without repainting? Let’s dive into the solution that finally worked for me and countless others.
Will These Tricks Really Work on My Walls?
That was my biggest concern early on, too. I remember trying some ‘home remedies’ that seemed promising but ended up worsening the stains or damaging the paint. The truth is, not all methods are created equal. Using the wrong product or technique can leave permanent marks, so it’s essential to follow proven advice. I also learned that understanding your wall’s finish—whether matte, satin, or gloss—is key. With patience and the right approach, you can safely eliminate crayon marks and preserve your walls’ beauty. Ready to see how? I’ll walk you through the most effective tips, rooted in real experience and backed by experts like those at cleaning professionals.
Start with Gentle Wipes and Mild Soaps
My first attempt was using a damp microfiber cloth with warm water. I gently wiped the crayon marks, avoiding excessive pressure that could damage the paint. This straightforward approach often removes fresh or light stains without risking harm. When the marks persisted, I moved on to a mild soap solution, mixing a few drops of dish soap into warm water. Applying this with a soft sponge and gentle circular motions helped lift the crayon without stripping the paint. Remember, always test on a small, inconspicuous area first to prevent any unintended damage.
Use Baking Soda for Stubborn Stains
For tougher crayon smudges, I sprinkled a small amount of baking soda on a damp sponge or cloth. Baking soda’s gentle abrasive properties loosen the waxy residue without scratching the surface. I softly scrubbed the stains in circular motions, checking regularly to ensure I was not removing any paint. This method proved effective on older marks that wouldn’t budge with water alone. Afterward, I wiped the area with a clean damp cloth to remove any residual baking soda. This technique is safe for most painted surfaces and offers a chemical-free solution.
Employ Commercial Remove Crayon Products Carefully
If home remedies don’t work, consider products designed specifically for crayon removal. I chose a gentle, non-abrasive cleaner labeled safe for painted walls. Applying a small amount with a soft cloth, I gently scrubbed the stain, working slowly to prevent paint damage. After the stain faded, I rinsed the area with a damp cloth. Always follow the manufacturer’s instructions and ensure good ventilation. This step is especially useful for particularly stubborn marks, but hesitation is key to avoiding accidental stripping of the paint.
Try Heat and Plastic Scrapers with Caution
In a desperate moment, I used a hairdryer on a low setting to slightly warm the crayon stain, making it softer and easier to remove. Caution was vital—I kept the dryer moving to prevent heat damage. Once warmed, I gently scraped the residue using a plastic putty knife or an old credit card, working from the edges inward. This method requires delicacy; applying too much force can peel the paint or scratch the wall. I recommend practicing on less visible areas first to gauge the wall’s response.
Final Buffing and Inspection
After removing the stain, I inspected the wall for any signs of damage or leftover residue. Light buffing with a clean, dry microfiber cloth helped restore the wall’s sheen and took off any remaining marks. If a slight discoloration persisted, applying a small amount of touch-up paint matching the wall color can blend the repair seamlessly. Remember, patience and gentle techniques are your best allies when cleaning painted walls.
Practicing these steps carefully will help you persist through even the stubbornest crayon stains without risking your paintwork. By combining gentle physical methods and safe household products, you can restore your walls to their pristine condition—a task easier than repainting entire sections. For more professional tips and comprehensive cleaning strategies, check out house cleaning strategies for a sparkling home.
Many homeowners and renters approach cleaning with a set of widely accepted beliefs, but seasoned cleaning experts often see these assumptions as oversimplifications or even misconceptions. For instance, a common myth is that all upholstery can be treated with the same cleaning method; however, fabrics vary greatly in their fiber composition and dye stability. Using a one-size-fits-all approach can lead to discoloration or fabric damage. Advanced techniques involve understanding the specific fabric type—like silk, velvet, or microfiber—and customizing cleaning methods accordingly, as detailed in our comprehensive upholstery care guide. Another frequent misconception is that disinfectants alone guarantee a germ-free environment. While disinfectants are crucial, their effectiveness depends on proper contact time and application, as highlighted in recent sanitizing research. Rushing through move-out or deep-clean routines can overlook hidden grime lurking behind appliances or under carpets, which can cause deposit deductions or health hazards. A detailed cleaning plan tailored to specific areas, as advised in our move-out checklist, is essential.
### How Can Overlooking These Details Cost You?
Ignoring the nuanced differences in cleaning techniques and product applications can lead to costly mistakes, such as re-soiling, fabric deterioration, or failings during inspections. For example, using overly aggressive brushes on delicate fabric might remove stains temporarily but cause irreversible damage, reducing the lifespan of your upholstery. Similarly, employing ineffective sanitizing methods for high-touch surfaces might give a false sense of security, while bacteria persist and pose health risks. Proven expertise emphasizes that meticulous, fabric-specific cleaning strategies and proper sanitization protocols are the backbone of professional-grade results. Don’t fall into the trap of neglecting these finer points; comprehensive knowledge and careful execution save time, money, and peace of mind. For an in-depth look at maintaining your home’s cleanliness standards, visit our house cleaning strategies.
### Why Do Many Avoid Professional Help and Still Struggle?
Many think DIY methods, like heavy scrubbing or generic disinfectants, are sufficient. However, without understanding the subtle nuances—such as optimal cleaning agents for specific fabrics, correct application techniques, and the sequence of cleaning tasks—results can be subpar. This misunderstanding often leads to second-guessing and repeated attempts, increasing the risk of damage and frustration. Professionals leverage a detailed knowledge base, often supported by studies and industry standards, to ensure safe and effective results. Would you like to avoid common pitfalls and achieve truly spotless results? Explore expert advice here. Have you ever fallen into this trap? Let me know in the comments.
Keep Your Cleaning Equipment in Top Shape
Investing in quality tools makes all the difference in maintaining a spotless home over the long term. I personally swear by my Vax Steam Cleaner for deep cleaning carpets and upholstery. Its powerful yet chemical-free steam allows me to refresh fabrics without harsh detergents, reducing wear and tear. Regularly descale the device using a mixture of white vinegar and water to prevent mineral buildup, ensuring consistent performance. For those who prefer quick touch-ups, a microfiber Mop with proper maintenance—such as washing it after each use and replacing pads every few months—keeps flooring looking pristine without spreading dirt. Staying proactive with equipment upkeep not only extends your tools’ lifespan but also guarantees effective cleaning every time.
How do I maintain my cleaning gear over time?
Establishing a routine maintenance schedule is key. Clean appliances and tools after each use, inspecting for damages or residue buildup. For vacuums, check filters and belts regularly—clogged filters diminish suction and can cause motor strain, leading to costly repairs. Use manufacturer-recommended cleaning solutions or natural alternatives like baking soda for brushes and filters to avoid chemical corrosion. Additionally, storing tools in a dry, organized space prevents rust and damage. For software-based cleaning management, consider scheduling reminders through apps or digital calendars—many cleaning services now offer digital support to track maintenance cycles, as highlighted in industry reports on home upkeep automation. Embrace these practices to keep your equipment running smoothly and your home consistently sparkling.
How will future cleaning trends change tool use?
Looking ahead, innovations like AI-powered robotic vacuums and smart steam cleaners with app-controlled settings will become commonplace, making home maintenance even more efficient. These devices will offer real-time diagnostics, alerting you when filters or brushes need replacing, or when cleaning cycles are complete. Such advancements will allow homeowners to maintain cleanliness with minimal manual effort, placing greater importance on routine checks and smart maintenance. The integration of IoT (Internet of Things) technology suggests a future where your cleaning tools proactively manage themselves, reducing long-term costs and upkeep hassle. Staying ahead by adopting these smart tools now positions you to benefit from hassle-free, long-lasting cleanliness, reducing the need for frequent replacements or repairs.
Take Action: Upgrade Your Tools Today
Don’t wait for your equipment to fail—start integrating these maintenance habits now. Try using a descaling solution on your steam cleaner or replacing worn pads on your microfiber mop this week. These simple steps will extend your tools’ lifespan and improve cleaning results, keeping your home in tip-top shape. If you want more detailed advice on maintaining specific appliances or equipment, visit our contact page and share your questions. Remember, proactive maintenance is the secret to long-term cleanliness and saving money in the future. Start small, stay consistent, and enjoy the clean home you deserve.
Secrets Soap and Baking Soda Taught Me About Gentle Cleaning
One of the most valuable lessons I learned was that patience and gentle methods outperform harsh chemicals every time. Instead of instantly reaching for powerful cleaners, I discovered that starting with mild soap solutions and familiar household items like baking soda yielded incredible results without any damage. This approach not only saved my walls and upholstery but also extended their lifespan, making me more confident in my cleaning routines.
Why Overlooking Detail Can Cost You Execu-Expenses
I used to believe that a quick swipe was enough, but that mistake cost me dearly in both time and money. Overlooking small details—like the texture of the wall or the type of fabric—can lead to significant damage or the need for costly repairs down the line. Attention to detail and understanding your surfaces can turn a routine clean into a preservation strategy, preventing disasters like peeling paint or fabric discoloration.
What I Wish I Knew About Proper Equipment Maintenance
Maintaining your cleaning tools is just as important as choosing the right methods. Regularly cleaning and inspecting equipment like steam cleaners, microfiber cloths, and vacuum filters ensures they perform optimally. Neglecting this can lead to ineffective cleaning and even damage to surfaces, ultimately costing more money and effort. A small investment of time in equipment care pays off with longer-lasting tools and better results, as shown in reviews of top cleaning gadgets and maintenance tips you can find here.
Where Future Tech Will Revolutionize How We Care for Upholstery and Walls
Looking ahead, innovations like AI-driven cleaning devices and smart surface sensors will make maintaining your home more efficient than ever. These advancements can automatically adjust cleaning intensity based on surface type or detect hidden stains, saving you time and protecting your surfaces. Embracing these innovations now can help you stay ahead and maintain a fresh, damage-free environment with minimal effort, especially as detailed in expert opinions about smart cleaning tools here.
Take Action Today—Protect Your Surfaces With Knowledge and Care
Every small effort counts when it comes to maintaining your home’s beauty and integrity. Choosing the right cleaning methods, tools, and schedules can prevent costly repairs and preserve your wall and upholstery finishes. Remember, patience and gentle techniques are your best allies. Are you ready to implement these expert tips and see the difference for yourself? Share your experiences or ask questions below—let’s grow together in our cleaning journey.