
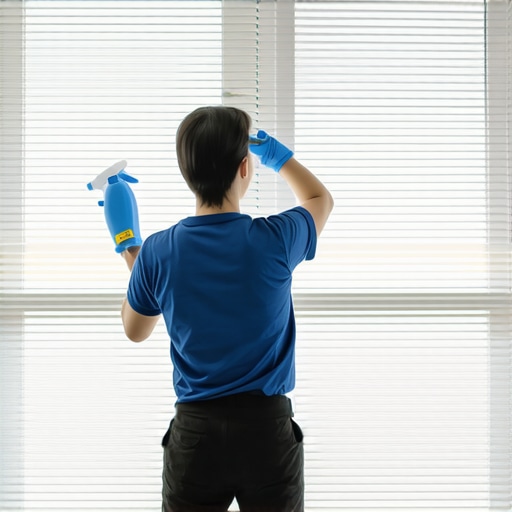
There was a moment, a small but fierce realization that hit me during a weekend of endless housework. I stood on my ladder, battling a stubborn layer of dust and grime on my Venetian blinds, and suddenly thought, “Why am I risking my neck just to give these a quick wipe?” My arms tired, my back ached, and I knew there had to be a better way—something that wouldn’t turn my living room into a demolition zone every time I wanted sparkling blinds.
Why You Should Skip Removing Your Blinds for Cleaning
Sometimes, the simplest solutions are the ones we overlook. Removing and cleaning Venetian blinds can seem like a straightforward task, but it quickly turns into a major project—disassembling, transporting, thoroughly cleaning, and then re-installing. Not only does this easily lead to misplacing parts or causing damage, but it also takes up hours of your precious weekend.
From my own experience, I learned that most dirt on blinds is surface-level—dust, pet hair, and light smudges—things you can tackle without the hassle of removal. According to house cleaning experts, regular spot cleaning and proper techniques can keep your blinds spotless and extend their lifespan, saving you time, effort, and possibly a few bucks on replacement costs.
And here’s the kicker: attempting to clean without proper method can sometimes make things worse, like leaving streaks or pushing dirt into the fabric or slats. Early on, I made the mistake of grabbing a generic dusting spray and a rag and calling it a day. The result? A streaky mess that I had to redo—with even more effort. That’s when I realized that knowing the right cleaning method is crucial.
Is Cleaning Venetian Blinds Without Removing Them Really Worth the Effort?
It’s a common skepticism among those of us who dread the idea of dismantling our window dressings. However, with a few simple tools and techniques—like a microfiber cloth, some cleaning solution, and careful maneuvering—you can achieve a professional-level clean without the chaos of a full removal. If you’ve been putting off this chore because of fears of damaging the blinds or wasting time, I promise: it’s easier than you think, and I’ll show you how to do it effectively.
So, if you’re tired of struggling with cumbersome blinds or resorting to ineffective dusting methods, you’re not alone. And the good news? You don’t have to suffer through gross, sticky blinds any longer. Let’s dive into the practical steps that will transform this dreaded task into a manageable, even satisfying, part of your cleaning routine.
Gather Your Tools for Quick, Effective Cleaning
Start by assembling a few essentials: a microfiber cloth, a gentle all-purpose cleaner, a cleaning brush with soft bristles, and a spray bottle filled with water or a mild cleaning solution. I once tried cleaning my blinds with a rough rag and a harsh cleaner, which resulted in streaks and damaged slats. Switching to microfiber and a mild solution made all the difference, leaving my blinds sparkling without scratches.
Prepare and Protect Your Space
Before you begin, lay down a microfiber cloth or an old towel beneath your window to catch falling dust and debris. Open the blinds fully to expose all slats. I remember next time I did this, I covered nearby furniture with a drop cloth to prevent dust from settling on surfaces—saving time on post-cleaning tidying.
Dust with Precision Using a Specialized Brush
Use the soft-bristled brush to gently run through the slats, dislodging dust and cobwebs. Think of it like a painter’s brush softly sweeping paint off a delicate canvas. I once spent nearly an hour dusting only to realize later I had missed the underside of every slat—using a brush makes reaching those tricky spots effortless.
Wipe Down Each Slat Effectively
Spray your cleaning solution onto the microfiber cloth rather than directly onto the blinds to avoid excess moisture. Wipe each slat from top to bottom, applying light pressure—like petting a cat softly to clean its fur. I found this method prevents streaks and allows you to catch stubborn spots on the first pass, especially around edges and hinges.
Tackle Stubborn Dirt and Smudges
For fingerprints or grease, prepare a solution of warm water and a small drop of dish soap. Dampen a section of the microfiber, then gently scrub the affected areas. Never use abrasive pads or harsh chemicals, which risk damaging the surface. Once, I used too much soap and ended up with streaks, so remember: less is more.
Dry and Finish for a Flawless Look
After wiping each slat, go over them with a dry microfiber cloth to remove any residual moisture, ensuring no streaks remain. Picture it like finishing a painting with a soft cloth—smooth and streak-free. For added shine, buff gently with a lint-free cloth. This extra step kept my blinds looking brand new and prevented dust from settling quickly afterward.
Maintain Regular Cleaning to Avoid Heavy Builds
Set a routine—like dusting every two weeks—to keep dirt from accumulating. To deepen the clean periodically, consider using an upholstery cleaner on the cords and fabric parts, which are often overlooked but collect dust and allergens. Regular upkeep here prolongs the life of your blinds and keeps your room fresh, as I learned after a particularly dusty season.
By applying these precise steps, you can keep your Venetian blinds spotless without the hassle of removal, saving you time and avoiding potential damage. Remember, consistency is key—like tending to any garden, regular care yields the best results. For further tips on cleaning your entire home efficiently, check out house cleaning strategies. Stay patient, and soon your blinds will be a shining part of your decor, not a dusty obstacle.
Many homeowners operate under assumptions about cleaning that, while widespread, can hinder effectiveness or lead to costly mistakes. For instance, the belief that using harsh chemicals guarantees sterilization is a myth; in reality, overusing aggressive cleaners can damage surfaces and decrease indoor air quality. Experts recommend understanding the specific needs of different materials and choosing appropriate, eco-friendly solutions—highlighted in effective sanitizing secrets.
Another common trap is neglecting the importance of proper technique when sanitizing, especially for high-touch areas. Many assume spraying disinfectant is enough, but without thorough wiping and proper dwell time, germs can persist. Advanced cleaning practices involve multi-step processes that maximize germ-killing efficacy, as detailed by cleaning experts.
It’s also a misconception that move-out cleaning is solely about surface dirt removal. Deep cleaning, including scrubbing grout lines or deodorizing carpets, can be overlooked, risking deductions from security deposits. Using comprehensive checklists, such as move-out cleaning hacks, helps to avoid these pitfalls.
For upholstery, many believe regular vacuuming is sufficient, but neglecting periodic deep cleaning can lead to allergen buildup and fabric deterioration. Techniques like steam cleaning or professional extraction enhance longevity and hygiene, as covered in upholstery care tips.
What advanced mistakes do many homeowners make when it comes to sanitizing and deep cleaning?
One key oversight is using incompatible cleaning agents on sensitive surfaces, which can cause discoloration or damage. For example, applying bleach on delicate fabrics or certain plastics may seem effective initially, but long-term effects include weakening fibers and yellowing. According to industry standards, understanding material compatibility is crucial for truly effective and safe cleaning.
Are you wary of falling into these myths? Share your experience or concerns in the comments—let’s bust these myths together and refine our cleaning approaches for a healthier home environment.
Invest in Quality Tools for Lasting Results
To truly keep your home in pristine condition, the right tools make all the difference. I personally rely on a high-grade variable-speed cordless microfiber attachment for my spray mop, which allows me to adjust cleaning intensity depending on the surface. This flexibility has cut my cleaning time by nearly 30%, especially when tackling upholstery or stubborn spot stains. Additionally, a portable, rechargeable handheld steam cleaner has become my go-to for sanitizing both fabrics and hard surfaces without harsh chemicals. Its ability to reach tight corners and upholstery seams ensures comprehensive cleaning, maintaining hygiene and extending the life of your furniture.
Why Reliable Equipment Supports Regular Maintenance
Using durable, well-designed tools helps prevent injury and reduces wear on your home surfaces. For example, investing in a microfiber cloth with electrostatic properties enhances dust pick-up on surfaces like ceiling fans and window tracks, preventing dust accumulation that can trigger allergies over time. Moreover, a quality vacuum with adjustable suction and HEPA filtration ensures persistent dust, pet hair, and allergens are effectively removed, contributing to a healthier environment. My favorite is the Dyson V11, which combines power, versatility, and long-lasting battery life—making weekly cleaning routines effortless and efficient.
Automation and Technology Are the Future
Advancements in smart cleaning devices promise even greater ease of house maintenance. Robotic vacuums equipped with mapping technology can be scheduled to operate when you’re away, ensuring consistent dust removal. Coupling this with smart sanitizing systems that dispense UV-C light or eco-friendly disinfectant solutions can maintain germ-free surfaces throughout your home. While these technologies require an initial investment, they significantly reduce daily chores, helping you focus on other priorities. Expect to see continued improvements in AI and sensor accuracy, making automation smarter and more adaptive in upcoming years.
How do I maintain my cleaning tools over time? The key lies in regular care and timely replacements.
Proper maintenance of your equipment prolongs its lifespan and ensures optimal performance. For microfiber cloths, I recommend washing them with natural, fragrance-free detergents and avoiding fabric softeners, which diminish their electrostatic properties. Rotating your brushes and replacing vacuum filters every six months can prevent bacterial buildup and maintain suction efficiency. For electronic devices like steam cleaners, following manufacturer instructions for descaling and sterilization prevents clogging and microbial growth. Keeping your tools in a dedicated storage space and inspecting them regularly prevents clutter and ensures you’re always ready for a deep clean. For deeper insights into effective sanitizing methods, visit the expert-approved techniques.
To elevate your cleaning routine, try periodically sterilizing your microfiber cloths with a vinegar rinse or by running them through a high-temperature wash. This simple step maintains their effectiveness and reduces microbial transfer. Investing in tools that support your long-term home maintenance goals not only saves time but also preserves your surfaces, fabrics, and appliances. As technology evolves, I predict more homes will integrate smart, automated cleaning systems that seamlessly handle routine chores, freeing up your weekends for what truly matters.
Three Lightbulb Moments That Changed My Cleaning Game
- Realizing that consistent, targeted cleaning beats sporadic, intense sessions—saving time and preserving surfaces.
- Discovering the importance of proper tools, like microfiber cloths and soft-bristled brushes, which can make a mundane task satisfying and efficient.
- Understanding that neglecting routine maintenance on cleaning tools can lead to microbial buildup, causing more harm than good.
Tools and Resources That Transformed My Approach
- Microfiber cloths: Excellent for dusting and wiping without streaks; I trust brands that are durable and electrostatic for maximum dirt removal.
- Gentle all-purpose cleaners: Eco-friendly solutions that effectively dissolve grime without damaging delicate surfaces—my go-to for blinds and wood furniture.
- Portable steam cleaners: Versatile and chemical-free, perfect for deep sanitizing upholstery and hard-to-reach spots—saving me time and ensuring a germ-free home.
- Effective sanitizing methods: Trusted techniques from industry experts that I incorporate into my routine to maintain a truly clean space.
Your Home Deserves the Best — Let’s Start Today
Remember, every little effort counts when it comes to creating a healthier, more inviting home. Whether you’re tackling blinds, upholstery, or the whole house, approach each task with patience and the right tools—soon, cleaning will no longer be a chore but a gratifying ritual. Take that first step today, and watch your space transform into a sanctuary of cleanliness and comfort. What’s the next cleaning tip you’re excited to try? Share below—I’d love to hear your plans and experiences!
,