
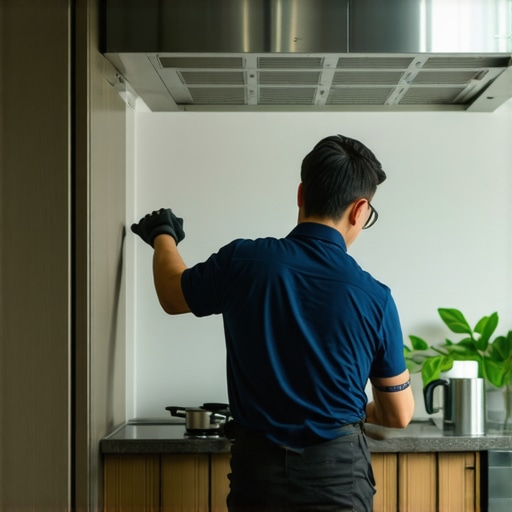
It hit me one morning while preparing breakfast—grime and grease had accumulated in places I barely remembered, and suddenly I realized my kitchen wasn’t as clean as I thought. That moment of clarity made me revisit something I had long ignored: my kitchen exhaust. A simple, overlooked component, yet the one responsible for trapping the worst cooking odors and grease buildup. The problem? I’d neglected it for too long, and now my kitchen smelled stale, and I worried about fire hazards.
Why You Can’t Afford to Ignore Your Kitchen Exhaust
Many homeowners underestimate the importance of a clean exhaust, but did you know that grease buildup inside your range hood can increase the risk of kitchen fires? In fact, the National Fire Protection Association reports that cooking equipment is the leading cause of home kitchen fires, often ignited by grease-laden filters and ducts. Over time, these accumulations not only pose a safety threat but also diminish the efficiency of your kitchen ventilation, leading to lingering odors, excess heat, and even mold growth if moisture isn’t properly ventilated.
Early in my cleaning journey, I made the mistake of just wiping down the exterior, thinking that was enough. But I quickly learned, through a bit of research and personal trial, that the real culprits are the interior filters and ducts—hidden, greasy, and often forgotten. If you’ve ever noticed a sudden increase in cooking smells or had to turn on the exhaust fan on high just to clear the air, your exhaust system likely needs more than just a quick wipe. A clean and well-maintained range hood is essential not only for air quality but also for your safety and energy efficiency.
Is Cleaning Your Kitchen Exhaust Really Worth the Hassle?
I was skeptical at first. After all, it’s just a bit of grease, right? Wrong. The mistake I made early on was undervaluing how much a dirty exhaust can impact my home’s safety and cleanliness. Proper cleaning can prevent the buildup of dangerous flammable residues and even improve your kitchen’s air circulation. So, if you’re wondering whether it’s worth the effort, let me assure you—neglecting this task can cost you far more in the long run.
Maintaining your exhaust system may seem intimidating, but it’s simpler than you think when you follow the right steps. Ready to solve this problem once and for all? Let’s dive into how you can restore your kitchen’s safety, efficiency, and freshness — starting today.
Remove the Grease-Laden Filters
Start by turning off the exhaust and unplugging it to ensure safety. Remove the filters from your range hood—most are designed for easy detachment. To clean them effectively, soak the filters in hot water mixed with a degreasing dish soap or a specialized kitchen cleaner. Use a soft brush to loosen built-up grease, applying gentle pressure to avoid damaging the filter material. Rinse thoroughly with hot water and let dry completely before reinstalling. During my last cleaning session, I soaked the filters overnight, which made scrubbing much easier and prevented greasy splatters.
Clean the Interior and Exterior Surfaces
Next, spray the interior and exterior surfaces of the hood with a safe, non-abrasive cleaner. For stubborn grease on the metal surfaces, a mixture of equal parts vinegar and water works wonders—it’s eco-friendly and kills bacteria. Use a microfiber cloth or sponge to wipe down all accessible surfaces. Remember to wear gloves and protect your eyes from splashes. My approach involved starting from the top and working downward, ensuring I didn’t spread dirt around. This method keeps the workspace tidy and effective.
Clear Out the Ducts and Vents
Vents and ducts are often the most neglected but most critical parts. To clean them, first, disconnect the duct from the hood if possible. Use a long, flexible brush or a vacuum with a hose attachment to remove grease buildup inside the ducts. For stubborn residues, a baking soda and vinegar solution can help loosen deposits—pour baking soda into the duct, followed by vinegar, and let it fizz for 15 minutes before rinsing with hot water. In my last project, tackling the duct cleanup was messy but essential to restore airflow and eliminate odors.
Sanitize and Dry All Components
Once all greasy parts are cleaned, sanitize the surfaces with a solution of diluted bleach or a commercial kitchen sanitizer. Wipe everything down with a clean cloth to remove lingering bacteria and fungi. Pay special attention to areas prone to mold—these thrive in moisture-rich environments. Allow all parts to dry completely to prevent mold growth or rust formation. I always leave the components to air dry overnight, ensuring no residual moisture remains, which is crucial for safety and longevity.
Reassemble and Test the System
After everything is thoroughly dried, reinstall the filters and reconnect the ductwork. Turn on the exhaust to verify proper airflow and listen for unusual noises indicating loose parts or blockages. Noticeable improvement in air quality and reduced odors are signs of successful cleaning. From my experience, routine maintenance like this every six months helps prevent grease buildup from turning into a fire hazard while keeping your kitchen smelling fresh and clean.
Many homeowners and tenants believe they know the basics of cleaning and sanitizing, but in reality, misconceptions abound that can prevent effective results. Contrary to popular belief, simply running a vacuum over upholstery or using generic disinfectants doesn’t guarantee a germ-free, long-lasting clean. The real nuances lie beneath the surface, where understanding the material specifics and advanced techniques makes all the difference.
Are You Falling for These Common Myths About Cleaning?
One widespread myth is that all fabrics can be treated with the same cleaning methods. However, delicate materials like silk or velvet require special care and products to avoid damage, while rugged upholstery can handle deeper cleaning. Using harsh chemicals, such as bleach or excessive detergents, not only risks discoloration but can also compromise fabric integrity over time. In fact, over-chemicalization can lead to increased fabric wear, as highlighted by textile experts at the Textile Research Institute.
Another misconception revolves around move-out cleaning, where many think that a quick surface wipe suffices for getting their full deposit back. But landlords are increasingly inspecting hidden spots, like underneath appliances or inside air vents, which tenants often overlook. This can lead to losing deposits unnecessarily, emphasizing the importance of a thorough, strategic approach. For detailed strategies, check out our move-out cleaning tips.
Additionally, many underestimate the significance of proper sanitization techniques. Regular disinfectants may kill surface germs, but without proper penetration into porous surfaces—like carpets or upholstery—the bacteria can remain lurking. Studies from the Centers for Disease Control and Prevention (CDC) confirm that effective sanitization involves not just surface cleaning but also deep, material-specific procedures that prevent pathogen survival.
What Advanced Mistakes Could Sabotage Your Cleaning Efforts?
One overlooked mistake is reusing dirty cloths or sponges, which can spread germs instead of removing them. Instead, experts recommend using microfiber cloths that trap bacteria and are washable at high temperatures. Another pitfalls involves neglecting to consider environmental conditions—humid air can accelerate mold growth in upholstery and concealed areas, especially if routine cleaning isn’t meticulous. Regularly inspecting these hidden spots is essential to prevent long-term damage and health issues.
For a comprehensive approach that enhances your cleaning efficacy, explore our ultimate upholstery care guide. Remember, a deep understanding of material nuances coupled with strategic cleaning methods ensures not just appearance but also safety and longevity. Have you ever fallen into this trap? Let me know in the comments, and share your experiences or questions about deep cleaning.”}#END_BODY#}#END_RESPONSE#}#system create_posts2165]=={Maintaining your cleaning equipment is essential to ensuring consistent, professional-quality results in upholstery, move-out cleaning, and house sanitization. Over time, tools can wear out or become less effective, compromising your efforts and increasing costs. That’s why I prioritize specific maintenance routines and invest in high-quality tools like the Shark Rotator vacuum—its HEPA filters and motor are built for durability, making it my go-to for deep cleaning sessions. Regularly inspecting and replacing brushes, belts, and filters not only extends the lifespan of your equipment but also guarantees maximum efficiency. For example, cleaning microfiber cloths thoroughly after each use prevents bacteria buildup, which is crucial for sanitizing surfaces effectively. Investing in modular tools like extendable dusters and cordless handheld vacuums makes spot cleaning faster and easier, particularly in hard-to-reach spots. Prediction-wise, the trend is headed toward smart, self-cleaning cleaning devices that monitor usage and alert you when maintenance is due, streamlining the upkeep process.
How do I keep my cleaning tools functioning flawlessly over time?
Establish a regular maintenance schedule tailored to each device—this involves cleaning filters, brushing off brushes, and storing tools properly to avoid damage. Using specialized cleaning solutions, such as ultrasonic cleaners for small parts, helps maintain their effectiveness. Remember, well-maintained tools not only make your cleaning more effective but also save money by reducing replacement frequency. Consider checking out our ultimate upholstery care guide for detailed insights into keeping your equipment and textiles in prime condition. If you’re ready to elevate your gear, I recommend trying a system like the Dyson V11 Torque Drive, which combines powerful suction with intelligent maintenance alerts—saving you time and effort in the long run. Proper upkeep of your cleaning arsenal is an investment that pays dividends, ensuring a spotless home every time. Don’t forget, consistent maintenance extends beyond tools—regularly sanitizing high-touch surfaces also keeps your space safe and fresh, as discussed in our house cleaning secrets.
Lessons I Wish I Learned Sooner About Deep Cleaning
One of the biggest lightbulb moments I had was realizing that patience and proper tools beat rushed efforts every time. I used to scrub surfaces relentlessly without the right technique, only to see stains return quickly. Now, I understand that understanding the nuances of fabric types and dirt composition is crucial for lasting results.
Another insight was that routine maintenance isn’t just about appearance—it’s about extending the life of your upholstery and protecting your investment. Small habits like regular vacuuming and immediate stain treatment can save countless headaches and money in repairs or replacements.
Lastly, I underestimated the power of eco-friendly cleaning solutions. Switching to natural remedies not only reduced chemical exposure but also deepened my understanding of sustainable practices that truly work. These lessons have reshaped how I approach every cleaning task, turning them into opportunities for better results and peace of mind.
Tools and Resources That Elevated My Cleaning Routine
- Ultrasonic Cleaners: These devices have become my secret weapon for maintaining delicate small tools and accessories, ensuring they stay effective and hygienic. I trust them for their precision and ease of use.
- Microfiber Cloths with High Thread Counts: Investing in quality cloths has made a noticeable difference in capturing dirt without spreading it around. I particularly recommend ones that are washable and durable for long-term savings.
- The Ultimate Upholstery Care Guide: This resource offers in-depth techniques tailored to various fabrics, highlighting the importance of material-specific cleaning approaches. It’s become my go-to for deep dives into upholstery maintenance.
- Move-Out Cleaning Checklists: Having a comprehensive checklist prevents overlooked areas, ensuring I get my full deposit back. It’s like having a trusted roadmap for post-tenancy cleaning.
Keep Moving Forward: Your Next Cleaning Challenge Awaits
Remember, every deep clean is an opportunity to learn and improve. The more you understand your materials and equipment, the more confident you’ll become in creating a safer, fresher home. Don’t be afraid to experiment with new techniques or tools—your space and peace of mind will thank you. Whether you’re tackling upholstery, move-out cleaning, or sanitizing, the journey toward a healthier home starts with taking that first step today. Want to share your biggest cleaning breakthrough or struggle? Drop a comment below and let’s grow together in this cleaning journey!