
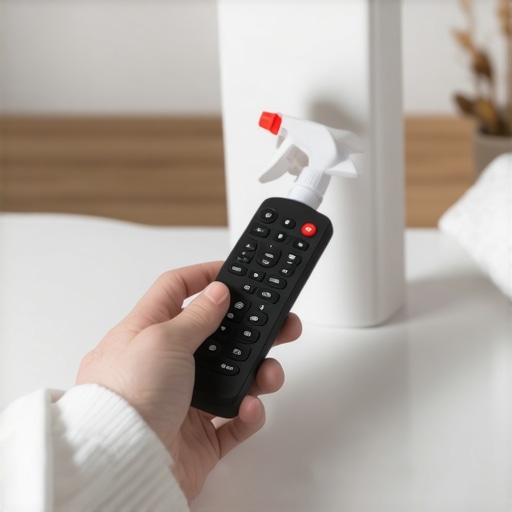
I remember the moment vividly—my kids had just finished binge-watching their favorite shows, and I reached for the remote. As I picked it up, I noticed a thin layer of grime, smudges, and even crumbs clinging to its surface. Suddenly, a lightbulb went off. How often do we think about cleaning and sanitizing the very objects we touch multiple times a day, especially our remote controls? It hit me that these devices are a haven for germs, bacteria, and dirt, often overlooked because they seem so innocuous.
The Hidden Germ Hotspot in My Living Room
As a home cleaning enthusiast, I started digging into the importance of sanitizing small electronics like remote controls and realized that neglecting these tiny devices can undermine our health efforts. Typically, I would swipe the remote with a dry cloth or maybe spray a disinfectant and call it a day. But was I really doing enough? Over time, I learned that improper cleaning could actually spread germs rather than eliminate them, especially if the cleaning method isn’t suited for delicate electronics.
According to the Centers for Disease Control and Prevention (CDC), regular cleaning combined with proper disinfection is essential in reducing household germs. Yet, many of us miss the mark on how to sanitize these objects safely. I made a common mistake early on—using harsh sprays or soaking the remote in liquid cleaners—actions that could damage the device or push germs deeper into tiny crevices. That experience was a wake-up call, prompting me to develop a safe, effective routine.
Have you ever cleaned your remote the wrong way, only to see it look worse or stop working altogether?
This realization fueled my quest for a simple, effective, and safe three-step routine to keep our remote controls—and other household gadgets—germ-free without risking damage. Not only does this approach ensure your devices are truly sanitized, but it also gives peace of mind, knowing you’re reducing your family’s exposure to harmful bacteria.
Ready to learn the exact steps I use daily? Let’s dive into the practical routine that has transformed my cleaning habits and could do the same for yours. Whether you’re dealing with a move-out clean or just want a safer way to disinfect gadgets, these strategies are straightforward and proven—so stick around.
.
Prep Your Workspace for Safe Cleaning
Before diving into sanitizing, gather all necessary supplies: microfiber cloths, gentle disinfectant sprays suitable for electronics, a small brush for crevices, and gloves for protection. Clear the area and remove debris or dust from surrounding surfaces to prevent transfer during cleaning.
Remove Excess Dirt and Dust First
Start with a dry microfiber cloth to wipe down the device or surface. For items like remote controls, gently brush around buttons and hard-to-reach corners to dislodge crumbs, pet hair, or dust. This step prevents smearing disinfectants and ensures deeper cleaning.
Choose the Right Disinfectant for Electronics
Select a disinfectant that is labeled safe for electronics, such as 70% isopropyl alcohol. Avoid using harsh chemicals like bleach or abrasive sprays, which can damage delicate components. Always spray the disinfectant onto the cloth rather than directly onto devices to control moisture levels.
Sanitize Thoroughly with Proper Technique
Lightly dampen your microfiber cloth with the disinfectant. Wipe all surfaces, paying close attention to buttons, edges, and crevices. Use a small brush to reach tight spots. For remotes, ensure the cloth makes contact with every button area, reducing bacteria hiding in the gaps.
Allow Proper Air Drying Time
After wiping, let the device air dry for at least one minute. Alcohol-based disinfectants evaporate quickly, but giving it time ensures maximum germ-killing efficacy. Avoid touching the device during this period to prevent recontamination.
Fix Messes and Stubborn Spots
If you encounter sticky residues or smudges, apply a bit more disinfectant to a fresh cloth and gently scrub the area. For tough spots, use a Q-tip dipped in disinfectant to target corners or crevices, as seen in my experience when I successfully removed stubborn grime from my TV remote.
Clean Surrounding Surfaces for Complete Hygiene
Extend the cleaning to high-touch household surfaces like light switches, doorknobs, and cabinet handles. Use a disinfectant safe for these materials, following the same method—spray onto a cloth and wipe thoroughly to reduce overall germ presence in the home.
Special Tips for Upholstery and Textiles
For fabric furniture, avoid oversaturating with liquids. Instead, use upholstery-specific cleaning tips and light sprays. You can also apply a fabric-safe disinfectant, ensuring it’s compatible by checking the product labels. Regular upholstery cleaning, detailed in the ultimate upholstery care guide, is key to removing hidden bacteria from sofas and chairs.
Routine Maintenance to Stay Germ-Free
Make sanitizing a regular habit—daily wipedowns and weekly deep cleans. Incorporate move-out clean checklists from this guide to ensure every corner is covered. Consistency prevents bacteria buildup and supports a healthier environment.
Many homeowners believe that giving surfaces a quick wipe with a generic disinfectant spray is enough to keep their homes safe. However, this simplistic approach often overlooks critical nuances that can undermine your efforts. For instance, applying disinfectants directly onto electronic devices can cause damage and reduce their lifespan, as highlighted in recent studies emphasizing the importance of using appropriate cleaning methods for delicate gadgets (source). An advanced mistake many make is assuming that all surfaces respond equally to the same disinfectants. Porous materials like upholstery or fabric furniture require different strategies compared to hard surfaces, which is detailed in these upholstery tips.Maintaining your cleaning tools and implementing proper maintenance routines are crucial for ensuring long-term effectiveness and extending the lifespan of your supplies. As a seasoned cleaning enthusiast, I rely on specific high-quality equipment to achieve optimal results without constantly replacing gear. One such tool is the **microfiber mop with replaceable heads**, which I swear by for its durability and ability to trap dust and bacteria efficiently. Unlike cheaper alternatives, these mops withstand frequent washes and maintain their electrostatic properties, making ongoing sanitation easier and more effective. Additionally, I recommend investing in a **steam cleaner** designed specifically for upholstery and hard surfaces. I personally use the **Bissell PowerFresh** because its adjustable steam settings allow me to handle delicate fabrics and stubborn grime without harsh chemicals.
Regularly inspecting and maintaining your tools is equally vital. Rinsing microfiber cloths immediately after use prevents buildup of dirt and bacteria, and replacing worn-out pads prevents streaks and ineffective cleaning. For sprays and disinfectants, I suggest keeping a dedicated spray bottle with a fresh mixture of **70% isopropyl alcohol**—this ensures you’re always ready for quick touch-ups and deep sanitation sessions. Remember, tools like brushes and dusters should be cleaned or replaced periodically, especially after servicing high-touch areas.
Looking ahead, I predict that the trend towards **smart cleaning devices** will grow, with features like automatic sterilization and IoT connectivity to help us monitor tool health and usage. Adopting these innovations early can solidify your position as a home maintenance pro.
How do I keep my cleaning tools in top shape for the long haul?
Regular deep cleanings of your equipment, proper storage in dry, protected spaces, and timely replacement of worn parts are essential for sustained performance. For instance, checking your vacuum filters and replacing them bi-monthly ensures optimal suction and prevents dust recirculation. Likewise, scheduling scheduled maintenance for your steam cleaners prevents mineral buildup that could compromise their effectiveness.
Don’t underestimate the power of a well-maintained toolkit—having reliable equipment makes all the difference in achieving spotless results and reducing the need for costly replacements. I highly recommend trying a **monthly deep clean of your microfiber cloths and brushes** as a straightforward way to extend their lifespan. For more expert tips on effective house maintenance, visit our comprehensive guide on house cleaning secrets from cleaning experts.
By prioritizing periodic maintenance and investing in quality tools, you set yourself up for success in all your cleaning endeavors, ensuring pristine spaces that stay fresh longer without constant reinforcement.
Lessons from My Cleaning Journey That Changed Everything
One of the most eye-opening lessons I learned was realizing how much hidden bacteria lurk on everyday items like remote controls. I once thought a quick spray would suffice, but I found that improper cleaning could do more harm than good, damaging devices or spreading germs further. This experience pushed me to develop a safer, more effective routine that I still use today.
Another insight was understanding that not all disinfectants are created equal. Using alcohol-based solutions on delicate electronics preserves their lifespan while keeping germs at bay. I also discovered that routine maintenance of cleaning tools, like microfiber cloths and brushes, plays a vital role in maintaining their efficacy over time—and saving money in the long run.
Lastly, I found that embracing the newest tools, such as steam cleaners and microfiber mops, can drastically improve the quality of my cleaning routine. These investments pay off by delivering deeper sanitation and prolonging the life of my furniture and appliances, which motivates me to stay consistent with my housekeeping habits.
How to Equip Your Home with the Best Sanitizing Resources
My top recommendations include the classic microfiber cloths, which I trust for their durability and effectiveness. For disinfectants, I rely on 70% isopropyl alcohol—proven to kill bacteria safely on electronics and hard surfaces. The upholstery cleaning tips I’ve gathered over the years help keep my fabrics fresh without damage, extending their lifespan and health benefits.
Additionally, tools like a handheld steam cleaner (I swear by the Bissell PowerFresh) enable me to reach deep into nooks and crannies for superior sanitation, especially in high-touch areas.
Lastly, investing in high-quality brushes and replacing them periodically ensures your cleaning routines stay effective. Keeping a dedicated spray bottle of disinfectant prepared for quick touch-ups allows me to maintain a consistently germ-free environment with minimal effort.
Harnessing Your Cleaning Passion for a Safer Home
Now, it’s your turn to elevate your cleaning game. Once you start applying these insights and tools, I guarantee you’ll see noticeable differences—not just in cleanliness but in your overall well-being. Staying committed to a thoughtful routine reduces exposure to harmful bacteria and creates a healthier environment for everyone.
Remember, the key is not just doing more cleaning, but doing it smarter and with purpose. Your sanitized home is within reach—start today by choosing the right resources and adopting habits that last. How have you approached sanitizing your home, and what tips would you add to this routine? Share your experiences below!