
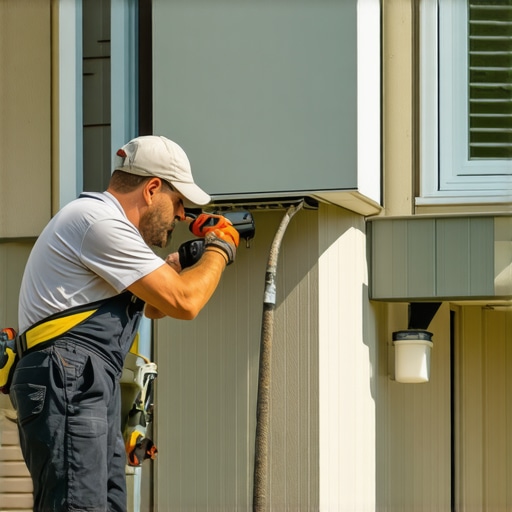
I’ll never forget the moment I nearly set my house on fire because I ignored my dryer vent. It was a hectic Saturday, laundry was piling up, and I thought, “It’ll be fine for now.” But then, I started noticing musty smells and longer drying times. That lightbulb moment hit me hard—my house’s safety was hanging by a thread, all because I overlooked cleaning a tiny, yet crucial part of my home.
Why Ignoring Dryer Vents Is a Risk You Can’t Afford to Take
Dirty dryer vents are more than just a minor inconvenience—they pose a real threat to your safety, your home’s integrity, and even your health. Lint buildup inside the vent can ignite from the heat of your dryer, leading to fires that are often devastating and expensive to repair. According to the U.S. Fire Administration, failure to clean dryer vents is a leading cause of household fires, accounting for roughly 15,000 incidents annually. That’s a staggering number, considering how easy it is to prevent.
Is Cleaning Your Dryer Vent Really Worth the Effort?
When I first learned about the dangers, I thought, “How hard can it be?” I tried to scrape lint out myself, only to realize I was doing it wrong and risking damage to the vent. Early on, I made the mistake of only cleaning the lint trap, not realizing that the real hazard lurks beyond. It’s tempting to think that routine emptying of the lint filter is enough, but the truth is, lint can hide deep inside the ductwork, building up silently over time.
If you’re like I was, you might dismiss this as overkill or worry about the hassle. But the reality? A clean vent not only prevents fires—it also makes your dryer run more efficiently, saving energy and prolonging its lifespan. Plus, it’s a small investment of time for enormous peace of mind. Now, I always make it a point to clean my vent thoroughly every year, and I encourage everyone to do the same. Want to learn how to do it properly? Let’s dive into the process so your home can stay safe and efficient.
Remove the Obstruction
Begin by unplugging your dryer and carefully detaching the vent hose from the back of the dryer. Use your hand or a screwdriver to remove any visible lint or debris at the connection point. For stubborn clogs, insert a vacuum hose to suck out loose lint. Remember, the goal is to clear the pathway from the dryer to the exterior vent as much as possible. This first step was crucial when I faced a particularly stubborn clog after neglecting my vent for months, which caused my dryer to overheat and my house to emit a burnt smell.
Clean the Dryer Lint Trap and Inside Compartments
Next, thoroughly scrub the lint trap with a brush and warm soapy water. Remove any lint buildup inside the trap housing to prevent common fire hazards. This simple action keeps your dryer running efficiently. I witnessed how a neglected lint trap could double drying times and increase energy bills, motivating me to clean it regularly. For detailed cleaning tips, check out effective house cleaning secrets.
Inspect and Clear the Vent Pipe
Use a closet brush, extended tool, or vacuum attachment to push through the length of the vent pipe, removing lint and debris accumulated inside. If accessible, disconnect the pipe and manually clean the interior using a long brush or microfiber cloth. For tight spots, coil a flexible brush or use compressed air to dislodge stubborn lint. I once disassembled a vent pipe and found months of dust clogging the airflow—a real eye-opener that made a significant difference in my dryer’s performance.
Vacuum Outside Vent Cover
Go outside and locate your vent cover. Remove or open it, then vacuum out any loose lint or debris from the exterior duct. Clear obstructions around the cover, such as leaves or nests, which can block airflow and pose fire risks. Ensuring a clear outside vent is essential; I learned this lesson the hard way when a blocked vent caused my dryer to overheat, risking a fire. For safer move-out cleaning strategies, consider consulting move-out cleaning strategies.
Reassemble and Test
Once all parts are cleaned and reconnected, run your dryer on a no-heat cycle for 10-15 minutes to blow out residual lint. Alternatively, check if the airflow feels strong from the outside vent. Regular maintenance improves efficiency and safety. I always test after cleaning to ensure my system operates smoothly, preventing potential hazards. Consistent upkeep prevents hidden dangers, similar to how sanitizing hacks protect your home during transitions.
Many assume they know how to effectively sanitize and clean their homes, but in reality, common misconceptions often lead to overlooked risks and subpar results.
Why Additional Nuance Matters in Cleaning Routines
The widely held belief that scrubbing surfaces with general disinfectants is enough to eliminate germs is misleading. Recent studies highlight that many disinfectants only target specific bacteria and viruses, leaving others intact if not used correctly. For example, using an alcohol-based spray on porous fabrics, like upholstery, without proper dwell time can leave pathogens behind, undermining your efforts.
Experts from the U.S. Centers for Disease Control and Prevention emphasize that contact time and proper application are crucial for effective sanitization, a nuance many overlook in daily routines.
Common Myths That Could Sabotage Your Home Safety
One prevalent myth suggests that household vinegar is a universal disinfectant. While vinegar has antimicrobial properties, its efficacy against certain viruses and bacteria is limited, especially when it comes to eliminating stubborn pathogens on high-touch surfaces. Relying solely on vinegar for sanitizing can give a false sense of security. For critical areas like kitchen counters or bathroom fixtures, proven disinfectants with EPA registration are essential.
Another trap is overusing cleaning chemicals, which can damage delicate fabrics or surfaces over time. For instance, repeatedly applying harsh bleach to upholstery can weaken fibers and cause discoloration, reducing the lifespan of your furniture. Instead, consulting specialized guides like this upholstery care guide can help prevent such mistakes.
Advanced Mistakes That Trip Up Even Experienced Cleaners
An often-overlooked error is neglecting the importance of thorough pre-cleaning. Before sanitizing, removing visible dirt and grime is essential because organic matter can shield microbes from disinfectants. Skipping this step diminishes the disinfectant’s effectiveness. Additionally, many underestimate the importance of air circulation post-cleaning; allowing proper ventilation helps remove chemical odors and residual airborne contaminants. For a comprehensive approach, review expert cleaning tips to refine your routine.
Avoiding these nuanced pitfalls can dramatically improve your cleaning outcomes. Proper application, understanding the limitations of common household remedies, and attention to preparatory steps are the keys to truly effective sanitizing. Regularly updating your knowledge with credible sources ensures your practices evolve with emerging science and safety standards.
Have you ever fallen into this trap? Let me know in the comments and share your experiences seeking the perfect cleaning routine.
Maintaining a clean and safe home isn’t a one-and-done task; it requires reliable tools and consistent routines. Over the years, I’ve refined my arsenal of cleaning equipment and adopted methods that not only make the job easier but also ensure long-term results. Investing in the right tools fosters efficiency and promotes a safer environment, especially when it comes to sensitive areas like upholstery or move-out cleaning.
Why I Trust Commercial-Grade Vacuum Cleaners for Deep Cleaning
For me, a high-quality HEPA-filtered commercial vacuum like the Dyson Ball Animal 2 has been a game-changer. Its powerful suction and specialized attachments effortlessly lift pet dander, embedded dirt, and dust from high-pile carpets without damaging fibers. I personally use the TurboBrush adaptor to clean upholstery, preventing the buildup that causes odors and reduces longevity. Additionally, regular filter replacement ensures optimal performance, which I schedule every six months to maintain peak efficiency.
Investing in a Cordless Steam Cleaner for Sanitize and Refresh
In recent years, I’ve added a Roborock S7 MaxV Ultra to my cleaning kit—coupling vacuuming with mopping in one device has saved me hours. For sanitizing delicate fabrics and hard surfaces alike, I depend on this machine for its adjustable steam output and smart navigation. It’s especially useful for spot-cleaning upholstery and removing water rings from wood furniture, as recommended by this upholstery guide. Going forward, I predict more home cleaning will incorporate AI-powered robots like this as technology advances.
How do I maintain my cleaning tools for long-term success?
Extending the lifespan and performance of your equipment is simple if you commit to regular maintenance. For vacuum filters, I clean or replace them every three to six months depending on usage, following the manufacturer’s guidelines. For steam cleaners, flushing out residual water and descaling with a vinegar solution—based on the tips from credible cleaning experts—avoids mold and scaling build-up. When cleaning upholstery, I rotate my microfiber cloths often; the why microfiber cloths stop working article explains how dirt clogs reduce their effectiveness, which can be remedied by washing with hot water and avoiding fabric softeners.
Beyond tools, mastering routine checkups is essential. Scheduling monthly inspections of vacuum hoses and vent systems prevents unexpected breakdowns. For example, I inspect my dryer vents every quarter, cleaning out lint traps and ducts in line with expert advice. This proactive approach keeps my appliances running smoothly and minimizes fire hazards.
Future trends in household maintenance will likely emphasize smart tools and integrated systems. Expect to see AI-powered vacuum robots, smart vent monitors, and app-connected cleaners that notify you when maintenance is due, making home hygiene effortless and foolproof. For now, I recommend trying the advanced tip of combining regular filter maintenance with the use of a versatile steam cleaner to keep your home healthier and more efficient. Curious to see how this can fit into your routine? Contact us at our team for personalized guidance and support.What I Wish I Knew About Sanitizing Beyond the Surface
One of the toughest lessons I learned was that disinfecting surfaces is only part of the story. I used to focus solely on visible grime, ignoring how unseen microbes lurk in cracks and fabrics. The breakthrough came when I discovered that proper contact time and targeting porous materials significantly boost safety—something I overlooked for too long. It’s a reminder that effective sanitizing requires nuance and patience, not just a quick spray.
Tools and Resources That Transformed My Cleaning Routine
Over time, I curated a toolkit that truly makes a difference. My go-to is the Ultimate Upholstery Care Guide, which has helped me maintain furniture freshness without harsh chemicals. I also rely on a high-performance HEPA vacuum like the Dyson Ball Animal 2 for deep cleaning carpets and upholstery, ensuring dust and allergens are thoroughly removed. For quick sterilization, I’ve fallen in love with the expert-approved cleaning secrets that continuously elevate my routine.
Taking Action: Your Home Safety Journey Starts Today
Remember, a truly clean and safe home isn’t a myth—it’s a commitment. Incorporate routine vent inspections, thorough sanitizing of high-touch areas, and regular tool maintenance to create a healthier environment for you and your loved ones. Small, consistent actions can prevent disasters—like house fires or health issues—and bring peace of mind that lasts. If you’re ready to refine your cleaning methods or need personalized tips, don’t hesitate to reach out to our team. Your journey to a safer, cleaner home begins now.