
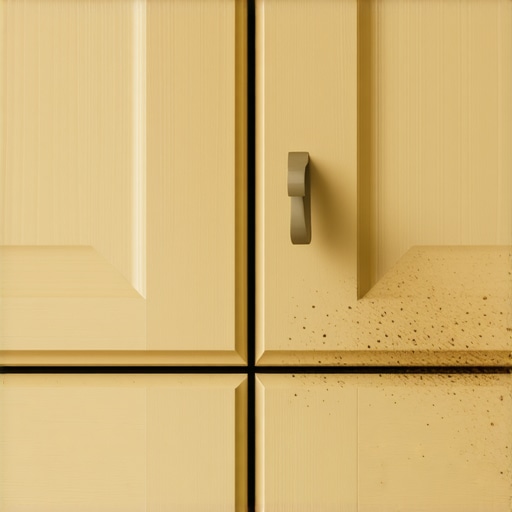
Ever opened your pantry door and felt that sticky, grimy film on top of your kitchen cabinets? It’s a moment of quiet horror—like discovering a forgotten science experiment. I’ve been there, frustrations mounting as I scrubbed endlessly, only to settle for a bandaid fix that didn’t really solve the problem. That’s when I realized: the buildup wasn’t just dirt; it was a stubborn residue landlords absolutely despise, and if you’re planning to move out or just want to keep your kitchen looking fresh, you need to get rid of it once and for all.
Why Does Residue Build Up on Kitchen Cabinets Anyway?
Are We Overreacting to a Little Dust?
Many homeowners underestimate the accumulation of grease, dust, and airborne kitchen particles that settle on the top of cupboards over time. Cooking oils, smoke, and even humid air contribute to a sticky layer that little by little becomes almost impossible to remove without the right approach. Early on, I made the mistake of using generic all-purpose cleaners, thinking they’d do the trick. Spoiler: They didn’t. That’s a common mistake I see many make, which actually makes the buildup worse by spreading the residue around instead of lifting it.
The buildup can be more than just an eyesore. According to a study published in the Journal of Environmental Health, airborne grease and dirt can harbor bacteria, leading to potential health issues in the long run. So, cleaning isn’t just about appearances; it’s about maintaining a healthier kitchen environment.
Are you tired of feeling embarrassed during move-out inspections because of that stubborn residue? Do you find yourself avoiding cleaning those tricky upper cabinet surfaces because they seem impossible to keep spotless? If so, you’re not alone—and I promise, there’s a way to make this a manageable task.
In this post, I’ll walk you through my proven method for banishing that sticky residue for good, with tips that are simple, effective, and gentle on your cabinets. Ready to finally clear that grime and impress your landlord? Let’s dive into the steps that transformed my kitchen and can do the same for yours.
Gather Your Supplies and Prepare Your Work Area
Start by assembling essential cleaning tools: a microfiber cloth, a scrub brush, a bucket of warm water, mild dish soap, white vinegar, baking soda, and a spray bottle. Clear the countertop near your cabinets to create a safe workspace, ensuring no obstacles hinder your cleaning process. Personally, I once cleared my entire kitchen counter—which became a messy but satisfying battle zone—and immediately felt more in control of the task.
Start with a Gentle Dry Dusting
Before applying any liquids, use a dry microfiber cloth to remove loose dust and cobwebs from the cabinet surfaces and edges. This step prevents dirt from smearing and makes subsequent cleaning more effective. I learned this tip the hard way when skipping it resulted in smudging stubborn grease, requiring extra elbow grease later. Think of it as sweeping away the initial dirt layer before tackling the sticky residue underneath.
Apply a Vinegar Solution to Loosen Residue
Fill a spray bottle with equal parts white vinegar and water. Spray generously onto the greasy buildup, focusing on areas with visible gunk. Vinegar is a natural degreaser—it breaks down the fatty deposits without harsh chemicals. Once, I sprayed this solution on my cabinet tops, waited five minutes, and watched the grime begin to soften, making scrub easier. <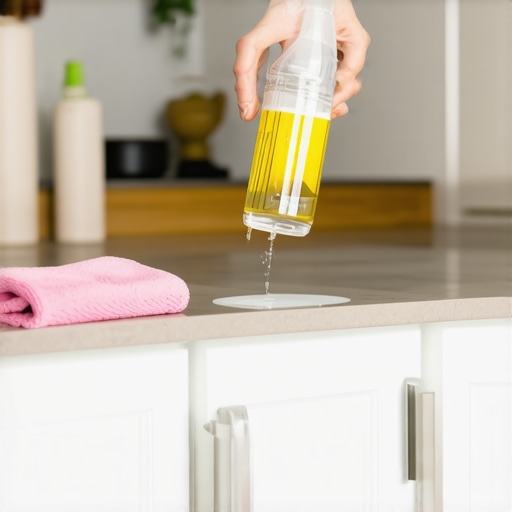 >
>
Use Baking Soda for Stubborn Spots
If some areas resist initial cleaning, sprinkle baking soda directly onto the stubborn spots. Dip your damp microfiber cloth into more vinegar solution or warm water and scrub in circular motions. Baking soda’s mild abrasive action aids in lifting dried grease. I recall tackling a particularly greasy corner that took me fifteen minutes of scrubbing, but the baking soda turned the process into a manageable task rather than an insurmountable chore.
Wipe Clean and Dry Thoroughly
Once residue loosens, wipe the entire surface with a clean, damp microfiber cloth to remove the loosened gunk and vinegar smell. Follow up with a dry cloth to prevent water spots or streaks, leaving a bright, fresh finish. In my experience, drying immediately prevents the residue from resettling, ensuring a clean slate.
Sanitize for Safety and Freshness
For additional germ-killing power, lightly spray a sanitizing solution—preferably one with natural ingredients—onto the cabinets and wipe down. This step is especially important if you’re preparing for a move-out or just want peace of mind. I’ve found that using a homemade spray of water, a few drops of tea tree oil, and lemon juice effectively sanitizes without harsh chemicals. For more advanced sanitizing hacks, visit this guide.
Maintain Regular Upkeep
To prevent future buildup, incorporate a weekly quick wipe with a damp microfiber cloth and a natural cleaner. Regular maintenance keeps residue manageable, reducing the need for intensive scrubbing. I now dedicate ten minutes each week to this task, saving hours of arduous cleaning down the line. This habit not only preserves your cabinets but also keeps your kitchen looking pristine.
While many believe that basic household cleaning habits are enough to maintain a spotless home, the truth is there are nuanced pitfalls that many overlook. A common misconception is that using harsh chemicals is the most effective way to sanitize upholstery or prepare for move-out inspections. However, overusing or misapplying aggressive cleaners can damage fabrics and create health risks, as noted by experts in effective sanitization methods. Instead, understanding the specific fabric types and their cleaning needs, like using gentle upholstery-specific solutions, can extend furniture lifespan and ensure safety.
Another widespread mistake involves assuming that all cleaning tools are equal. For instance, many rely on generic microfiber cloths, but unless these cloths are maintained properly—washed regularly and replaced when worn—they can harbor bacteria and spread dirt rather than eliminate it, as outlined in [this comprehensive guide](https://spotlesscarpetz.com/effective-house-cleaning-secrets-from-cleaning-experts). Therefore, selecting high-quality, properly maintained tools is a crucial detail often missed.
From a move-out perspective, tenants frequently underestimate the importance of detailed cleaning of hidden or overlooked areas like behind appliances or under cabinets. This neglect can trigger damage claims or deposit deductions. Experts recommend a meticulous approach, following a move-out cleaning checklist that addresses these nuances, which can be found [here](https://spotlesscarpetz.com/move-out-clean-checklist-to-simplify-your-transition). In my experience, thoroughness in these small details prevents costly disputes.
Finally, consider the myth that sanitizing alone ensures a completely germ-free environment. In reality, the effectiveness of sanitizing depends heavily on the contact time and method—simply spraying a disinfectant isn’t enough if the surface isn’t cleaned first. For advanced cleaning strategies, see this [expert resource](https://spotlesscarpetz.com/sanitizing-hacks-for-safe-house-transitions). Remember, a multi-step process yields the best results.
Are you falling into any of these common traps? Share your experiences or questions in the comments, and let’s dig deeper into mastering home care with precision and care.Maintaining a spotless home requires not just effort but also the right tools that make the process efficient and consistent. Over the years, I’ve refined my toolkit to include equipment and methods that deliver professional results without the hefty price tag or harsh chemicals. Investing in quality tools is key to long-term success, and understanding their specific roles ensures you can keep your upholstery, kitchen surfaces, and entire house in top shape with minimal stress.
A cornerstone for me has been the use of a **high-quality microfiber cleaning cloth**. Unlike cheaper alternatives that wear out quickly and trap bacteria, my preferred microfiber cloths are durable, easy to wash, and highly effective at trapping dust and grease. They are essential for delicate surfaces like upholstery and high-touch areas, and I always keep a stack ready for different rooms. Proper maintenance of these cloths—washing them in hot water and avoiding fabric softeners—extends their lifespan and keeps them truly sanitary.
For tackling stubborn grime, I rely on a **steam cleaner** with adjustable steam settings. Not only does it eliminate bacteria without chemicals, but it also penetrates deep into fabric fibers and grout lines. I specifically recommend models with **extended hoses and multiple attachments**, which allow me to clean hard-to-reach spots, like under appliances and behind furniture. The versatility of a good steam cleaner means fewer devices cluttering your storage, and it’s perfect for upholstery refreshes, tile grout, and bathroom fixtures.
In the realm of liquid solutions, I swear by **white vinegar and baking soda**—but with a twist. Instead of applying these simple ingredients haphazardly, I use **precision spray bottles** and **microfiber applicators** to target specific areas. For example, I make a vinegar solution in a spray bottle for kitchen cabinets and avoid over-saturating surfaces, which can damage finishes. Baking soda, stored in a shaker container, allows me to sprinkle only where needed, such as stubborn stains or greasy corners. Proper application ensures these natural cleaners are safe yet effective.
When it comes to digital tools, I leverage **smart scheduling apps** to keep track of my cleaning routines. Setting reminders for regular tasks like upholstery maintenance or move-out cleaning helps me stay consistent, especially when managing a busy schedule. These apps can also recommend personalized checklists—like those found in our move-out cleaning guides—to ensure no detail is overlooked, saving time and reducing anxiety.
Prediction suggests that home cleaning will increasingly incorporate **AI-powered gadgets**, like robotic vacuum cleaners with advanced mapping and voice-activated controls. I believe these innovations will make home maintenance more hands-free, leaving you more time for other tasks or relaxation.
How do I maintain these tools over time? Regular cleaning of microfiber cloths, descaling steam cleaners, and updating digital apps are crucial. For example, I wash microfiber towels after every use with hot water and a gentle detergent, which prevents bacteria buildup and maintains their effectiveness. Similarly, descaling my steam cleaner with vinegar solutions ensures it operates at peak performance, extending its lifespan and maintaining safety.
Finally, for anyone serious about long-term results, I recommend incorporating these tools into a routine cleaning schedule—like our detailed [daily house cleaning routine](https://spotlesscarpetz.com/daily-house-cleaning-routine-to-maintain-perfection)—to keep your home consistently fresh and hygienic. Try starting with a high-quality microfiber cloth and a spray bottle of vinegar; these simple tools can dramatically improve your daily maintenance effort and ensure your home stays welcoming for years to come. If you’re interested in exploring more advanced sanitizing techniques, check out our [sanitizing hacks for safe house transitions](https://spotlesscarpetz.com/sanitizing-hacks-for-safe-house-transitions).
Lessons from My Stubbornest Cleaning Battles
One of the hardest lessons I learned was that rushing through cleaning often leads to less effective results. Patience and attention to detail truly pay off. I also discovered that natural cleaners like vinegar and baking soda aren’t just eco-friendly—they can outperform many chemical-based products when used correctly. Finally, I realized that frequent, light cleaning prevents buildup; it’s far easier to maintain than to overhaul after neglect.
Tools and Resources That Elevated My Home Care Game
My go-to microfiber cloths are a game-changer—durable, washable, and antimicrobial. A quality steam cleaner with attachments has replaced many chemical sprays and deep cleans. For scheduling, I trust digital reminders to keep my routine consistent. Books like “Effective House Cleaning Secrets from Cleaning Experts” offer in-depth strategies, and for move-out prep, the move-out cleaning checklist saved me from last-minute stress. These resources have been instrumental in transforming my cleaning habits into lasting routines.
Your Turn to Shine: Taking Action with Confidence
Now that you’re armed with insider knowledge and trusted tools, it’s time to tackle those once-daunting surfaces. Remember, a clean and fresh home isn’t just about appearances; it’s about creating a healthier, more inviting space for you and your loved ones. Don’t wait for dirt to build up—start incorporating these tips today and enjoy the peace of mind that comes with a truly spotless home. Want to share your own cleaning victories or ask for advice? Drop a comment below and let’s keep the conversation going!
,