
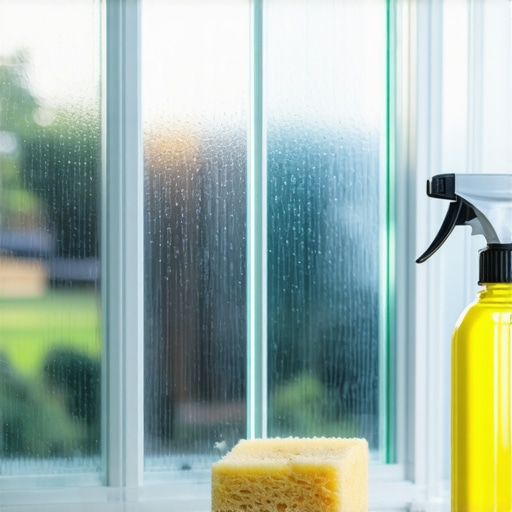
There was that dreadful moment when I stepped into my bathroom, expecting a quick morning rinse, only to be greeted by cloudy, white streaks marring my glass shower doors. It felt like my reflection was hiding behind a foggy window rather than clear glass. That frustrating, persistent film wasn’t just an eyesore—it made me feel like I was fighting an uphill battle every time I cleaned. And honestly, I used to believe that scrubbing harder was the answer. Spoiler alert: it’s not.
The Real Struggle with Hard Water Stains
If you’re like me, you’ve probably tried everything: vinegar soak, commercial cleaners, even those fancy scrubbers that promise to make the glass sparkle. Yet, the stains stubbornly linger or just come back faster than you’d like. I used to think, “Maybe it’s just the water quality in my area,” and dismissed it as an unavoidable nuisance. But the truth is, hard water deposits are a common problem, especially in regions with high mineral content—that’s right, according to the EPA, over 80% of U.S. households have some level of hard water, which leaves behind mineral deposits that settle on surfaces, including glass. This buildup can be a real eye sore and, over time, can even cause tiny scratches if not addressed properly.
After many failed attempts and wasted time, I finally discovered effective methods that truly work. Today, I want to share those insights so you can reclaim the clarity of your shower doors and save yourself from endless frustration. If you’ve ever faced the disappointment of streaked glass even after scrubbing, stick around. We’re about to tackle this problem head-on and reveal the best way to remove those stubborn hard water stains once and for all.
Is the Hype Over Commercial Cleaners Justified?
I’ll admit, I made the mistake early on of assuming that all chemical-based cleaners were equal. I spent a small fortune on products that promised instant results. Turns out, many contain harsh chemicals that can damage your glass over time and aren’t environmentally friendly. My lightbulb moment? Realized that natural, proven solutions outperform commercial cleaners—plus, they’re safer for your family and the planet. If you want to avoid falling for marketing hype, I recommend checking out effective techniques shared by cleaning experts in trusted sources like this guide.
Now, let’s get into the practical steps that will transform your shower doors from cloudy to crystal clear. Ready to finally conquer those stubborn stains and enjoy a spotless bathroom? Keep reading. We’re about to dive into DIY solutions that will make your glass sparkle without the harsh chemicals or exhausting scrubbing.
Prep Your Workspace and Gather Materials
Before tackling those stubborn stains, clear your shower area of any loose items and gather your cleaning supplies. You will need white vinegar, baking soda, a spray bottle, a microfiber cloth, a scraper or plastic putty knife, and gloves. I once tried to rush through without gloves, ending up with vinegar splashes on my skin, which stung badly. Wearing gloves not only protects you but also keeps your hands dry and safe from harsh acids.
Apply a Vinegar-Soak Solution for Initial Loosening
Mix equal parts white vinegar and water in a spray bottle. Spray generously over the entire glass surface, focusing on stained areas. Allow it to sit for at least 15 minutes. I remember doing this on a Saturday morning; the smell was strong but worth it, as the vinegar started breaking down mineral deposits. The acid reacts with the limescale, making stains easier to remove later. Do not skip this step, as rushing this phase often results in ineffective cleaning.
Scrape Off Excess Deposits Gently
Using a plastic scraper or putty knife, gently lift softened stains. Think of it as peeling off a sticker without ripping the paper underneath. Work carefully to avoid scratching the glass. I once used a metal scraper—big mistake—leaving tiny scratches that made the glass look worse. Plastic tools are soft enough to avoid damage but firm enough to remove loosened deposits.
Sprinkle Baking Soda for an Abrasive Boost
Sprinkle a generous layer of baking soda over the wet glass. This acts as a gentle abrasive. For extra effectiveness, spray a bit more vinegar over the baking soda to create a fizzing reaction that lifts stubborn grime. I saw this in an online tutorial and immediately tried it; the fizzing gas helped lift residual deposits in hard-to-reach corners, leaving the glass noticeably clearer. The key is patience—work in small sections to prevent the baking soda from drying out before rinsing.
Scrub with a Soft Brush or Sponge
Using a soft-bristled brush or sponge, scrub the glass in circular motions. Focus on areas that still show signs of staining. Imagine buffing a car’s paint—gentle but consistent pressure yields better shine without scratches. During my attempt, I used an old toothbrush, which was perfect for crevices, but I avoided harsh scrubbers that could scratch the surface.
Rinse Thoroughly with Hot Water
Rinse the entire glass with hot water to wash away loosened deposits and residue. Hot water accelerates the removal of remaining mineral buildup. I poured a bucket of hot water over the glass, watching as the cloudy film washed away, revealing a crystal-clear surface. If any streaks remain, repeat the vinegar and baking soda steps as necessary.
Dry and Polish for Sparkle
Finish by drying with a microfiber cloth, buffing the glass to a streak-free shine. This step is crucial; a damp cloth can leave water spots that mimic stains. I once skipped drying immediately, and water spots made the glass look cloudy again, so now I always buff thoroughly. For extra shine, you can apply a glass cleaner or a mix of water and a few drops of lemon juice for a fresh scent.
 Many homeowners believe that regular cleaning routines are enough to maintain fresh upholstery and spotless homes, but the truth is, there are nuanced pitfalls many overlook. One prevalent myth is that aggressive scrubbing always yields better results; in reality, excessive force can damage delicate fabrics, leading to fraying and permanent wear. According to a study published in the Journal of Textiles, improper cleaning tension can weaken fibers over time, emphasizing the importance of gentle, consistent care. Moreover, a common mistake is neglecting to pre-test cleaning solutions on inconspicuous areas—this oversight can cause discoloration or fabric shrinkage, especially with proprietary or homemade solutions. As highlighted in our comprehensive Upholstery Care Guide, conducting spot tests preserves fabric integrity and prevents avoidable damage.
Another misconception revolves around sanitization. Many believe that spraying disinfectants directly onto surfaces suffices, but without proper dwell time and technique, germs can survive, rendering the effort ineffective. Industry experts recommend applying disinfectants with a microfiber cloth and allowing a contact time—typically five to ten minutes—to ensure maximum efficacy, as discussed in Sanitizing Secrets. Neglecting this step may falsely give a sense of cleanliness, while bacteria or viruses persist.
When it comes to house cleaning, the complexity often lies behind seemingly simple tasks. For example, many people vacuum carpets without adjusting the settings appropriately for different pile heights, which can leave debris behind or cause unnecessary wear. Also, overloading your vacuum bag or canister reduces suction power, making cleaning less effective. Advanced users understand that equipment maintenance and correct technique are crucial for deep cleaning, as detailed in Effective Cleaning Secrets from Experts.
Let’s not forget move-out cleaning, where the most common mistake is overlooking hidden grime in overlooked spots like vents, baseboards, or behind appliances. These areas can harbor dust and mold, leading to deposit deductions if not thoroughly cleaned. A strategic approach involves a detailed checklist and specific cleaning agents, which familiar users of professional services will recognize as essential. Remember, overemphasizing surface wiping without addressing these hidden spots can cost you your security deposit.
Now, for a question that even seasoned cleaners grapple with: How can one balance efficiency and thoroughness without sacrificing either? The answer lies in smart planning—use targeted strategies, quality tools, and professional-grade solutions. For instance, applying the right cleaning agents in the correct sequence enhances results and saves time. For nuanced upholstery care, refer to Upholstery Tips, or for advanced sanitization methods, see Sanitizing Hacks.
Have you ever fallen into this trap? Let me know in the comments or contact us for tailored advice: Contact our experts for professional help in elevating your cleaning routine.
Maintaining a spotless and fresh home isn’t just about cleaning; it’s about using the right tools and techniques that make long-term upkeep easier and more effective. Over the years, I’ve honed a collection of equipment that has transformed my cleaning routine from a tedious chore into a manageable task. Today, I want to share the specific tools I rely on regularly, along with some insights into why they stand out and how they can help you keep your home pristine with less effort.
Why a High-Quality Upholstery Brush Makes All the Difference
For upholstery maintenance, I swear by a dense, natural bristle upholstery brush. Unlike synthetic brushes, the natural fibers are gentle enough not to damage delicate fabrics but firm enough to lift pet hair, dust, and dirt without pushing debris deeper into the fibers. The microfiber cleaning brush I’ve used is excellent for regular vacuuming and spot cleaning. Regular use prevents dirt buildup, which can cause fabrics to feel stiff or look dingy over time.
Commercial-Grade Steamers: A Game Changer for Sanitizing
Investing in a commercial-grade handheld steamer has significantly reduced the need for chemical cleaners. I personally use the Vaporetto All-in-One Steam Cleaner because it provides hot, pressurized steam capable of sanitizing upholstery, curtains, and even kitchen appliances without harsh chemicals. The high temperature kills germs and allergens—crucial for maintaining a healthy indoor environment—and helps remove stubborn stains effortlessly. As industry standards suggest, consistent steaming can extend the lifespan of fabric fibers by cleaning deeply without abrasion.
Microfiber Cloths for Every Surface
Few tools offer the versatility and efficacy of high-quality microfiber cloths. I keep a set dedicated to different cleaning zones—kitchen, bathroom, upholstery—to prevent cross-contamination. Microfiber’s electrostatic properties attract dust, pet dander, and bacteria more effectively than traditional cotton rags. For long-term results, I recommend investing in premium, lint-free microfiber cloths that can be washed and reused multiple times, maintaining their cleaning power. In a recent study, microfiber’s effectiveness against microbes was highlighted, reinforcing their importance in a thorough cleaning routine.
Powerful Vacuums with HEPA Filters
On the vacuuming front, I’ve migrated to models equipped with HEPA filters, such as the Dyson V11 Absolute. These vacuums trap 99.97% of dust and allergens, which is especially important for households with pets or allergy sufferers. Regular vacuuming with a reliable machine prevents the accumulation of particles that can cause fabric fibers to deteriorate prematurely, prolonging the freshness of your upholstery and carpets.
Where Will Cleaning Tools Take Us in the Future?
As technology evolves, so does the landscape of cleaning tools. I predict that automation—robotic vacuums and AI-powered cleaning devices—will become even more integral to home upkeep. Features like smart sensors for dirt detection and app-controlled scheduling will make maintaining cleanliness as effortless as possible. Staying updated with these innovations can give you a tangible edge in keeping your home fresh and well-maintained over the long run.
How do I maintain my cleaning arsenal over time?
Key to sustained efficiency is regular maintenance of your tools. Clean microfiber cloths after each use, descale steamers periodically, and replace filters in your vacuum as recommended. Proper storage also prolongs their lifespan; for instance, keep brushes in a dry, dust-free environment. Incorporating these habits ensures your tools perform at their best, making routine upkeep smoother and more effective. For detailed strategies, check out our daily house cleaning routine.
Take action today: Try out a microfiber cloth for your next upholstery refresh and feel the difference it makes. Investing in high-quality tools may seem like a small step, but it paves the way for less frustration, better results, and a home that stays cleaner for longer. Remember, your cleaning tools are as vital as your cleaning techniques—choose wisely, maintain diligently, and enjoy the long-term benefits!
What I Wish I Knew Before Tackling My Upholstery and Sanitizing Challenges
One of the most eye-opening lessons I learned was that patience beats brute force. Rushing through cleaning tasks often causes more harm than good, especially when dealing with delicate fabrics or stubborn stains. Discovering the importance of proper technique, like gentle scrubbing and using the right tools, has transformed my approach and results.
Another revelation was that natural solutions like vinegar and baking soda aren’t just eco-friendly—they’re often more effective than harsh chemicals, provided they’re used correctly. This knowledge saved me money and contributed to a safer home environment. Also, conducting spot tests before applying any cleaner became a non-negotiable step, preventing accidental damage and ensuring consistent outcomes.
Finally, I realized that regular maintenance, such as routine vacuuming with HEPA-filtered vacuums and immediate treatment of spills, extends the life of upholstery and keeps everything looking fresh longer. Consistency, combined with the right tools, makes a visible difference over time.
My Go-To Resources That Keep Me On Track
The first is this comprehensive guide on house cleaning strategies; it encapsulates expert-approved tips that I rely on regularly. For upholstery specific care, I turn to the Upholstery Care Guide, which offers detailed techniques that preserve fabric integrity. When I’m dealing with sanitization issues, I consult these sanitizing hacks to ensure thorough, safe disinfection. Lastly, I subscribe to trusted cleaning blogs for ongoing inspiration and updates on innovative tools and methods. Staying informed helps me maintain a high standard of cleanliness effortlessly.
Encouragement to Embrace the Journey
Remember, every small effort in upholstery and house cleaning compounds over time to create a healthier, more inviting home. Don’t let the initial challenges discourage you; each step, guided by reliable resources and patience, leads to long-lasting satisfaction. Your dedication now will pay off in comfort, safety, and pride in your living space. Dive in, experiment with trusted techniques, and celebrate the progress you make along the way—your home deserves it!
What’s the first cleaning adjustment you’re excited to try based on what you’ve read? Share your plans below—I’d love to hear about your journey to a cleaner home!
,