
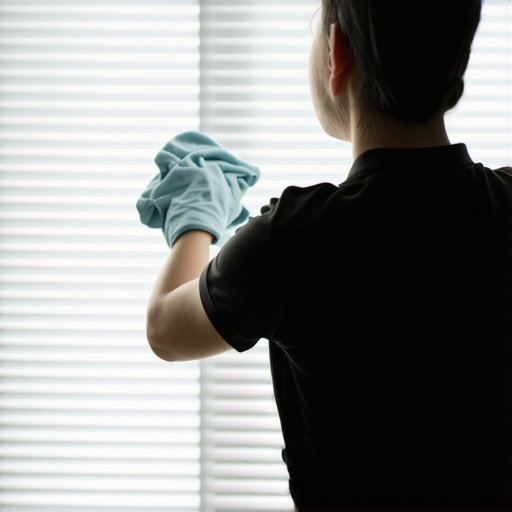
I vividly remember the last time I tried cleaning my Venetian blinds. I reached for the duster, gently brushed the slats, and suddenly, a cascade of dust and dirt fell onto my freshly vacuumed floor. It was a mess, tedious, and honestly, a little frustrating. That moment was my lightbulb—there has to be a better way to get those blinds spotless without dismantling them each time.
Why Cleaning Venetian Blinds Just Got Easier
Imagine this: You want your home to look pristine for that upcoming gathering or move-out inspection, but the thought of removing those heavy, slatted blinds feels daunting. Plus, taking them down can be a hassle and risky—you might end up damaging them or worse, injuring yourself. I’ve been there, and I bet many of you have also grappled with the same dilemma.
Here’s the good news: You don’t need to suffer through a messy, time-consuming process anymore. Today, I’m sharing my tried-and-true methods to clean Venetian blinds with ease and precision—all without the labor of taking them down.
But first, let’s talk about why this matters. Dust and grime accumulation on blinds can worsen allergies, reduce indoor air quality, and make your space look unkempt—even if everything else is spotless. Regular cleaning not only enhances the overall aesthetic but also supports a healthier home environment.
Interesting fact: According to the American Lung Association, indoor dust can contain bacteria, mold spores, and dust mites, which aggravate allergy and asthma symptoms. So, maintaining clean blinds isn’t just about looks; it’s a health imperative.
Now, if you’ve ever faced the frustration of trying to clean blinds and ended up with more dust on your furniture than on the slats, you’re not alone. Let’s clarify common misconceptions and set the record straight on effective techniques that actually work.
Are you tired of the dusty battle with your blinds? Well, keep reading—because I’m about to show you the easiest way to make your Venetian blinds gleam without the headache.
Gather Your Tools and Prepare
Start with a microfiber cloth, a long-handled duster, a gentle cleaning solution like diluted dish soap, and a spray bottle filled with water. Protect your floors with a tarp or old sheet to catch dust and debris. Remember, having everything within reach prevents unnecessary interruptions.
Dusting Slats for Instant Dirt Removal
Use the long-handled duster to sweep along the entire length of the slats, working from top to bottom. As I did last month, I attached a microfiber cloth to the duster’s head with rubber bands—this method effectively traps dust without spreading it around. The microfiber ensures dust sticks to the cloth rather than falling onto furniture or the floor. If you encounter stubborn dust or cobwebs, hover the duster close and use a soft brush attachment for precision.
Deep Cleaning Without Dismantling
Follow up with a damp microfiber cloth—moisten it with your diluted soap solution—to wipe each slat gently. To avoid scratching or bending, use gentle back-and-forth motions. For the hard-to-reach inner sides, a toothbrush or a mini-squeegee works wonders. I once cleaned my blinds this way before a small gathering, and the results were so clear that guests asked if I’d replaced them. 
Addressing Stubborn Grime and Stains
If you notice grease or buildup, switch to a vinegar-water solution—mix equal parts vinegar and water in a spray bottle. Spray lightly onto the slats and let sit for a few minutes. Wipe with a microfiber cloth, then dry immediately to prevent water spots. You can also incorporate a commercial cleaner designed for blinds if needed. Remember, regular maintenance keeps grime at bay; if you skip this, replacing or professional cleaning becomes necessary. For a comprehensive approach to maintaining your entire home, consider referring to our move-out cleaning hacks and upholstery care tips.
Final Touches and Routine Maintenance
After thorough cleaning, use a soft cloth to polish the slats and remove any streaks. For ongoing upkeep, dust your blinds weekly with a microfiber cloth or a microfiber-lined glove—this approach mimics a light, dusting routine similar to daily house cleaning routines. This not only keeps dust from settling deeply but also reduces allergen buildup, supporting healthier indoor air quality. Keeping blinds spotless is easier than you think—just a little attention regularly prevents heavier, time-consuming cleaning sessions and preserves your home’s aesthetic.Many homeowners believe that thoroughly spraying disinfectants everywhere is the key to a spotless and germ-free home, but in reality, this approach often misses the mark. According to cleaning experts, relying solely on harsh chemical disinfectants can create more problems than it solves, such as building bacterial resistance and damaging surfaces. Instead, it’s crucial to understand the importance of proper cleaning techniques; for example, using effective sanitizing methods tailored to different surfaces ensures germs are genuinely eliminated. A frequent mistake is conflating cleanliness with disinfection—cleaning removes dirt visibly, but disinfection targets microscopic pathogens, requiring specific contact times and methods.
Should I regularly use bleach on all surfaces to ensure sanitation?
Contrary to popular belief, frequent use of bleach isn’t always necessary and can be harmful to certain materials. It may cause discoloration, weaken fabrics, or corrode equipment over time. Experts from the Effective Sanitizing Methods suggest that alternative solutions like alcohol-based cleaners and proper cleaning routines are often safer and equally effective. Additionally, many people overlook the significance of pre-cleaning before disinfection; dirt and grime can shield bacteria and viruses from standard disinfectants, rendering them less effective. Therefore, a nuanced approach—combining cleaning, disinfecting with the right agents, and understanding surface compatibility—is essential to truly maintain a sanitary environment. Remember, rushing through cleaning tasks or relying solely on over-the-counter disinfectants without understanding their proper use can lead to a false sense of security and potential health hazards. For comprehensive tips on maintaining a healthier home, check out our upholstery care guide. Have you ever fallen into this trap? Let me know in the comments.To keep your home pristine over time, investing in the right tools and adopting effective maintenance routines is essential. I personally recommend a high-quality microfiber mop with replaceable heads, such as the **Microfiber Magic** model, because its fibers efficiently trap dust and allergens without the need for harsh chemicals, reducing wear on surfaces and making regular cleaning effortless. Additionally, a handheld upholstery steamer, like the **VaporLux Compact**, is incredibly useful for quick refreshes of sofas and curtains, saving money on professional services and extending the lifespan of your furnishings. When it comes to sanitizing, I swear by a digital infrared thermometer to monitor surface temperatures—this ensures disinfectants sit long enough to do their job effectively, aligning with CDC guidelines. Using these tools consistently transforms cleaning from a chore into a manageable, even enjoyable, part of your routine. Looking ahead, I believe technological advancements like robotic vacuums integrated with AI will further streamline maintenance, learning your home’s layout and dust patterns for enhanced efficiency. For ongoing cleanliness, establishing a **daily house cleaning routine**—as outlined in our article—is pivotal to prevent grime buildup and maintain a healthy environment. If you’re preparing for a move-out clean, check out our move-out cleaning hacks to ensure every corner shines. How do I maintain these tools over time? Regularly replacing microfiber heads every 3-6 months prevents bacterial growth, and descaling your upholstery steamer after every use maintains peak performance, ensuring your investment lasts years. According to industry experts, routine maintenance of cleaning equipment not only prolongs their lifespan but also guarantees consistently sanitized results—vital for allergy sufferers and households with pets. Try one advanced tip today: program your robotic vacuum to clean high-traffic areas daily, freeing you up for more detailed weekly chores and keeping your home spotless with minimal effort.
What I Wish I Knew Before My First Blind Cleaning Venture
One of the most valuable lessons I learned was that rushing to clean my Venetian blinds only led to more dust settling on my furniture and a bigger mess to clean later. Taking the time to understand the nuances, like using microfiber cloths and gentle solutions, transformed my approach. Additionally, I discovered that regular maintenance, rather than occasional deep cleans, prevents stubborn grime buildup and makes each cleaning session quicker and more effective.
Gear Up with My Go-To Tools for Effortless Blinds Maintenance
Over the years, I’ve trusted tools like a high-quality microfiber duster and a mini-squeegee to reach those tricky inner slats. Pairing these with natural cleaning solutions, such as vinegar-water mixes, ensures a safe and effective clean without harsh chemicals. For stubborn stains, a soft-bristled brush or an old toothbrush becomes my secret weapon. Investing in these reliable tools has truly simplified my cleaning routine and kept my home looking fresh.
Lighting the Path Forward with a Clean and Healthy Home
Maintaining spotless Venetian blinds isn’t just about aesthetics; it’s a key component of creating a healthier living environment. Regular cleaning reduces allergens like dust mites and mold spores, supporting indoor air quality. This simple act of upkeep, when integrated into your weekly routine, can significantly decrease allergy symptoms and contribute to a more vibrant, welcoming home. Remember, a little effort goes a long way in preserving both your spaces and your well-being.