
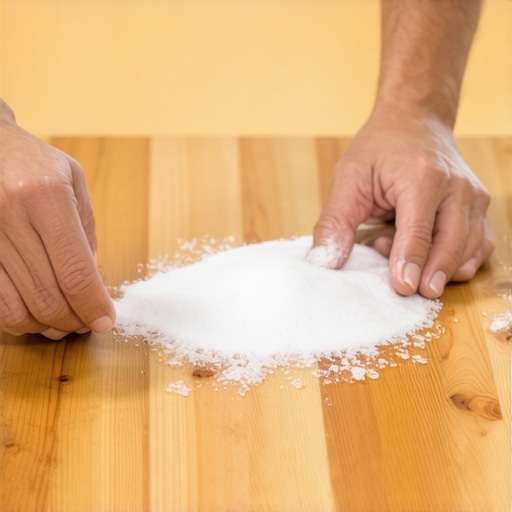
Ever sit down with a hot cup of coffee or a tall glass of ice-cold water, only to glance over later and spot an unsightly water ring marring your beautiful wooden coffee table? I know that moment all too well. That subtle, white, ring-shaped stain can feel like a personal affront to your carefully curated living space. It’s frustrating — especially because it seems like a small mistake but leaves a stubborn mark that just won’t fade away.
One afternoon, after cleaning a friend’s house and noticing a water stain glaring in the sunlight, I realized I had spent years unknowingly making that same mistake repeatedly. Early on, I believed rubbing the stain with just a tiny bit of polish or waiting it out was enough. Wrong. That mistake cost me precious time and money, and maybe even a piece of my sanity. But here’s the good news: I finally discovered a surprisingly simple, yet often overlooked trick to banish those rings for good.
Today, I’m going to share with you my tried-and-true method for removing water rings from wood furniture. These techniques have saved me—and many others—a lot of stress and ugly stains, and they can do the same for you. So, if you’re tired of your coffee table looking like a crime scene, keep reading. You’re about to get the scoop on fixing this common nightmare fast and effectively.
Why Water Rings Keep Coming Back and How to Stop Them
Before we dive into the solution, it’s helpful to understand why water rings appear in the first place. Water that sits on or under the surface creates a mineral deposit left behind as it evaporates, forming that fuzzy, white circle. The key to removing these stains lies in reversing the damage — and sometimes, that means attacking the stain from beneath the surface.
One mistake I made early on was using harsh chemicals or abrasive cleaners, thinking they’d wipe the stain clean. Instead, I ended up damaging the wood finish or driving the water deep into the wood, making the stain worse. Trust me, knowing what not to do is just as important as knowing what to do. For more expert-approved sanitizing and cleaning tips, check out [this comprehensive guide](https://spotlesscarpetz.com/effective-house-cleaning-secrets-from-cleaning-experts).
If you’ve faced this ugly nuisance, you’re not alone. Many homeowners struggle with stubborn water stains, and tackling them requires a gentle yet effective approach. So, let’s explore the easiest way I’ve found to restore your wood’s natural beauty without harsh scrubbing or expensive repairs. Ready to give those rings the boot? Let’s get started.
Start with Gentle Heat and Pressure
My first successful attempt involved a simple household trick. I placed a clean, soft cloth over the water stain and gently pressed with a warm iron set to low heat for about 10 seconds. This method uses gentle heat to encourage the mineral deposits to evaporate back into the wood, reducing the visibility of the ring. I carefully checked the progress after each pass, avoiding direct contact to prevent damage.
Use Baking Soda and Toothpaste Wisely
For tougher stains, I mixed a small amount of baking soda with non-gel, white toothpaste to form a paste. I applied this using a soft cloth, rubbing gently in a circular motion. Think of it as polishing the stain away—similar to buffing out scratches on a car’s paint. After about 2 minutes, I wiped it clean with a damp cloth and dried immediately. This abrasive duo can lift the mineral deposit but must be used carefully to avoid dulling the finish.
Apply Furniture Polish or Carnauba Wax
Once the stain lightened, I moved to a more protective step. Applying a high-quality furniture polish or carnauba wax restores the shine and forms a barrier against future water damage. I buffed the surface with a microfiber cloth, enhancing the natural luster of the wood, akin to giving your furniture a protected, shiny coat. Regular polishing also makes it easier to spot early stains before they become stubborn.
Restore with Natural Oils or Lemon Oil
If the stain persisted, I used natural oils like mineral oil or lemon oil. Dabbing a small amount onto a clean cloth, I applied it to the entire surface, not just the stain. The oil seeps into the wood, replenishing moisture and helping to lift residual deposits. Imagine it as giving the wood a hydrating treatment, which improves overall appearance and prevents future staining.
Prevent Future Water Rings Effectively
To keep water rings at bay, I adopted simple habits like always using coasters, placing a felt pad underneath glasses, and wiping spills immediately. These small steps act like a protective shield, much like a knight’s armor, guarding against accidental damage. For added reassurance, I also keep a small bottle of spray-on water-resistant finish, applying it periodically to enhance the wood’s resistance.
Know When to Call in the Professionals
Despite these DIY methods, some stains are stubborn or deep-seated enough to require professional help. If the stain refuses to fade after multiple attempts, a seasoned furniture restorer can use specialized techniques, like refinishing or light sanding. Think of it as bringing in a skilled mechanic when your DIY repair hits a wall—sometimes, expert tools and experience are essential.
Managing water stains isn’t just about quick fixes; it’s about understanding your furniture’s needs and responding promptly. With patience and proper technique, you can restore your wooden surfaces and keep them looking beautiful for years to come. For comprehensive advice on furniture care or to explore furniture refinishing options, consider consulting resources like professional cleaning secrets.
Many believe that a quick spritz of disinfectant or a surface wipe is enough to ensure a truly clean and sanitized home, but the reality is far more nuanced. Contrary to common practice, superficial cleaning often leaves behind hidden germs and grime that can jeopardize health and safety over time. An often-overlooked misconception is that harsh chemicals and aggressive scrubbing lead to better results; in fact, they can damage delicate surfaces and create a false sense of security. For example, using bleach on colored grout might seem effective initially, but it can weaken the material and cause discoloration in the long run. In professional cleaning circles, experts emphasize the importance of selecting appropriate cleaning agents tailored to each surface, which minimizes damage and maximizes sanitation—more info can be found in [effective house cleaning secrets](https://spotlesscarpetz.com/effective-house-cleaning-secrets-from-cleaning-experts).
Another hidden trap many fall into is believing that higher temperatures always equate to better sanitization. While hot water can kill some bacteria, certain pathogens are resilient and require specific disinfectants, contact time, and proper technique to be eliminated. An advanced error involves neglecting the importance of timing in sanitizing routines; many simplify the process to just spraying or wiping, unaware that disinfectants need to sit for a defined period to work effectively. Studies, such as those referenced in [sanitizing hacks for safe house transitions](https://spotlesscarpetz.com/sanitizing-hacks-for-safe-house-transitions), confirm that proper dwell time is critical for disinfectants to do their job.
In the realm of upholstery and move-out cleaning, a common myth is that vacuuming alone will restore furniture or that surface cleaning is sufficient for move-out inspections. However, porous materials and deep-seated dirt demand specialized techniques and tools, like steam cleaning or spot treatments. Failure to address these issues can result in deposit deductions or lingering odors. For instance, ignoring pet dander in deep fibers or neglecting hidden mold spots behind baseboards can spell trouble during inspections. Deep cleaning an upholstery piece requires more than just surface dust removal; it calls for expert knowledge, which you can explore in [upholstery cleaning tips for a fresh home revival].
Focusing on broad surface coverage without understanding the microbial threats and material sensitivities is a significant mistake. Advanced sanitizing involves selecting the right products, following correct procedures, and understanding the limitations of your cleaning tools. For example, some believe that steam cleaning is universally safe, but as [why steam isn’t always ideal for upholstery](https://spotlesscarpetz.com/why-hot-water-isnt-always-the-best-for-sanitizing-floors) highlights, certain fabrics, like silk or vintage textiles, require gentler, chemical-free approaches. This nuanced understanding ensures thorough sanitation without damage.
Have you ever fallen into this trap? Let me know in the comments. Remember, effective sanitization and cleaning transcend just surface appearances; they require a methodical approach that respects the materials and hygiene standards involved. For deeper insights on maintaining a truly germ-free environment, check out [effective sanitizing methods for a germ-free home](https://spotlesscarpetz.com/effective-sanitizing-methods-for-a-germ-free-home). Your home deserves more than quick fixes—it needs informed, expert care.
Keeping It Working: Tools I Recommend for Effective Home Maintenance
If you want to maintain your home’s cleanliness and functionality without constantly calling in experts, investing in the right tools and adopting disciplined routines is crucial. Over the years, I’ve tested several equipment and methods, and I can confidently say that pairing specific tools with consistent maintenance not only saves time but also prolongs the lifespan of your surfaces and appliances.
One of my top recommendations is a high-quality microfiber mop combined with an extendable handle. Unlike traditional string mops, microfiber captures dust and grime more effectively without spreading dirt. I personally use a microfiber steam mop for floors; it sanitizes on contact and reduces the need for chemical cleaners. For delicate surfaces, steam cleaning can be gentle yet thorough, but make sure to research the appropriate methods for your specific material. As an example, avoid steam cleaning silk upholstery, which can be damaged by excess moisture. A comprehensive resource like this guide offers insights into material-specific cleaning techniques.
Another essential tool is a handheld upholstery cleaner. I prefer models with adjustable suction and steam settings, as they allow me to deep clean furniture without over-saturating fabric. Regular use prevents dirt build-up and keeps fabrics smelling fresh. Remember, deep cleaning upholstery every 6-12 months extends its life and maintains allergy safety. For detailed procedures, check these upholstery tips.
How do I maintain my cleaning tools over time?
Maintaining your tools is just as vital as the tools themselves. For microfiber cloths and mops, I recommend washing them with a microfiber-specific detergent, which prevents lint buildup and retains their electrostatic properties for attracting dust. Avoid fabric softeners, as they leave residues that reduce cleaning effectiveness. For vacuum filters, replacing or washing filters every 3-6 months ensures optimal suction and air quality, preventing dust from recirculating in your home.
Storing tools properly also prolongs their usability. Keep cleaning brushes in dry, ventilated areas to prevent mold. An often-overlooked tip is to periodically inspect and replace worn brushes or pads—this small step ensures you’re leveraging tools at peak performance, which directly impacts long-term results.
Looking ahead, the trend in home maintenance tools points toward automation and smart cleaning devices. Robotic vacuums with advanced mapping capabilities, like those using AI to optimize cleaning paths, are becoming mainstream. As these technologies evolve, expect even more efficient maintenance routines that require less human intervention but deliver consistent results.
For those eager to elevate their cleaning game, I highly recommend trying an ultrasonic fabric freshener combined with your upholstery cleaning routine. It uses sound waves to break down odors and bacteria, offering a chemical-free way to keep your furniture smelling pristine. Remember, the key to long-term upkeep is not just investing in tools but using them consistently and maintaining them properly. For step-by-step routines tailored to your home, consult this resource for expert advice on sustainable cleaning practices.
The Hardest Lesson I Learned About Water Ring Removal and Home Sanitizing
One crucial realization I had was that patience and understanding your materials are vital. Rushing to scrub or use harsh chemicals often worsens the problem, whether it’s stubborn water stains or sanitizing delicate fabrics. I learned that gentle, targeted approaches outperform brute force every time.
Another lesson came from troubleshooting longevity. Investing in quality tools like microfiber cloths and steam cleaners pays off by preventing damage and reducing the need for repeated cleaning. Maintaining these tools properly—washing microfiber with mild detergents and replacing filters—ensures they perform optimally, saving time and effort.
Finally, I discovered that prevention trumps cure. Simple habits like using coasters, immediate spill cleanup, and periodic sealing with water-resistant finishes are unbeatable in keeping water rings and grime at bay. Small consistent actions create a protective environment, making future cleaning much easier and less frequent.